Hydroponics Quickstart

Tony Hinde provided this quick introduction into how hydroponics works, all aspects around growing plants from seed or seedling in a hydroponic system and common problems encountered.

hydroponics 101 ebook
More extensive guide to hydroponics .

HOW PLANTS GROW

We need to know how plants grow in soil in order to understand how hydroponics differs from soil. A plant has three main parts, namely the root system, the stem and the leaves. The root system anchors the plant in the soil and takes up water and nutrients from the soil.

The soil itself consists of 5% organic matter, which is plant remains and animal residues. These are broken down by bacteria to form humus, This mixture increases the water-holding capacity of the soil and fixes inorganic plant nutrients as well as being a source of nitrogen. The inorganic part of the soil, comprising 45% by volume, is made up of minerals released from broken-down rock particles, mainly sand and clay. This provides the chemical nutrients for plants. The remaining 50% of soil is made up in equal parts of water and air.

Autopot Hydroponics System

Air is essential for the supply of oxygen to the roots of a plant. The stem connects the roots and the leaves. It is responsible for getting water and nutrients from the roots to the leaves. The leaves, in the sunlight, turn carbon dioxide and water from the atmosphere into chlorophyll. This is the green substance which is the source of energy to help the plant grow. Another function of the leaves is to act as an air-conditioner to cool the plant on a hot day. Now we come to the common denominator between growing in soil and hydroponics, which is the availability of mineral elements. These are absorbed by the plant from the soil (or nutrient solution in hydroponics) and are essential for the growth of the plant.

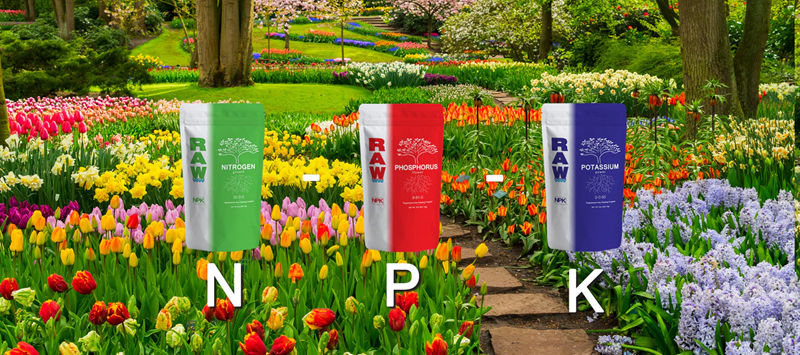
There are six major elements and six trace elements. The major elements are nitrogen, phosphorus, potassium, calcium, magnesium and sulphur. The trace elements are iron, mangenese, boron, copper, zinc and molybdenum. There are other trace elements, but they do not have any effect on plant growth. We don’t want to frighten you with too much science, but it is important that you have the basics. An interesting fact is that the mineral elements mentioned above form only about 2% by weight of a tomato fruit, with 95% made up of water!

NUTRIENTS

You don’t have to worry about making up a nutrient solution of the major and trace elements, as there are ready-made mixtures on the market. We use a two-part nutrient, which, though a bit more trouble than single-part nutrients to mix, has given superior results without the sedimentation experienced with the single-part mixtures. A new solution should be made up once a week, throwing the old solution away into your garden. During the week top up the reservoir with plain water to replace any transpiration losses.

If you want to be more scientific, you can use an EC meter. This measures the total concentration of nutrients in the solution. There comes a time when your plants do not seem to be very happy, turning yellow or brown for no apparent reason. This may be caused by a deficiency in one of the mineral elements. While this may seem to be a contradiction if you are using a ready-made solution as mentioned above, in fact it isn’t, as plants may need more of a particular element at different times in their growth cycle. Although the different nutrient deficiency symptoms may look the same, there are small differences in each problem. It is by observation that the cause may be isolated.

The following should be of help in this task:

Nitrogen
Small, stunted plants with very large root systems; leaves smaller and lighter in colour than normal; slow growth. Paleness will start at the tips of the lower leaves. If this deficiency continues, the foliage will continue to develop, but stems will be spindly, sappy and soft, flowering will be delayed, small fruit will grow and the plant will become more susceptible to disease.

Phosphorus
Stunted plants with dark, dull and sometimes discoloured leaves, unusually hard stems, poor root system and very little branching. Attacks lower, more mature leaves first. Occurs especially when nitrogen level is low.

Potassium
In early stages, yellowing and curling of older leaves. Newer leaves will begin to droop. Older leaves then become blotchy and scorched. Flowers are lacklustre and stems are soft. The plant will be more susceptible to diseases such as mildew and rust.

Calcium
Underdeveloped roots are the first to be affected. Younger leaves will be immobile and their edges will curl. Plants will be stunted and have dark crinkly leaves. (See blossom end rot under diseases.)

Magnesium
Symptoms do not appear until the deficiency is well established. The plant will be stunted. Leaf veins will stay green while the remainder of the leaf turns yellow. Brown spots will appear and then the plant will dry out. Flowers will be slow to develop, if at all. Flowers that do grow will be lack lustre.

Sulphur
Resembles nitrogen deficiency in many ways. Iron Tips of new leaves will become either pale or yellow, and this will spread inward. The leaf will likely turn blotchy from a lack of green pigment, eventually turning brown and drying out. Manganese Poor blooming, weak growth. Leaves may turn yellow or blotchy.

Boron
Brittle stems and immobile new leaves with brown tips.

Zinc
Growth will be stunted. You may never encounter any of these imbalance problems, but it is as well to be aware of them. If they do occur, one of the ways to remedy the situation is to give the plant a foliar feed of nutrient solution, using a very fine spray.

HYDROPONICS AND pH

pH and element uptake
How pH affects nutrient uptake

Before your eyes glaze over with all this science, it is necessary to have a working knowledge of pH. Although it sounds fearful, it is simply the relative acidity or alkilinity of a solution. In hydroponics we are interested in determining the pH level of water before nutrient is added to it, making adjustments if necessary, and then checking the pH level of the nutrient solution from time to time.

If we take a scale of 1 to 14, the centre point, or neutral position, is 7. Everything above neutral is alkaline and everything below is acid. To determine accurate pH levels, each whole number is divided into ten parts. Thus we have 6.8, 6.9, 7.0, 7.1, 7.2 and so on. When growing several kinds of vegetables or herbs in one unit, you will probably do best in the slightly acidic range of 5.6 to 6.5, as it is within this range that the nutrients are most available to the plants. To illustrate this, at 7.0, which is outside the most suitable range for vegetables, they will take up nitrogen, phosphorus and potassium, but only half of the trace elements such as iron, manganese, boron, copper zinc and molybdenum. So if the pH is above 7.0, look out for trace element problems, rather than those caused by lack of major elements.

There are two simple methods of determining pH level, namely litmus paper or pH indicator solution. It is unlikely that the pH of your water supply will fluctuate, but if it does, a check of the pH level every two or three days may be necessary; otherwise, once a week should be enough. Many areas have a water pH of 7.0 to 8.2. Your nutrient powder will probably affect this, bringing it down close to the desired 5.6 to 6.5. If you change your nutrient solution regularly, say every week, pH shouldn’t be a problem. The other factors which may affect pH are the hardness of the water, which can be ascertained by getting an analysis from your local council, climate, what plants you are growing and how much nutrient each plant uses.

However, having said that, it is not necessary to get in a lather over pH, as you will still get decent crops! It is just interesting to experiment with different conditions. If your pH is too alkaline, add pH Down Nitric or pH Down  acid. The amount to be used should measured in single drops only! Check the pH level every eight hours. If your pH is too acidic, add pH Up to your solution.

Certain vegetables have specific preferences. For example, lettuces like 6.0 to 7.0 and tomatoes prefer 5.5 to 7.5. When growing combinations of vegetables, a good pH range is 5.6 to 6.5. For Herbs only it is 5.6 to 7.0. If you are growing vegetables and herbs together try to maintain a pH of 6.0 to 6.5. Have a look at this chart for detailed information on the correct pH/EC/ppm for a variety of plants grown using hydroponics.

GROWING PLANTS

Now we come to the interesting part of hydroponics. You can grow almost anything in your unit; flowers for cutting, house plants for decoration, or vegetables and herbs to improve your meals. The only limitation is that root vegetables, such as potatoes and carrots need a different hydroponic system and will not have enough space in your unit. But it could also be argued that these vegetables do not suffer from long storage as much as vegetables like tomatoes, lettuce and green peppers, which thrive in your unit. So start with these and then experiment to your heart’s content as you go. We will discuss growing of specific plants later; the comments here apply to any plant you want to grow.

SEEDS

When you select seeds for raising, bear in mind that commercial seed varieties have been bred for toughness and long shelf life in the supermarket at the expense of fragrance and flavour, so ask for seed varieties suited to home growing. For instance, you might like to grow a bush tomato instead of the vine type, which may grow too high! Leaf lettuce will yield a high volume of leaves in a few weeks, while head lettuce takes a bit longer. If you choose a head lettuce, such as “Great Lakes”, treat it like a leaf lettuce and simply pick the leaves for your salads. Don’t be afraid to experiment with hydroponics; use any seed that interests you.

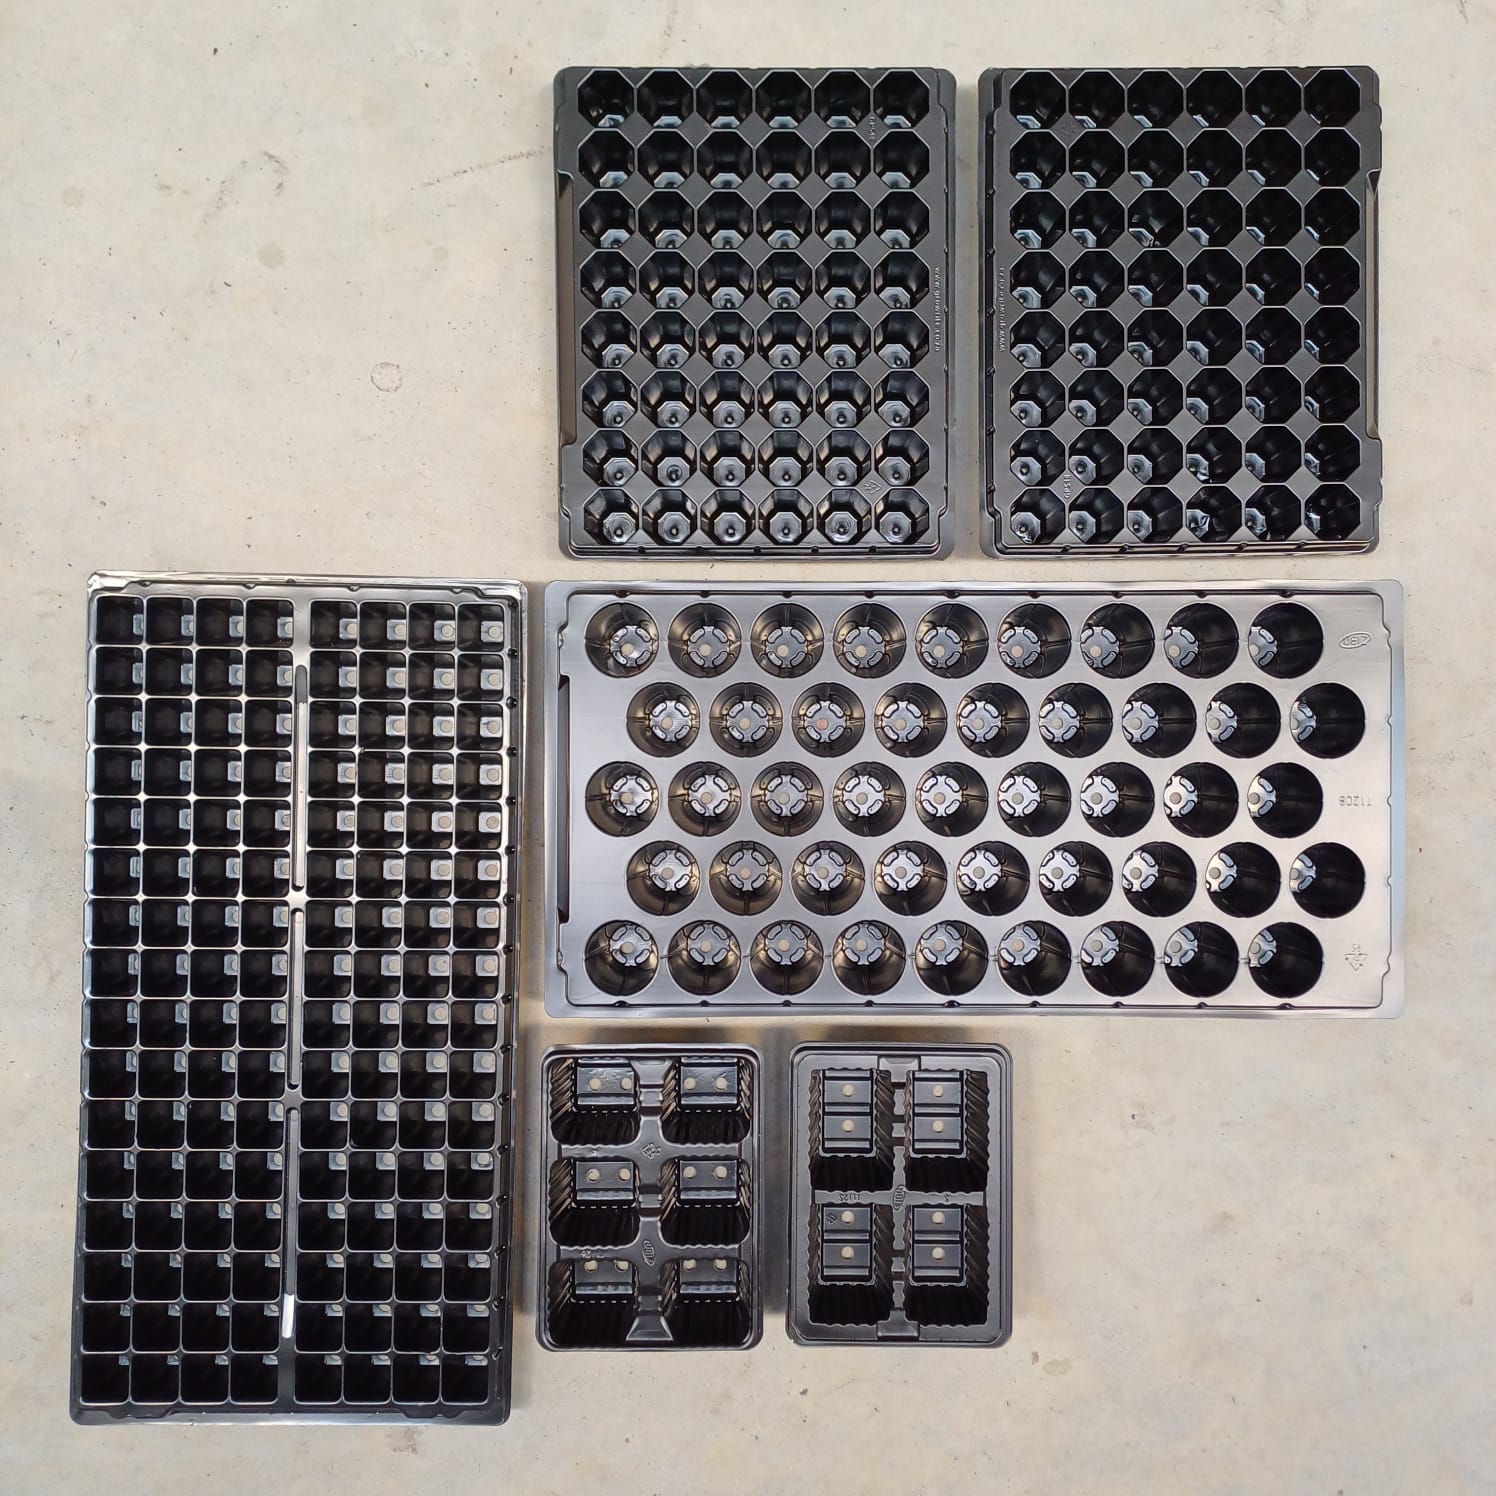
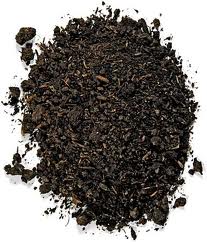
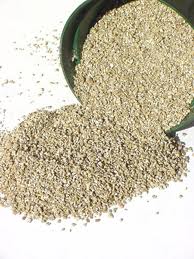
You can plants seeds directly into your hydropopnic unit or, by using the growing medium supplied with your unit, which is equal parts of vermiculite and perlite, put them into seed trays from local nursery. You can soak the seek overnight in water for faster germination. Plant two seeds where you want one plant. If both come up, snip off the smaller one with scissors. Push your seeds gently into the growing medium no deeper than 1.5cm. Most seeds germinate best in darkness, warmth and moisture. Thus, you can cover your seeds with dark plastic sheet or use a humidity dome with a heating pad. For those seeds that germinate best in light, such as certain herbs, use clear plastic. Check every day for results. As soon as the first sprouts poke through the medium, take the cover off to let air and light get to the seedlings. Failure to remove the cover soon enough will make the seedlings “bolt” (grow long and spindly). If that happens you might as well pull them out and start again!

If you have different seeds in the same tray, some may germinate faster than others. Just fold or cut the cover as needed. Some seeds come up fast (basil, cucumbers); others are quite slow (parsley, peppers). Identify what you have sown with plant markers. Use a waterproof felt pen or pencil so that the writing won’t wash off. If your seeds don’t sprout, there are five possible reasons:
– The seed tray is too cold for them (less than 13 degrees Centigrade).
– You have bought old seed that is no longer fertile. Check the “sell-by” date on the package.
– Your seeds were not treated for fungus resistance and have been eaten by the fungus. You’ve put your seeds under the germination cover, placed them in the hot sun and cooked them. Keep the tray out of direct sunlight.
– The seeds have come from sterile hybrids. This might happen if you saved seed, e.g. tomato, from a fruit that you bought at the supermarket.

SEEDLINGS

If you have grown seeds in the hydroponic growing medium in a seed tray, all you have to do is transfer them, with the growing medium clinging to their roots, to the unit. There should be no shock, drooping or wilting. They will just continue growing! When you insert the seedling into the growing pot, don’t be afraid to put the roots and the stem up to the first set of leaves into the pot. Ideally, the roots should just protrude into the nutrient channel. If you have been impatient to get started and bought seedlings in soil from your local nursery, that is O.K!

Deep Water Hydroponics system

You will have to wash the roots gently to remove the soil. Use cold water running steadily from a tap. The water will help to loosen the soil and the coldness will have an anaesthetising effect on the plant to minimise the shock. Then feed the roots into the growpot so that they stick out of the bottom of the pot. Place one hand under the pot and with the other hand put in the dry mixture by holding the pot under a gently-running tap. The mixture will not now come out of the bottom of the pot. Be warned that there may be some wilting or drooping initially and some plants may even lose some leaves, but you will see the new growth will appear within a few days. Whether you have used hydroponically raised seedlings or those raised in soil, be gentle with the roots.

CUTTINGS

Any plants that will normally root from cuttings can be placed directly into your growing pots. To make the cutting, use a sterile scalpel blade and cut a section of the plant that has at least 3 internodes diagonally down. Clean the leaves from the last 50mm of the stem and coat with a rooting hormone and place in your growing medium.

GROWING VEGETABLES

If you want to use your unit as a hobby, plant whatever interests you and don’t be afraid to experiment. If you want to grow crops for your table it may be advisable to stick to salad vegetables. Notes on a few of the more popular vegetable crops and their requirement follows:

Cucumbers
If you don’t wish to cross-pollinate, plant the English or seedless variety. They like hot weather and direct sunlight and are sometimes susceptible to mildew. They can be trained upwards and then laterally, using twine as a support. The crop then hangs downwards.

Lettuce
Grow either the heading variety, such as “Great Lakes”, or a leaf lettuce or “cos” lettuce. Although it is a cool weather crop, it can be grown throughout the year if shade is used during the summer months. It prefers a temperature of between 13 and 24 degrees Centigrade.Germination takes about 10 days and you should have leaves to harvest in six to eight weeks. If you want a continuous supply of lettuce, you should stagger planting.

Tomato
This is a most popular and rewarding plant to grow. It loves the sun and prefers a temperature range of 21 to 27 degrees Centigrade. When the plant has two pairs of leaves in addition to the seed leaves, it can be transplanted from the seed tray into the unit. At this stage you should make arrangements for supporting the plant. We have used twine, attached to the shade support quite successfully. You should get a crop about 12 weeks from planting seed. Experiment with different varieties. The small cocktail varieties are particularly sweet. It should be remembered that certain plants either like or dislike growing in close proximity, so it is as well to keep “friends” together and “enemies” apart. Examples of “friends” are tomatoes and parsley or lettuce and cucumber. However, tomatoes do not like cabbages, but it is highly unlikely that you will be growing those at the same time anyway! Cucumbers and sage should be kept apart. When growing combinations of vegetables, the pH should be 5.6 to 6.5.

GROWING FLOWERS

Flowers are very rewarding in any garden, and no less so in your unit. The carnation is always a favourite. It likes a pH of 6.0 to 6.5, but requires a fair amount of attention to be successful. Antirrhinums or Snapdragons will grow for many months of the year at a pH of 6.0. Experiment with Sweet Peas, Marigolds, Zinnias and anything else that takes your fancy. Just remember that flowers also have “friends” and “enemies”. These can be found in any good gardening book.

GROWING HERBS

There is nothing more satisfying than being able to enliven your cooking with fresh herbs. The main herbs for cooking include Basil, Marjoram, Sage, Parsley, Oregano and Thyme. The difference between using dried and fresh herbs is unbelievable! Herbs can be grown from seed, or you can obtain cutting from friends. Their pH requirements vary, but not markedly. For example, parsley grows best from 5.0 to 7.0, while thyme prefers a pH of between 5.5 and 7.0. A good range for herbs only is 5.6 to 7.0. If you are growing vegetables and herbs together, aim for between 6.0 and 6.5. Quite apart from the culinary uses, herbs are known for their medicinal properties, but that is another topic altogether!

GENERAL HINTS

Housekeeping
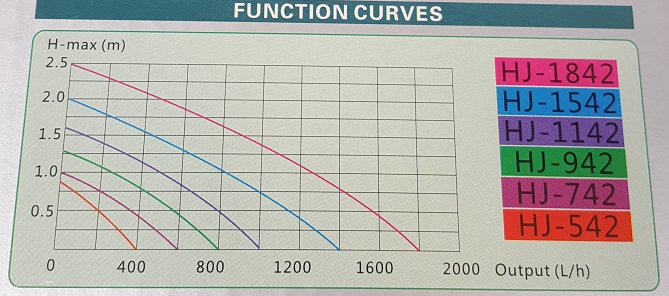
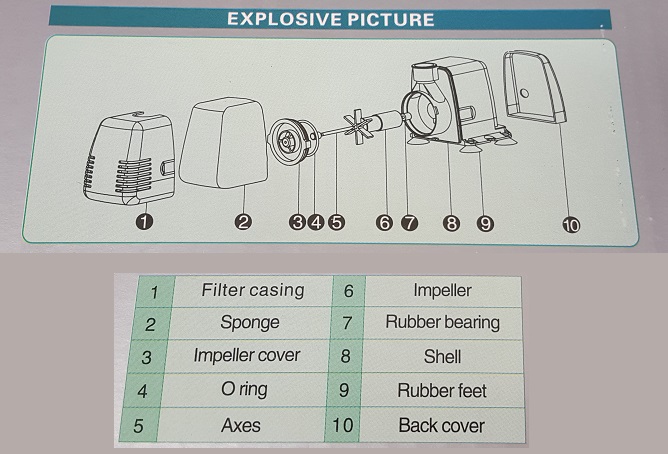
The pump should be cleaned at least weekly. The impeller can be accessed by pulling off the front of the pump, Do a daily check to see that the 5mm feeder pipes are clear and that the flow in the gullies is in contact with the roots of the plants, not wandering all over the place! The initial setting of the pump is 300l/h. You can increase this as the plants grow, and if you feel that the flow is insufficient. As a rule of thumb, the flow should be about 1-2 litres per minute. Keep your unit and its plants clean. Remove dead leaves before they rot, to avoid any fungal infection.

Pests
Watch out for insects, such as red spider mite and aphids. You can use commercial insecticides, but if you don’t like using them, a general organic spray that you can make yourself is as follows: Chop 90 grams of garlic cloves in a grinder or blender and soak for 24 hour in 2 tablespoons of mineral oil. Dissolve 15 grams of oil-based soap in 500ml of water and add to the garlic mixture. Stir well and use in your hand sprayer. Alternatively, there is a natural insecticide called “Neem”, which is derived from the Indian neem tree.

Record-keeping
Although you may not like the idea, it is worthwhile to keep a log of your day to day activities (hydroponically speaking of course). Record the pH when checked, when you changed the nutrient solution, the weather and light conditions, when seeds were planted, when they germinated, when they were transplanted, when they, start fruiting, when and how much you harvested. Anything that will add to your knowledge later can be noted. If you have problems, this may help you find solutions.

TROUBLE-SHOOTING

This section is intended to give you some idea of what to do if your plants do not seem to be as healthy as they could be. The problem with such a section is rather like reading a medical book containing symptoms of various diseases; you seem to have them all!

Bolting of lettuce
Lettuce is a cool weather crop and will bolt if it is too hot or if it doesn’t get enough light from germination to maturity. Give it plenty of light early on, but keep in a cool shady place after partial maturity. Use 40% shade cloth.

Damping off
This disease is also called root rot, although damping off applies more to seeds and root rot to plants. It is a fungus disease caused by a variety of fungi. It strikes seeds, which will turn mildewy and fail to grow. It may be due to the fact that your unit is in a place that keeps it too damp, dark and cool. In plants, the roots turn brown and rot. One answer is an all-purpose fungicide.

Drooping leaves
Check to see that your plants are getting enough water. Check that the pump is operating correctly. If these are all right it is possible that your nutrient concentration is too high. Flush the system and run on plain water for a couple of days, then use the nutrient again. Make sure that there is a good circulation of air around the unit and that it is not too hot.

Limp Lettuce
When they are grown in the sun, lettuce leaves are sometimes too limp to serve. They will crisp up nicely for your salad if you wash them in cold water, shake gently and put them in a plastic bag in the refrigerator for an hour before using.

Overfeeding
This is a common mistake, and burns the plants. It is safer to run nutrient on the lean side. If the plants get too little nutrient, you will know they need more because the veins of their leaves will turn yellow or pale. Just add a pinch of nutrient powder and they’ll turn green again almost overnight.

Rain overflow
If a heavy shower should cause your reservoir to overflow, it is best to throw away the solution and prepare a fresh one. Light rain will have little effect on the solution.

Spindly growth
This is caused by insufficient light.

Sunburn
White, bleached-looking patches appear on the leaves. Plants such as tomatoes and cucumbers need a 30% shade cloth, while lettuces do best with 40% shade cloth. Tip burn The tips or margins turn brown. This is caused by overfeeding. Flush the system and make up a new batch of nutrient solution.

Yellow leaves
When a vegetables is nearing the end of its fruitful life, its older leaves will usually turn yellow and die. This is normal. When younger leaves yellow or turn a distinctly lighter green than older leaves, try adding a pinch of nutrient. Wait a few days and they’ll turn green again. If not, add a little more.

More information about hydroponics:

Wikipedia entry for Hydroponics

We have a more in depth look at hydroponics, which is available from this site as an E-book.

hydroponics 101 ebook
More extensive guide to hydroponics .

Privacy Policy

This website is owned and operated by Windell Hydroponics and will be referred to as “We”, “our” and “us” in this Internet Privacy Policy. By using this site, you agree to the Internet Privacy Policy of this website (“the website”), which is set out on this website page. The Internet Privacy Policy relates to the collection and use of personal information you may supply to us through your conduct on the website.

We reserve the right, at our discretion, to modify or remove portions of this Internet Privacy Policy at any time. This Internet Privacy Policy is in addition to any other terms and conditions applicable to the website. We do not make any representations about third party websites that may be linked to the website.

We recognise the importance of protecting the privacy of information collected about visitors to our website, in particular information that is capable of identifying an individual (“personal information”). This Internet Privacy Policy governs the manner in which your personal information, obtained through the website, will be dealt with. This Internet Privacy Policy should be reviewed periodically so that you are updated on any changes. We welcome your comments and feedback.

Personal Information

Personal information about visitors to our site is collected only when knowingly and voluntarily submitted. For example, we may need to collect such information to provide you with further services or to answer or forward any requests or enquiries. It is our intention that this policy will protect your personal information from being dealt with in any way that is inconsistent with applicable privacy laws in South Africa.

Minors

We do not intentionally collect personal information from minor children. If you are the parent or
guardian and believe your minor child has provided us with personal information, please contact us
at the address below to request the deletion thereof.

Use of Information

Personal information that visitors submit to our site is used only for the purpose for which it is submitted or for such other secondary purposes that are related to the primary purpose, unless we disclose other uses in this Internet Privacy Policy or at the time of collection. Copies of correspondence sent from the website, that may contain personal information, are stored as archives for record-keeping and back-up purposes only.

Processing of Information

We will share your personal information only…
1. in order to comply with applicable law or with legal process served on our company;
2. in order to protect and defend the rights or property of our company; and
3. with employees and/or third parties who assist us in providing services to you and thus
require your personal information in order to render a proper and efficient service.

In accordance with the provisions of the Protection of Personal Information Act (POPIA), we process
personal information where:

1. it is necessary to carry out actions for the conclusion or performance of a contract to which
the data subject is a party;
2. the processing complies with an obligation imposed by law on the business;
3. the processing protects a legitimate interest of the data subject;
4. the processing is necessary for the proper performance of a public law duty by the business;
or
5. the processing is necessary for pursuing the legitimate interests of the business or of a third
party to whom the information is supplied.

Retention

We will not retain your personal information longer than the period for which it was originally
required, unless we are required by law to do so, or you consent to us retaining such information
for a longer period.

Collecting information on Registered members

As part of registering with us, we collect personal information about you in order for you to take full advantage of our services. To do this it may be necessary for you to provide additional information to us as detailed below.

Registration

Registration is completely optional. Registration may include submitting your name, email address, address, telephone numbers, option on receiving updates and promotional material and other information. You may access this information at any time by logging in and going to your account.

Credit Card Details

Credit Card details are not stored on our server.

Disclosure

Apart from where you have consented or disclosure is necessary to achieve the purpose for which it was submitted, personal information may be disclosed in special situations where we have reason to believe that doing so is necessary to identify, contact or bring legal action against anyone damaging, injuring, or interfering (intentionally or unintentionally) with our rights or property, users, or anyone else who could be harmed by such activities. Also, we may disclose personal information when we believe in good faith that the law requires disclosure.

We may engage third parties to provide you with goods or services on our behalf. In that circumstance, we may disclose your personal information to those third parties in order to meet your request for goods or services.

Security

We strive to ensure the security, integrity and privacy of personal information submitted to our sites, and we review and update our security measures in light of current technologies. Unfortunately, no data transmission over the Internet can be guaranteed to be totally secure.

However, we will endeavor to take all reasonable steps to protect the personal information you may transmit to us or from our online products and services. Once we do receive your transmission, we will also make our best efforts to ensure its security on our systems.

In addition, our employees and the contractors who provide services related to our information systems are obliged to respect the confidentiality of any personal information held by us. However, we will not be held responsible for events arising from unauthorized access to your personal information.

We will:
1. treat your personal information as strictly confidential;
2. take appropriate technical and organisational measures to ensure that your personal
information is kept secure and is protected against unauthorised or unlawful processing,
accidental loss, destruction or damage, alteration, disclosure or access;
3. promptly notify you if we become aware of any unauthorised use, disclosure or processing of
your personal information; and
4. provide you with reasonable evidence of our compliance with our obligations under this
policy on reasonable request.

Your rights

You have the right at any time to:

1. access your personal data by sending a written request to our Information Officer who’s
contact details are set out below. We may charge you a fee for this service.
2. request us to correct or supplement any of your personal data which we will undertake as
soon as practicable.
3. request the return or destruction of Personal Information. We will consider your request in
light of any other laws or regulations prohibiting us from destroying your personal data; and
4. lodge a complaint with the company.

Transborder Flow of Information

We may transfer your information outside South African borders for retention purposes and/or if
our service provider/s are cross border or uses cross border systems. We will only share your
information with service providers who have comparable privacy policies in place.

Collecting Information for Users

IP Addresses

Our web servers gather your IP address to assist with the diagnosis of problems or support issues with our services. Again, information is gathered in aggregate only and cannot be traced to an individual user.

Cookies and Applets

We use cookies to provide you with a better experience. These cookies and allow us to increase your security by storing your session ID and are a way of monitoring single user access.

This aggregate, non-personal information is collated and provided to us to assist in analyzing the usage of the site.

Access to Information

We will endeavor to take all reasonable steps to keep secure any information which we hold about you, and to keep this information accurate and up to date. If, at any time, you discover that information held about you is incorrect, you may contact us to have the information corrected.

In addition, our employees and the contractors who provide services related to our information systems are obliged to respect the confidentiality of any personal information held by us.

Links to other sites

We provide links to Websites outside of our websites, as well as to third party Websites. These linked sites are not under our control, and we cannot accept responsibility for the conduct of companies linked to our website. Before disclosing your personal information on any other website, we advise you to examine the terms and conditions of using that Website and its privacy statement.

Problems or questions

If we become aware of any ongoing concerns or problems with our websites, we will take these issues seriously and work to address these concerns. If you have any further queries relating to our Privacy Policy, or you have a problem or complaint, please contact us.

Aluminium Tape 50m Roll

Aluminium Tape

Aluminium Tape 50m Roll is highly reflective. Aluminium Tape is very useful in that once you stick it down it will not fall off  when exposed to moisture rich environments.

50 m roll, 5 cm wide.

Aluminium tape is particularly effective for joining or sticking down Mylar or Sisalation or joining ducting pieces together.

Siliconised release backing paper needs to be peeled off before use.

  • Conformable tape resists flame, moisture, weather, UV degradation and many chemicals, making it ideal for a variety of applications
  • Heat and light reflective tape protects, insulates and enhances lighting efficiency
  • Withstands a wide temperature range
  • Thermally conductive tape helps dissipate heat and improves heating and cooling efficiency
  • Transparent acrylic adhesive combined with the rugged, durable backing provides long service life both indoors and out.

        Aluminium Tape 50m Roll, 5cm wide

Submersible Water Pumps

Submersible Water Pumps

Submersible Water Pumps are used to circulate nutrient-rich water in NFT and other hydroponic systems.

Choosing the right water pump will be determined by how high the pump would need to lift the water. ( In the table below the listed Head Height is the height where the pump basically stops pumping any water. ) The prescribed flow rate for NFT hydroponics per channel is between 1 and 2 liters of water per minute. Choosing a pump slightly larger than the one that meets your minimum requirements is advised, as the flow rate can then be throttled back slightly by using an inline tap.

Model Output Head Pipe Fitting Size Power Consumption
Grech HJ-542 400 L/h 0.8m 12mm 5w
Grech HJ-742 600 L/h 1m 12mm 8w
Grech HJ-942 800 L/h 1.3m 12mm 16w
Grech HJ-1142 1000L/h 1.6m 15mm 22w
Grech HJ-1542 1400L/h 2.0m 20mm (Needs hose clamp) 28w
Grech HJ-1842 1800 L/h 2.5m 20mm (Needs hose clamp) 40w

Grech Function Curves

The Grech pumps come with 2 pipe fittings, the standard fitting (mentioned in the table above), used to connect to piping to lift/move water. The 2nd fitting ( with the little T-piece on the side, attached to clear piping ) is actually a venturi adaptor and can be used to aerate tanks of water, INSTEAD of lifting/moving water. This venturi really only works well on the larger models (HJ-942 and up) and is also dependent on how deep the pump is submerged. THIS video shows how a venturi can be used to aerate and agitate water.

The Grech pumps come with a filter sponge and needs to be cleaned regularly. All you need to do is put a dab of soap on it (optional) and work it in under running water, then rinse it out thoroughly.

Grech Explosive Picture

Grommets

Grommet

Grommets are used to create watertight seals for the plumbing of hydroponic systems such as NFT systems, DWC systems, Dutch Bucket systems, water reservoirs etc.

A hole is drilled and the Grommet is inserted into the hole. Piping is then pushed through the grommet which will form a watertight seal.

Irrigation Piping, Ring Grommet and Top Hat Grommet measurements (approximate, in mm) follow below:

Product – General Name Outer Diameter Inner Diameter
5mm Irrigation Piping 6 4
6mm Autopot Piping 6.3 4.2
9mm Autopot Piping 9 6.5
16mm Autopot Piping 18.5 12.5
12mm Irrigation Piping 16 12
15mm Irrigation Piping 18 15
20mm Irrigation Piping 24 21
- - -
6mm Grommet for Reservoir 10 5.5
12mm Ring Grommet 19 12
15mm Ring Grommet 20 15.5
20mm Ring Grommet 23 18
25mm Ring Grommet 32 25
- - -
6mm Top Hat Grommet 10 6
9mm Top Hat Grommet 13.5 9
16mm Top Hat Grommet 19 15
19mm Top Hat Grommet 23 18

Based on the above the following grommet & piping combinations are advised:

9mm Autopot Piping (for use with Autopot Aquavalve 5): 9mm Top Hat Grommet

5mm irrigation piping: 6mm Ring Grommet or 6mm Top Hat Grommet

12mm irrigation piping: 16mm Top Hat Grommet works beautifully. 12mm Ring Grommet fit will be a very tight fit, while a 15mm Ring Grommet’s fit could be a little loose (This could be countered by using an insert fitting (eg. straight connector/T-piece/elbow) inside the piping at the point where it goes through the grommet, to flare out the piping and create the waterproof seal)

15mm irrigation piping: 19mm Top Hat Grommet, or 20mm Ring Grommet

20mm irrigation piping: –

25mm white PVC electrical conduit: 25mm Ring Grommet


Hole Saw Sizes for Grommets – Please note: these hole saw sizes are for flat surfaces, not for curved surfaces. A slightly smaller hole can be tried on curved surfaces to prevent possible leakage due to the curving of the grommet on the curved surface. (Drilling test holes and testing if seals are watertight is always advised)

6mm Ring Grommet: 9mm drill bit

12mm Ring Grommet: 19 mm Hole Saw

15mm  Ring Grommet: 19mm Hole Saw

20mm  Ring Grommet: 25mm Hole Saw

25mm  Ring Grommet: 31mm Hole Saw


6mm Top Hat Grommet: 9.5mm drill bit

9mm Top Hat Grommet: 12.5mm drill bit

16mm  Top Hat Grommet: 19mm Hole Saw

19mm  Top Hat Grommet: 21mm Hole Saw


It is not recommended that Petroleum Jelly is used as a lubricant. A silicon lubricant, although more expensive, is better. Olive oil can also be used. Throwing grommets into HOT water before installing also helps a lot.

Please note if grommet is fitted and then taken out a number of times, it may stretch and warp.

Surgical Scalpels

Surgical Scalpels

Sterile surgical scalpels are used to take cuttings from plants-  fresh Surgical Scalpels need to be used every time that you decide to take new cuttings.

Taking cuttings is one of the most popular ways to propagate a plant. Also referred to as cloning, it offers the ability to get multiple plants that are genetically identical to the mother plant. Many people feel intimidated by the process, and are a bit leery to attempt it. If you are one of those people, relax, it’s a relatively easy process.
What follows are step by step instructions for a simple procedure that works for both hardwood and softwood plants. (NOTE: Not all plants can be cloned in this manner. Some plants are virtually impossible to get cuttings from, even for experts.)

Why Take Cuttings?

There are several reasons that you may want to clone your plant, one being, that it does not require seeds. Cloning may be your only option for obtaining a certain variety of plant when no seeds are available. Another reason is to maintain consistent quality control of your crop. Every seed, like every human being, is slightly different. Aside from identical twins, genetically, no two people are exactly the same. DNA works in plants the same way it does in humans. So if you have a plant that is just what you want it to be, you can take cuttings and have as many perfect clones of your special plant as you want.

Another big factor which makes cloning so popular is that in most cases, it’s much faster than starting from seed. The majority of plant species will produce a rooted, growing plant from a clone before the seeds of the same species can even sprout, saving a lot of time.

What You’ll Need

  • A SINGLE EDGE RAZOR BLADE – Must be sharp!!
  • BACK-UP BLOCK – A piece of Styrofoam, wood or plastic approximately 2″x2″.
  • SHOT GLASS – Or similar small glass or plastic container.
  • GROWING MEDIUM – Jiffys, Rockwool or Oasis cubes, Pro-mix, coconut fiber or one of several other suitable growing media.
  • SEED TRAY WITH CLEAR HUMIDITY DOME
  • ROOTING HORMONE – You will need a good quality gel, liquid or powdered rooting hormone. Although you can use a powdered rooting hormone, in our opinion they are much harder to work with resulting in a reduced success rate.
  • SPRAY BOTTLE WITH WATER
  • RUBBING ALCOHOL
Before You Start

This might sound obvious, but you should only take cuttings from healthy plants. The healthier the mother plant, the better success you will have with your clones. You should take a few more cuttings than you need and then select the best ones to use and dispose of the rest.

You will need to leach the nitrogen out of the mother plant(s) by watering them heavily with pH adjusted water only (no fertilizer) for two or three days before you take the cuttings. This is an important step because the nitrogen stored in the plant will retard rooting.

Decide what you are going to use for growing medium. Most people use Jiffys, Rockwool or Oasis cubes.  You can also use many different mediums successfully. Use plastic cups with holes cut in the bottom to hold coconut fiber, a Perlite & Vermiculite mix or other loose type growing medium. .You will need to pre-soak your growing medium before you start, using pH balanced water. Distilled water is the best thing to use, but any good, chlorine free water source will work. (NOTE: Most growing medium need to be soaked in pH 5.5 to pH 6.5 water. Rockwool needs to be soaked for 24 hours with water adjusted to a pH of 4.5 to 5.5).

Make a hole in the top of the growing medium which is about the same size or a little smaller than the stem of the cutting. You do not want to force the cutting into the growing medium.

It is critical that you sterilize everything before you start, because cuttings are very susceptible to fungus, viruses and diseases until they root. Use rubbing alcohol on your hands, the razor blade and the cutting block. Rinse the shot glass (or whatever you are using) with alcohol, dry it and then fill it 3/4 full with rooting hormone, and set it aside for now.

Work quickly but carefully. When you make the cut that separates the clone from the mother, you must get it into the rooting hormone as quickly as possible to prevent air from getting pulled into the stem. Please be careful not to cut yourself with the razor blade. (The lawyers made us say that).

Take the Cuttings
  1. cutting1Take a growing tip from your plant 3″ to 6″ long with at least one leaf internode, two is better but not always possible. (A leaf internode is where the leaf connects to the stem, See diagram 1).
  2. cutting2With a Sharp single edge razor blade, carefully cut off one or two leaves (or small branches) flush with the stem. (See diagram 2).
  3. cutting3Make a cut approximately 1/4″ below the internode(s) where you just trimmed the leaves. Cut at a 45 to 60 deg. angle. (See diagram 3). Hold the back-up block tightly behind the stem where you are going to cut. This supports the stem and protects your fingers. Make this cut as quick and clean as you can as you do not want to tear or crush the stem.
  4. cutting4Quickly insert the cutting into the rooting hormone (See diagram 4). If you are using a liquid hormone you can let the cutting soak for 30-60 seconds. With a gel type hormone you just dip the cutting and then insert it into the growing medium. If you are using a powdered hormone you need to wet the stem with water and then carefully roll it in the powder.
  5. cutting5Gently insert the cutting into the growing medium (see diagram 5). Do not push the cutting all the way thru the medium. You need to leave room for the roots to develop. Make sure that the cut(s) you made at the leaf internode(s) are below the surface of the growing medium.
  6. Lightly pack the growing medium up against the cutting. Make sure there is good contact between the cutting and the growing medium.
Care and Feeding Instructions

You have successfully taken cuttings. Now the challenge is to keep them alive long enough to root. The cuttings are obviously very vulnerable at this point and must be handled with care. If you follow the steps below you should have few problems.

  1. Once you have your cuttings in the growing medium, mist them with the spray bottle filled with water and place them in the tray. Mist the inside of the clear humidity dome and place the dome over the tray. (NOTE: The cuttings need some ventilation and a couple of small holes in the dome will usually do the trick).
  2. Remove the dome and mist the cuttings 2 or 3 times a day. This keeps the cuttings from drying out and also changes the air under the dome. This step is critical as the cuttings have no way to replenish lost moisture until they develop roots. Mist the inside of the dome and replace on tray. The humidity under the dome needs to be about 90% until roots appear on the cuttings. (NOTE: Be careful that the air under the dome doesn’t get too warm. If it does, you may have to increase the amount of venting, as well as the number of mistings per day). Cuttings need to be kept between 72° and 80° Fahrenheit. Too hot or too cold will inhibit root growth. If you live in a cold climate you may need a heated propagation mat.
  3. The cuttings will require lighting at this time. Dappled sunlight is fine if you are leaving your cuttings outside. Indoors, we recommend  fluorescents. They are cooler and more energy efficient then metal halides and provide equal to superior results. Keep in mind that fluorescent lights don’t penetrate so you must keep the lights 1-2 inches above the plants.If you are using a Metal Halide or High Pressure Sodium fixture you must keep the cuttings much further away (2 – 3 feet away for 175 – 400 watt bulbs and 4 – 6 feet for a 1000 watt bulb).The lights should be turned on for 18 to 24 hours a day.
  4. To water the cuttings we suggest using either plain distilled water or RO (reverse osmosis) water. It is recommended but not absolutely necessary to add a very mild fertilizer such as Olivia’s Cloning Solution or Wilder’s Clone Root Concentrate at this time. You can also use your hydroponic fertilizer at 1/4 strength. Don’t forget to adjust the pH of the water/nutrient solution at 5-5.5 for Rockwool and 5.5-6.5 for most everything else.
  5. Water the cuttings approximately every 2 days unless you live in a very dry climate in which case you will probably need to water every day. Never let the growing medium dry out. Do not let it set in water either, or the stem will rot. A great method for watering the cuttings is to use two trays, one with holes and the other without. Fill the tray without holes about half way with water and then slowly lower the tray with the holes and the cuttings, into it. Let sit for a few moments and then slowly raise the tray back out and let it drain. Small Hydroponic systems are available to automate the watering cycles of the cuttings, greatly reducing the amount of manual labor.
  6. After about a week you can test to see if your plants have started to root. Remove the humidity dome and leave it off for an hour or two. If the plants have not wilted at all then they probably have enough root development to support themselves. If no wilt is noticed leave the dome off. If they are wilted, spray the cuttings and dome and replace the dome on the tray. Once you have determined that the plants can support themselves, stop misting the cuttings and leave the humidity dome off. (NOTE: Once the plants have roots, constant misting can actually be harmful to the plants).
  7. If the lower leaves start to turn yellow and die, don’t worry. This is perfectly normal. It is the plant feeding off of itself to sustain life, moving valuable nutrient and water from the older growth. Do not remove any dead growth until the plant is well rooted. If you remove the dying growth the plant can starve and die completely.
  8. When the cuttings are completely rooted you can move them into your hydroponic system or the soil.
Final Notes

Cloning is easy once you get the hang of it. Just remember that every step must be done properly. Skipping a small, seemingly insignificant step can have very significant consequences. We suggest that the first time you take cuttings, take twice as many as you need. With a little practice this method of propagation should produce a 95 to 100 percent success ratio.

The use of distilled or RO water can drastically increase your success ratio, especially if you don’t have good quality water where you live. Do not continue using distilled water once the plants have gone into the hydroponic system or soil as it can lead to mineral deficiencies. RO or other chlorine/chloramine free water should be used at this time.

This is one tried and true method of propagation that works well on most types of plants. There are several other ways to clone your plants, including, air layering, dividing, and tissue culture. There are even hydroponic systems that do a good job of rooting cuttings using no growing medium at all. Once the cuttings form roots you simply transplant them to whatever growing medium you will be using.

Hydor HIT Metal Inline Fans

Hydor HIT Metal Inline Fans

Hydor HIT Metal Inline Fans – a QUALITY brand for residential, commercial  and industrial exhaust or supply air application. Direct connections to standard diameter circular ducting and comes standard with manufacturing.

Please make sure that these fans are wired up CORRECTLY ! Although the fan may function for a period of time when wired INCORRECTLY, it will soon burn out the motor’s windings, rendering it obsolete. This is not covered under warranty and will not be refunded or swapped out.

AND ANOTHER THING… When adding an inline duct fan to a fan speed controller, rheostat or dimmer switch, the fan must ALWAYS be set to its HIGHEST speed setting!


Hydor HIT Metal Inline Fans - correct wiring

Hydor HIT Metal Inline Fans – Features:

  • Easy to install
  • Performance up to 0.51m3/second.
  • Can be mounted at any angle and suitable for on intake and/or discharge side and for supply or exhaust application.
  • Suitable for ambient operating temperatures of up to 50° C.
  • Does NOT include electrical cord or 3-point plug
  • Hydor warranty: Products of its manufacture when not misused or neglected to be free of defects in workmanship and/or materials. Our obligation under this warranty is limited to repairing or exchanging F.O.B. factory, any part, assembly or portion found to be defective within one (1) year from the date of commissioning but not to exceed eighteen (18) months from date of shipment from our factory.

Motor:

  • External motor squirrel cage induction motor.
  • Electrical  supply, 220-240v.
  • Single phase.
  • Bearings are sealed for life.
  • Can be wired to run at 1 of 3 speeds ( Low , Medium or High ).
HIT -100 Inline Fan = 219 m3/h
HIT -150 Inline Fan = 464 m3/h
HIT -200 Inline Fan = 914 m3/h
HIT -250B Inline Fan = 1119 m3/h

HIT -315B Inline Fan = 1861 m3/h


Hydor HIT Metal Inline Fans - 315mm clamping info


DIMENSIONS

PLEASE NOTE: Only 200mm and larger fans come with a crossbar between the 2 mounting feet.

HIT Inline fan Dimension Breakdown Table Drawing

Model  B C D E F G KG
HIT100 98 205 130 236 284 270 47 3.7
HIT150 148 195 165 278 326 312 47 3.6
HIT200 198 235 190 333 392 372 100 5.5
HIT250B 248 210 190 333 392 372 100 5.3
HIT315B 313 265 227 400 460 440 100 8.8

TECHNICAL DATA

Model  Hz   W r.p.m. m3/h H m3/h M m3/h L
HIT100 230 50 59 2641 219 194  158
HIT150 230 50 62 2578 464 403 324
HIT200 230 50 155 2502 914 792 680
HIT250B 230 50 165 2480 1119 867 680
HIT315B 230 50 240 2480 1861 1746 1616

Compared with sleeve bearing, ball bearing has the following advantages:  Long life, low maintenance, low temperature compatibility.

How to work out the size and type of fan required:
In order to provide adequate ventilation for a given application, it is essential the
correct size, type and number of units are selected. Selection of the correct fan depends on two
principal factors: the performance and application.
Step 1
step1
Determine which mounting arrangements meet your requirements
Step 2
step2
Calculate the VOLUME of the room in cubic meters (m3) by multiplying the length x width x height.
Step 3
How many air changes (AC/H) are required. Work out how fast one complete ‘air change’ needs to be carried out under warm conditions (i.e. the maximum you will ever need the fan to operate).If excess heat in a certain growing environment is a common problem, or there is a large volume of plants growing in a very restricted space you will need more air flow per hour than for a larger growing area which doesn’t suffer from too much heat build up with smaller plants. Growers commonly underestimate just how much ‘air exchange’ is required to remove excess heat and humidity, bring in fresh CO2 and generally create fresh air movement over all of the plant surfaces. As a comparison to greenhouse crops growing in full sunlight – one air change per minute or 60 air changes an hour are often aimed for with large, mature crops growing under warm, humid conditions. However, in a grow room situation, one complete air change obtained in 4-5 minutes is acceptable. Obviously this needs to be more frequent (one complete air change in 2-3 minutes) where lighting is creating a lot of extra heat to be removed or when a CO2 generator is being used.
Step 4
Use the following formula: Volume (m3) x AC/H = Airflow (m3/h)

Step 5
Select a fan that does the airflow you require.

Seedling Trays

Seedling Trays 2024 1-1

Seedling trays are suitable for starting seeds or cuttings.

Most sizes will hold Jiffy Pellets or Rock Wool plugs (36mm x 40mm). Alternatively, use your seedling substrate of choice in the trays

45 Cell Tray

Length: 540mm
Width: 275mm
Shape: Round
Diameter: 48mm
Depth: 60mm

48 Cell Tray (For Preforma Plugs / loose seedling mix / 33mm Jiffy Pellets)

Length: 305mm (2 of these trays fit into a Large Rootit Propagation dome / Garland XL High Dome Propagator)

Width: 255mm
Shape: Roundish
Cavity Top Diameter: 35mm
Cavity Bottom Diameter: 25mm
Depth: 50mm


128 Cell Tray (For Preforma Plugs / loose seedling mix. Preforma plugs will sit proud inside this shallow tray, as they are taller than the tray)

Length: 540mm. Will need to be trimmed shorter along one short side (using scissors / box cutter) to fit flat into a ROOTiT Large Propagator.
Width: 275mm
Shape: Square
Cavity Top: 28mm
Cavity Bottom: 15mm
Depth: 40mm


Seeds:

Soak seeds for 24 hours in distilled water

Plant seeds twice as deep as the width of the seed.

Germinating seeds 21°C – 32°C (25°C), shadowy warm location. Top of Fridge

Keep evenly moist

Rockwool: slice open – root must be 1.5cm long so doesn’t heave up and out.

7 – 10 days: Cotyledon Leaves

10 – 14 days: True leaves

Can apply quarter-strength Nuts now

Growing medium – evenly moist

Keep growing medium 2°C – 5°C warmer than ambient air temperature

Ambient temperature 24°C – growing medium 25°C – 27°C

Seedlings need at least 16 hours of light for 2 to 3 weeks

Seedlings require less intense light.

Wurmbosch Worm Castings 10L

Worm Castings

Wurmbosch Worm Castings 10L is a rich, all-natural source of organic matter with lots of nutrients and moisture-holding capabilities.

Vermicast, also called worm castingsworm humus or worm manure, is the end-product of the breakdown of organic matter by an earthworm. These castings have been shown to contain reduced levels of contaminants and a higher saturation of nutrients than do organic materials before vermicomposting.

Earthworm castings are known to have an extraordinary effects on plant life. Worm Castings improve the soil structure and increase fertility making them the most enriching soil conditioner available.

Widely & successfully used for propagation and all stages of transplants and a 10% to soil mixes come highly recommended.

Can also be effectively used to make teas, for foliar application to green up leaves and to help keep insects at bay, mainly during vegetative stages.

The product must be kept closed to maintain moisture levels for bacteria to stay alive until ready for use.

Recommended  Usage:

As fertilizer or top dressing, scatter 1 cm on indoor plants or 2 cm on outdoor plants every 2-3 months.

For planting seedlings, put 1 heaped Tbs (40-50ml) into prepared hole.

Add 1/3 worm castings to soil to make potting soil.

Seedling Mix: 40% Coco Peat, 40% Perlite, 20% Worm Castings


🌱 How to Use Wurmbosch Worm Castings 10L

Worm castings are a gentle, all-natural soil booster packed with nutrients and beneficial microbes. They won’t burn your plants, but using the right amounts will give you the best results.


Top Dressing / Fertilizer

  • Indoor plants: Sprinkle a thin layer (about 1 cm) over the soil every 2–3 months.

  • Outdoor plants: Spread a 1–2 cm layer around the base of plants every 2–3 months. Water lightly to help nutrients soak in.


Planting Seedlings & Transplants

  • Add 1 heaped tablespoon (20–30 ml) of castings into the planting hole before placing your seedling.

  • For larger plants or transplants, use up to 40–50 ml for an extra boost.


Potting Soil Mix

  • Blend into your potting soil at 10–20% worm castings (about 1 part castings to 4 parts soil or compost).

  • This improves soil health, root growth, and moisture retention without making the mix too heavy.


Seedling Mix

For strong, healthy starts:

  • 40% coco peat

  • 40% perlite

  • 20% worm castings


🌿 Extra Tip

Worm castings work best with regular, light applications rather than heavy doses. Think of them as a steady food supply for your plants and soil microbes.

✅ Microgreens Growing Medium Recommendations

Worm castings:

  • Optional, and only at 5–10% of the mix.

  • This provides beneficial microbes and a gentle nutrient kick, but keeps the medium light and clean.

Vermiculite

Vermiculite

Vermiculite is a mined material. In its natural state it resembles mica rock, but when quickly heated, it expands due to the generation of interlaminar steam.
Vermiculite is most frequently used in conjunction with perlite as the two complement each other well.

  • 80%    porosity  
  • 10%    air space
  • 60%    moisture

Please note: Our Vermiculite is Medium – grade ( size ) Vermiculite

SOLD ACCORDING TO VOLUME WHEN FILLED.

Vermiculite is a popular hydroponic media favoured for its affordability.

It is made from a natural mineral that expands with the application of heat. The expansion process is called exfoliation which takes place in purpose built commercial furnaces.

Vermiculite is very lightweight and sterile.

It has excellent water retention and capillary action properties, which allows it to be fully hydrated simply by applying moisture from above or below.

When used in hydroponics, vermiculite is often mixed with perlite if the media becomes too water logged. This improves aeration and drainage.

In hotter climates vermiculite is often used by itself because of its higher water holding capacity. Vermiculite also tends to break down after a perod of time so is favoured for more short term crops such as lettuce.

Growers who use vermiculite usually have a system in place where they manually fill NFT growpots or cell trays with the media. A seed is then inserted into the top of the media and the pots and trays are placed into a propagation system like an Ebb and Flow table where they remain until the seedlings have emerged and are at a resonable size for transplanting into the main growing system.

The root system of the seedling holds the media together so individual root bound ‘plugs’ can be removed from the propagating cell trays and placed directly into the plant holes of an NFT gully if required.

If  NFT growpots are used, the media filled growpot is placed into the plant hole in the gully and the pot acts as additional support for the plant. The growpot also prevents light entering the gully which can promote algal growth

Terra Aquatica FinalPart

Terra Aquatica FinalPart 2022

Terra Aquatica FinalPart (Formerly GHE Ripen) is a complete late flowering nutrient/stimulant requiring no additional boosters. It increases flowering and production of active principles, and eliminates nutrient excess.

FinalPart acts in 3 ways:

  • It sends the plant a strong signal that it is coming to the end of its life; this prompts the plant to accelerate the ripening process.
  • It forces the plant to strengthen its defenses and thus increase essential oil and active principle production.
  • It delivers all the mineral salts the plants need in a form that is easy to assimilate: in case of a previous accumulation of nitrate or microelements, this helps metabolize residues, which improves taste.

As a “forcing solution”, Terra Aquatica FinalPart can be used in any circumstance where you need to control or enhance ripening, and at the end of every flowering/fruiting cycle of annual flowers and fruits to maximize yield and flavor intensity.

Outdoors, FinalPart enables you to quickly harvest a  crop before it is spoiled by cold and damp weather. Indoors, it helps you harmonize the end of the grow cycle by speeding up the ripening of the slowest plants or varieties. And in case of a severe infestation of fungi or insects, it can allow you to accelerate the natural cycle and recover something out of a crop that would otherwise be completely lost.

In hydroponics:

Replace old nutrient solution with pH adjusted water add up to 5ml/L of FinalPart to match or slightly exceed your previous EC (up to 2.6) and mix well. Run for 10 days, or as needed, then use FlashClean to finish or harvest your crop directly.

In soil:

Apply in pH adjusted water at up to 4ml/L to match or slightly exceed your previous EC (up to 2.0). Apply until leaf yellowing occurs and / or ripening is satisfactory. This can take from 10 to 20 days. Then use FlashClean to finish or harvest your crop directly.

Expert growers can use FinalPart to manipulate water stress to maximize active principal concentration, and minimize splitting in soft fruit culture: Target EC 2.6 ms in hydro and target EC 2.0 ms in soil.

COMPLETE USER GUIDE – HERE

FlashClean helps FinalPart work to its full potential. By rinsing residues of nitrogen and other salts out of your substrate, FinalPart can get to work more effectively mobilizing nitrates and improving taste in your final crop. When you’re done, instead of a 10 day flush with water after FinalPart, try 2 days with FlashClean – growers around the world have, because in commercial production, 8 days per harvest is a big bonus!

AirDome

AirDome

The AirDome is the perfect accessory to gardeners of all abilities. It has been designed to increase the amount of air around the root zone in plant pots.

Airdome inside pot
Airdome inside pot


If you are lucky enough to have power in your greenhouse or tunnel this little addition can increase yields by up to 130%. It is very simple to use once assembled, which will take less than 30 seconds. The AirDome is placed at the bottom of the pot, covered with compost and then connected to an air pump. Oxygen is then supplied directly to the plants’ root zone, improving crop development and ensuring maximum growth.

It is very easy to use. The AirDome is placed at the bottom of the pot, covered with the substrate of choice and then connected to an air pump.

To maximise the effectiveness of the AirDome use a fluffy mix  such as a mixture of 50% good Coco Peat and 50% Perlite.

Provide the plants with additional oxygen to boost growth significantly and increase yields.

To increase levels  of oxygen for smaller plant at times when the medium seems to stay wet.

With all growing conditions  being correct the Air Dome has been proven to increase yields by up to 130%

The AirDome should only be switched on during the daylight periods. Always ensure that warm air is blown in and around the root zone. Temperatures between 18 and 22 degrees are ideal. Temperature below and above 5 degrees and 30 degrees will potentially damage the roots.

Raise your air pump higher than the AirDome(s) to prevent water from siphoning back when the pump is off or use a non-return valve.

Use a timer to turn the pump on and off when the air temperature is warm and before it gets too cool.

Many AirDomes can be linked together using 5mm connections, or for larger AirDome setups, use 12mm pipe as the supply line, reducing the pipe at each AirDome point with the AutoPot 12mm to5mm Cross Connectors.

Air Dome Instructions(PDF)

Airdome Information Video Autopot

AutoPot Brochure

Replacement Blue Bubble Pipe consists of 4 x 5.2cm Strips which will replace inside Blue Bubble Pipe for 1 AirDome

Rockwool Growing Medium

Rockwool Growing Medium

Rockwool Growing Medium can hold large quantities of water and air that aid root growth and nutrient uptake in hydroponics; the fibrous nature also provides a good mechanical structure to hold the plant stable. It is used primarily for drip hydroponic systems.

Rockwool is made by melting a combination of rock and sand and then spinning the mixture to make fibers which are formed into different shapes and sizes.

Rockwool  has a pH of roughly 7.8. Please see ‘Preparation’ further down…


Rockwool-Diagram

As can been in the diagram above, rooted Rockwool Plugs can be placed into Rockwool Cubes and the rooted cubes can then be placed on top of Rockwool Slabs. The roots will then grow into the slab over time.

Dimensions:

Square Rockwool Plugs: (36 mm x 36 mm (Top) x 40 mm (H)) – sold individually.

77-Plug Tray: (Tray Dimensions: 53 cm x 31 cm x 3 cm) filled with 77 x Plugs.

Rockwool Cubes:
Smaller sized cubes that can be placed on top of a Rockwool slab: 100 mm x 100mm x 65 mm (H).
Larger, higher cubes (A.K.A. Hugo Blocks): 150 mm x 150 mm x 150 mm

Rockwool Slab: 100 cm x 20 cm x 7.5 cm.

Rockwool Slab NARROW : 100 cm x 15 cm x 7.5 cm.


Disclaimer: Brand of horticultural rockwool may differ from time to time, depending on availability.

Rockwool Growing Medium Preparation

Items you will need:

Rockwool Cubes have a pH of roughly 7.8. This is pretty alkaline, yet our plants prefer to grow in a slightly more acidic environment (between 5.5 – 6.5). In order to prepare our Rockwell cubes for the seeds, we need to soak them in some pH adjusted water, that way they have everything the seeds need to germinate and sprout; water and a slightly acidic environment.

Hydrate And Stabilize The Rockwool Cubes

Get a bowl or some other container that is big enough to fill with water and have room left for your Rockwool cubes.

Fill the container/bowl with water from your tap.

Using either a pH test kit or a pH meter, determine the pH of the water. Water comes out pretty alkaline, usually around 7.4, so you will need to acidify it a little bit to bring that pH down to the desired level. Aim for as close to a pH of 5.5-6 as you can get.

To accomplish this, use pH down. Add to the water in small increments (a drop), and test the water to see where the pH is. Continue doing this until you have a pH of 5.5-6.

Important: Do not let the pH of the water go below 5.  A pH this low will damage the fibers of the Rockwool Cube

Now that we have the pH adjusted water, it’s time to stabilize and hydrate the Rockwool cubes in it. Insert the Rockwool Cubes into your container and let them soak for roughly 1 hour. Once the hour is up, the cubes will be big and fat with water.

DO NOT SQUEEZE THEM TO DRAIN ANY WATER

Rockwool Cubes are designed to maintain the correct water to air ratio and squeezing them may damage their structure.

Using Slabs

The slabs are wrapped and sealed in plastic. Most people will start their plants in Rockwool cubes and then transplant them to the slab. To transplant a Rockwool cube to the slab, simply cut an X that is the same size as the cube, in the plastic on top of the slab. You then lift the plastic tabs and set the cube on top of the slab. You may want to pin the cube temporarily with a plastic spike until the roots grow down into the slab.