Thread Seal Tape 19mm: The Ultimate Solution for Leak-Proof Connections
Perfect Seal Every Time, your go-to solution for ensuring leak-proof and secure connections in all your plumbing, gas, and air systems. Whether you’re a professional tradesperson or a DIY enthusiast, this high-quality tape is essential for achieving reliable seals.
Key Features and Benefits
Reliable Leak Prevention: Designed to provide a perfect seal on threaded pipe joints, this tape (also known as plumber’s tape) prevents leaks in plumbing, gas lines, and air systems, ensuring your installations remain secure and drip-free.
High Durability: Made from premium-grade PTFE (Polytetrafluoroethylene), this tape offers excellent durability and resistance to wear, ensuring long-lasting performance in various applications.
Easy to Apply: The tape’s 19mm width is ideal for a wide range of pipe sizes, making it easy to apply and ensuring a snug fit every time. Simply wrap the tape around the threaded area of the pipe for a quick and effective seal.
Versatile Use: Suitable for both residential and commercial applications, the tape is perfect for sealing connections in water, gas, and air systems. It is compatible with most types of pipes and fittings, making it a versatile addition to your toolkit.
Non-Toxic and Safe: The tape is non-toxic and safe to use in all environments, including those involving drinking water. It complies with all relevant safety standards, giving you peace of mind.
Specifications
Width: 19mm
Thickness: 0.1mm
Length of roll: 12m
Material: PTFE (Polytetrafluoroethylene)
Color: White
The Thread Seal Tape 19mm stands out for its ease of use, durability, and effectiveness. It is an essential product for anyone looking to ensure secure and leak-proof connections in plumbing, gas, and air systems. Its high-quality PTFE construction guarantees reliable performance, while its compatibility with a wide range of pipes and fittings makes it incredibly versatile.
Application Tips
Clean the Threads: Ensure that the threads are clean and free from debris before applying the tape.
Wrap Correctly: Wrap the tape around the threads in the direction of the thread rotation to ensure a tight seal.
Apply Evenly: Overlap the tape slightly as you wrap to cover the threads completely without bunching.
Ensure your connections are secure and leak-proof with the Thread Seal Tape 19mm. Order today and experience the peace of mind that comes with knowing your systems are reliably sealed.
Grow Tent 1.2m x 1.2m x 2m – an unbranded midrange grow tent that will not disappoint!
600D mylar fabric thickness
Multiple ducting sleeves and a cabling sleeve
16mm steel frame with steel connector pieces
Reinforced tent canvas corners
Mylar fabric drip tray
Verco covered viewing window and air vents
Side access zip-up panel/s with larger sizes
Benefits of growing in a tent…
Using a grow tent like the Grow Tent 1.2m x 1.2m x 2m for indoor growing offers numerous benefits, making it an ideal choice for both novice and experienced gardeners. Grow tents provide a controlled environment, allowing growers to manage light, temperature, humidity, and airflow effectively, which are crucial for plant health and growth. They come equipped with reflective interiors that maximize light efficiency, ensuring plants receive adequate illumination from grow lights. This setup promotes faster growth and higher yields. Grow tents also help contain and control odors, pests, and diseases, reducing the risk of infestations and contamination. Additionally, their enclosed nature minimizes the impact of external factors such as seasonal changes, making it possible to grow plants year-round. With easy assembly and portability, grow tents offer a convenient and efficient solution for optimizing indoor gardening.
What is the “D” in material thickness…
The Denier(“deh-neer”) measurement originates from the French word “denier,” which was a medieval French coin. The term was adopted into the textile industry in the 19th century to describe the fineness of silk fibers. In this context, denier became a unit of measurement for the linear mass density of fibers, defined as the mass in grams per 9,000 meters of the fiber. This measurement was crucial for the silk industry, as it helped standardize and compare the thickness and strength of different silk threads. Over time, the use of denier expanded to other synthetic fibers, such as nylon and polyester, becoming a widely recognized standard for fabric thickness in the textile industry.
A higher denier number indicates a thicker, more durable, and heavier fabric, while a lower denier number indicates a finer, lighter, and less durable fabric.
Grow Tent 1m x 1m x 2m – an unbranded midrange grow tent that will not disappoint!
600D mylar fabric thickness
Multiple ducting sleeves and a cabling sleeve
16mm steel frame with steel connector pieces
Reinforced tent canvas corners
Mylar fabric drip tray
Verco covered viewing window and air vents
Side access zip-up panel/s with larger sizes
Benefits of growing in a tent…
Using a grow tent like the Grow Tent 1m x 1m x 2m for indoor growing offers numerous benefits, making it an ideal choice for both novice and experienced gardeners. Grow tents provide a controlled environment, allowing growers to manage light, temperature, humidity, and airflow effectively, which are crucial for plant health and growth. They come equipped with reflective interiors that maximize light efficiency, ensuring plants receive adequate illumination from grow lights. This setup promotes faster growth and higher yields. Grow tents also help contain and control odors, pests, and diseases, reducing the risk of infestations and contamination. Additionally, their enclosed nature minimizes the impact of external factors such as seasonal changes, making it possible to grow plants year-round. With easy assembly and portability, grow tents offer a convenient and efficient solution for optimizing indoor gardening.
What is the “D” in material thickness…
The Denier(“deh-neer”) measurement originates from the French word “denier,” which was a medieval French coin. The term was adopted into the textile industry in the 19th century to describe the fineness of silk fibers. In this context, denier became a unit of measurement for the linear mass density of fibers, defined as the mass in grams per 9,000 meters of the fiber. This measurement was crucial for the silk industry, as it helped standardize and compare the thickness and strength of different silk threads. Over time, the use of denier expanded to other synthetic fibers, such as nylon and polyester, becoming a widely recognized standard for fabric thickness in the textile industry.
A higher denier number indicates a thicker, more durable, and heavier fabric, while a lower denier number indicates a finer, lighter, and less durable fabric.
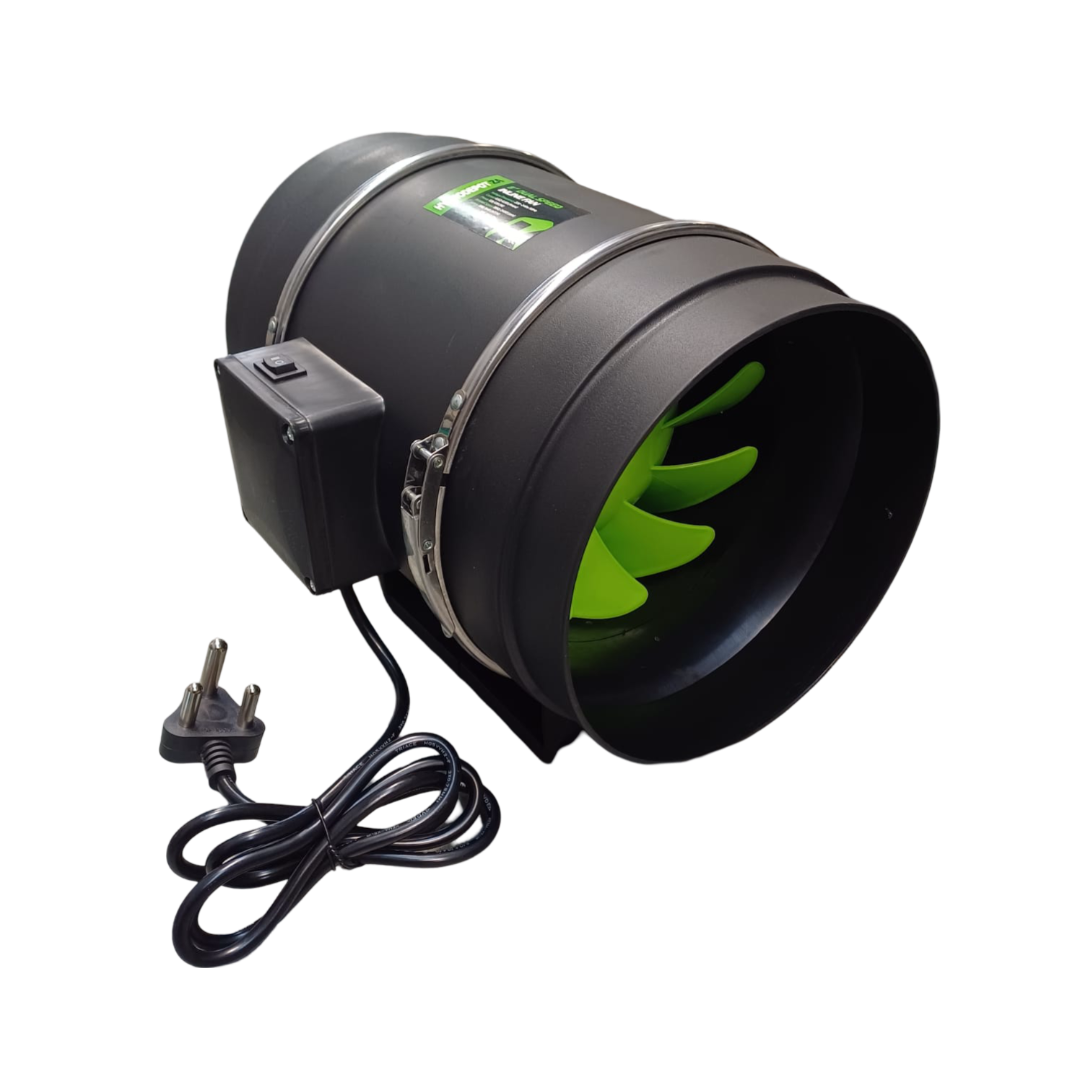
HydroDepot Dual Speed Inline Fan 200mm – a two speed mixed flow fan, perfect for high pressure, quiet air movement. They have an integral mounting bracket and come wired with a 1.5m lead. They have a release system, making it easy to maintain and clean.
RUNS AT EITHER 690M³ OR 840M³, WITH THERMAL OVERHEATING PROTECTION
Power Draw: 123 / 128 W, 0.53 Amp
Noise: 55 / 63 db
More on ventilation…
Ventilation fans like the HydroDepot Dual Speed Inline Fan 200mm fans are essential components in grow tents and grow rooms, providing a controlled environment that is crucial for the health and productivity of plants. These fans facilitate the exchange of stale, humid air with fresh air, which helps maintain optimal temperature and humidity levels. Proper ventilation prevents mold and mildew growth, reduces the risk of pest infestations, and ensures that plants receive an adequate supply of carbon dioxide, which is vital for photosynthesis. By maintaining a stable environment, ventilation fans help create the ideal conditions for robust plant growth and high yields.
Moreover, ventilation fans play a significant role in managing odors and improving overall air quality within grow tents and grow rooms. Many plants, especially those with strong fragrances, can produce odors that may be overwhelming in enclosed spaces. Ventilation systems equipped with carbon filters can effectively neutralize these odors, ensuring a pleasant working environment. Additionally, good air circulation helps prevent hot spots and ensures that all parts of the plants receive uniform exposure to light and nutrients. This even distribution promotes consistent growth patterns and helps maximize the efficiency of lighting and nutrient use, contributing to healthier, more productive plants.
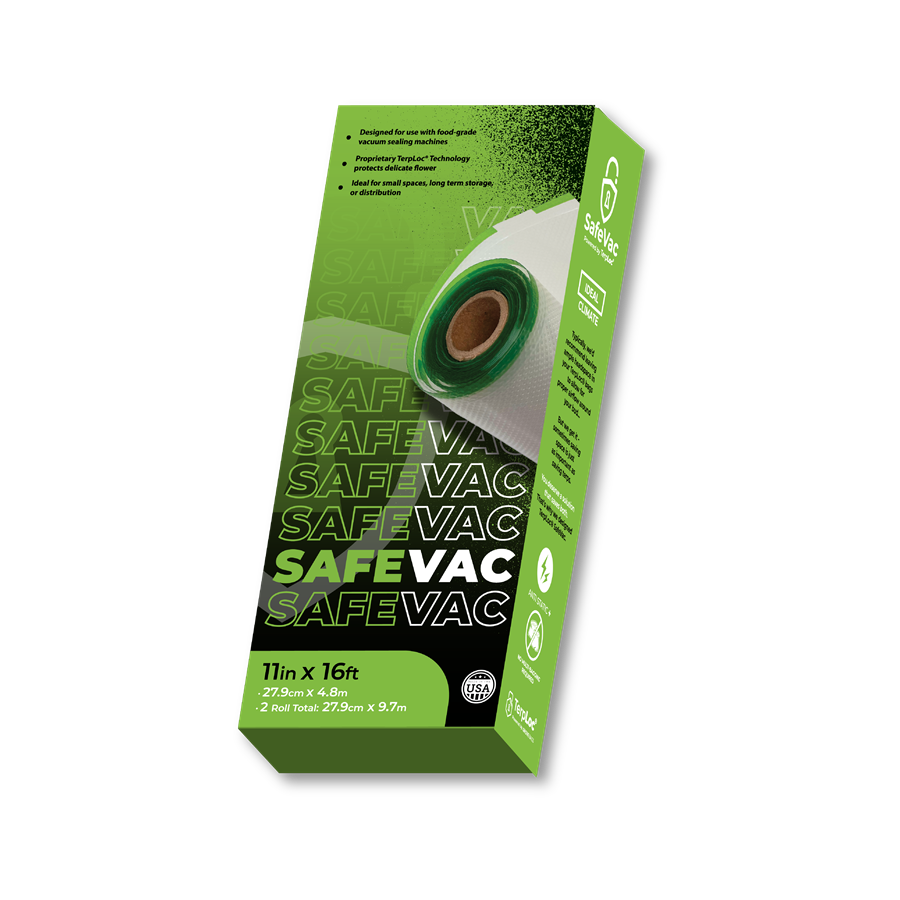
TerpLoc SafeVac Vacuum Film – SafeVac is TerpLoc’s solution for maximizing cannabis potency and quality, even under less-than-ideal vacuum-sealed conditions.
A direct placement for typical food-storage vacuum films, SafeVac uses proprietary TerpLoctechnology to maintain optimal humidity and protect against degradation while saving space during storage or transit.
Each pack includes 2 rolls (Each roll is 11″x16′ or 27.94 cm x 4.87 m)
What Does TerpLoc SafeVac Vacuum Film Do?
BURP-FREE CURING: Let your flower finish while in storage or transit, without worrying about burping containers.
BURN-FREE FREEZING: Whether storing finished flower or processing fresh frozen, SafeVac’s unique barrier allows for proper moisture distribution to prevent freezer burn.
HASSLE-FREE FOR FLOWER: Unlike turkey bags or vacuum films made for food, SafeVac is designed for the unique physiology of cannabis to preserve its quality.
ANTISTATIC
MULTIBAGGING NOT REQUIRED
Don’t Fear the “Puff-Up”…
Since SafeVac retains the same selective permeability properties as other TerpLoc products, some ‘puffing’ of the package is expected and normal. The degree and rate at which your SafeVac packaging will ‘puff up’ will depend on biomass moisture and ambient conditions.
Why vacuum-pack? …
Vacuum sealing dried cannabis offers numerous advantages that significantly enhance both the quality and longevity of the product. One of the primary benefits is the preservation of potency and flavor. By removing air from the packaging, vacuum sealing prevents the degradation of cannabinoids and terpenes, which are responsible for the cannabis’s psychoactive effects and aromatic profile, respectively. Oxygen exposure can cause these compounds to break down over time, leading to a loss of potency and a diminished sensory experience. Vacuum sealing effectively creates an airtight environment that maintains the integrity of these essential components, ensuring that the cannabis remains as fresh and potent as the day it was packaged.
Additionally, vacuum sealing protects dried cannabis from environmental factors that can compromise its quality. Moisture, light, and fluctuating temperatures are all detrimental to stored cannabis, potentially leading to mold growth, discoloration, and a harsh smoking experience. The vacuum-sealed environment shields the cannabis from humidity and light exposure, two critical factors that contribute to mold and mildew development. This method also helps maintain a consistent temperature around the product, further safeguarding it from conditions that can degrade its quality. By employing vacuum sealing, growers and consumers can significantly extend the shelf life of their cannabis, ensuring it remains safe, effective, and enjoyable for an extended period.
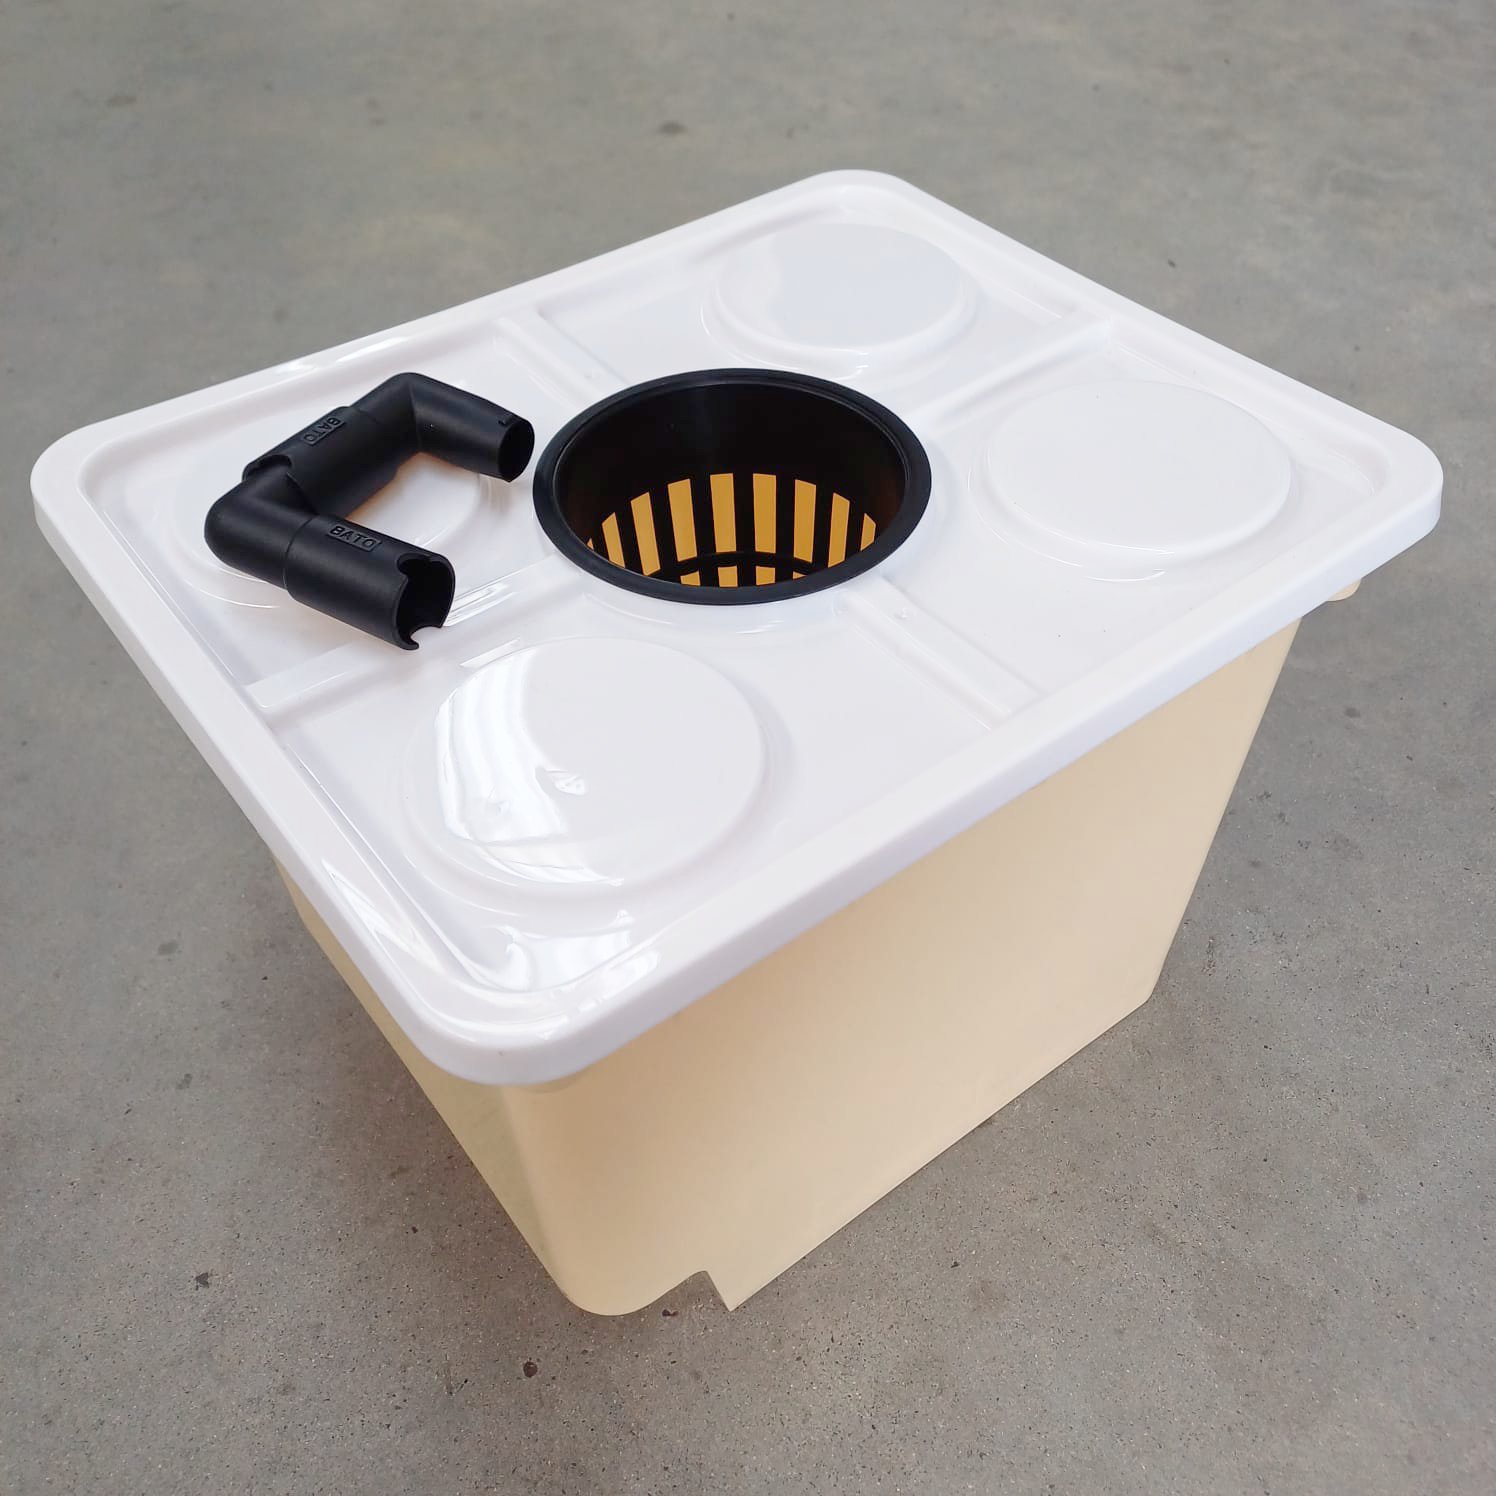
Bato Dutch Bucket 11L: Enhance your hydroponic or aquaponic garden with the Bato Dutch Bucket 11L, a top-tier choice for both novice and experienced growers. Crafted from high-quality, durable plastic, this 11-liter Dutch bucket is designed to withstand the rigors of both indoor and outdoor growing environments. Its robust construction ensures longevity, making it an excellent investment for your gardening setup.
The Bato Dutch Bucket 11L features an efficient drainage system with a built-in siphon elbow, promoting healthy root development by ensuring optimal aeration. This bucket is perfect for growing larger, vine-type plants such as tomatoes, cucumbers, and peppers, allowing for superior root space and growth potential.
Key Features:
Durable Construction: Made from high-quality, robust plastic for long-lasting use.
Optimal Size: 11-liter capacity ideal for larger, vine-type plants like tomatoes, cucumbers, and peppers.
Drainage System: Built-in siphon elbow for easy setup
Versatile Use: Suitable for both indoor and outdoor hydroponic or aquaponic systems.
Easy Integration: Compatible with drip irrigation systems for seamless setup and maintenance.
Simple Maintenance: Easy to clean and maintain, promoting healthy plant growth.
PLEASE NOTE:
This is a DIY system component, not a full system
Drainage pipe that the buckets will drain into should be 50mm in diameter.
Buckets are SOLD INDIVIDUALLY – each bucket includes its own lid, net pot (slightly smaller than our 1lt net pot), and 2 x siphon elbows.
Bucket can be filled with clay pebbles (“LECA”) or Perlite, or can be used as DWC if the siphon elbows are used as in the picture below. Inserting a coarse sponge into the siphon elbow facing up, when used as DWC bucket, will be advantageous – as this will help prevent roots from growing into the outlet.
Plumber’s tape or PVC glue can be used on siphon elbows for piece of mind regarding leaks or spillages while away from the system.
Elevate your gardening experience with the reliable and efficient Bato Dutch Bucket 11L, designed to optimize plant health and maximize yields. Perfect for hydroponic enthusiasts, this bucket offers the durability and functionality needed for a successful growing operation.
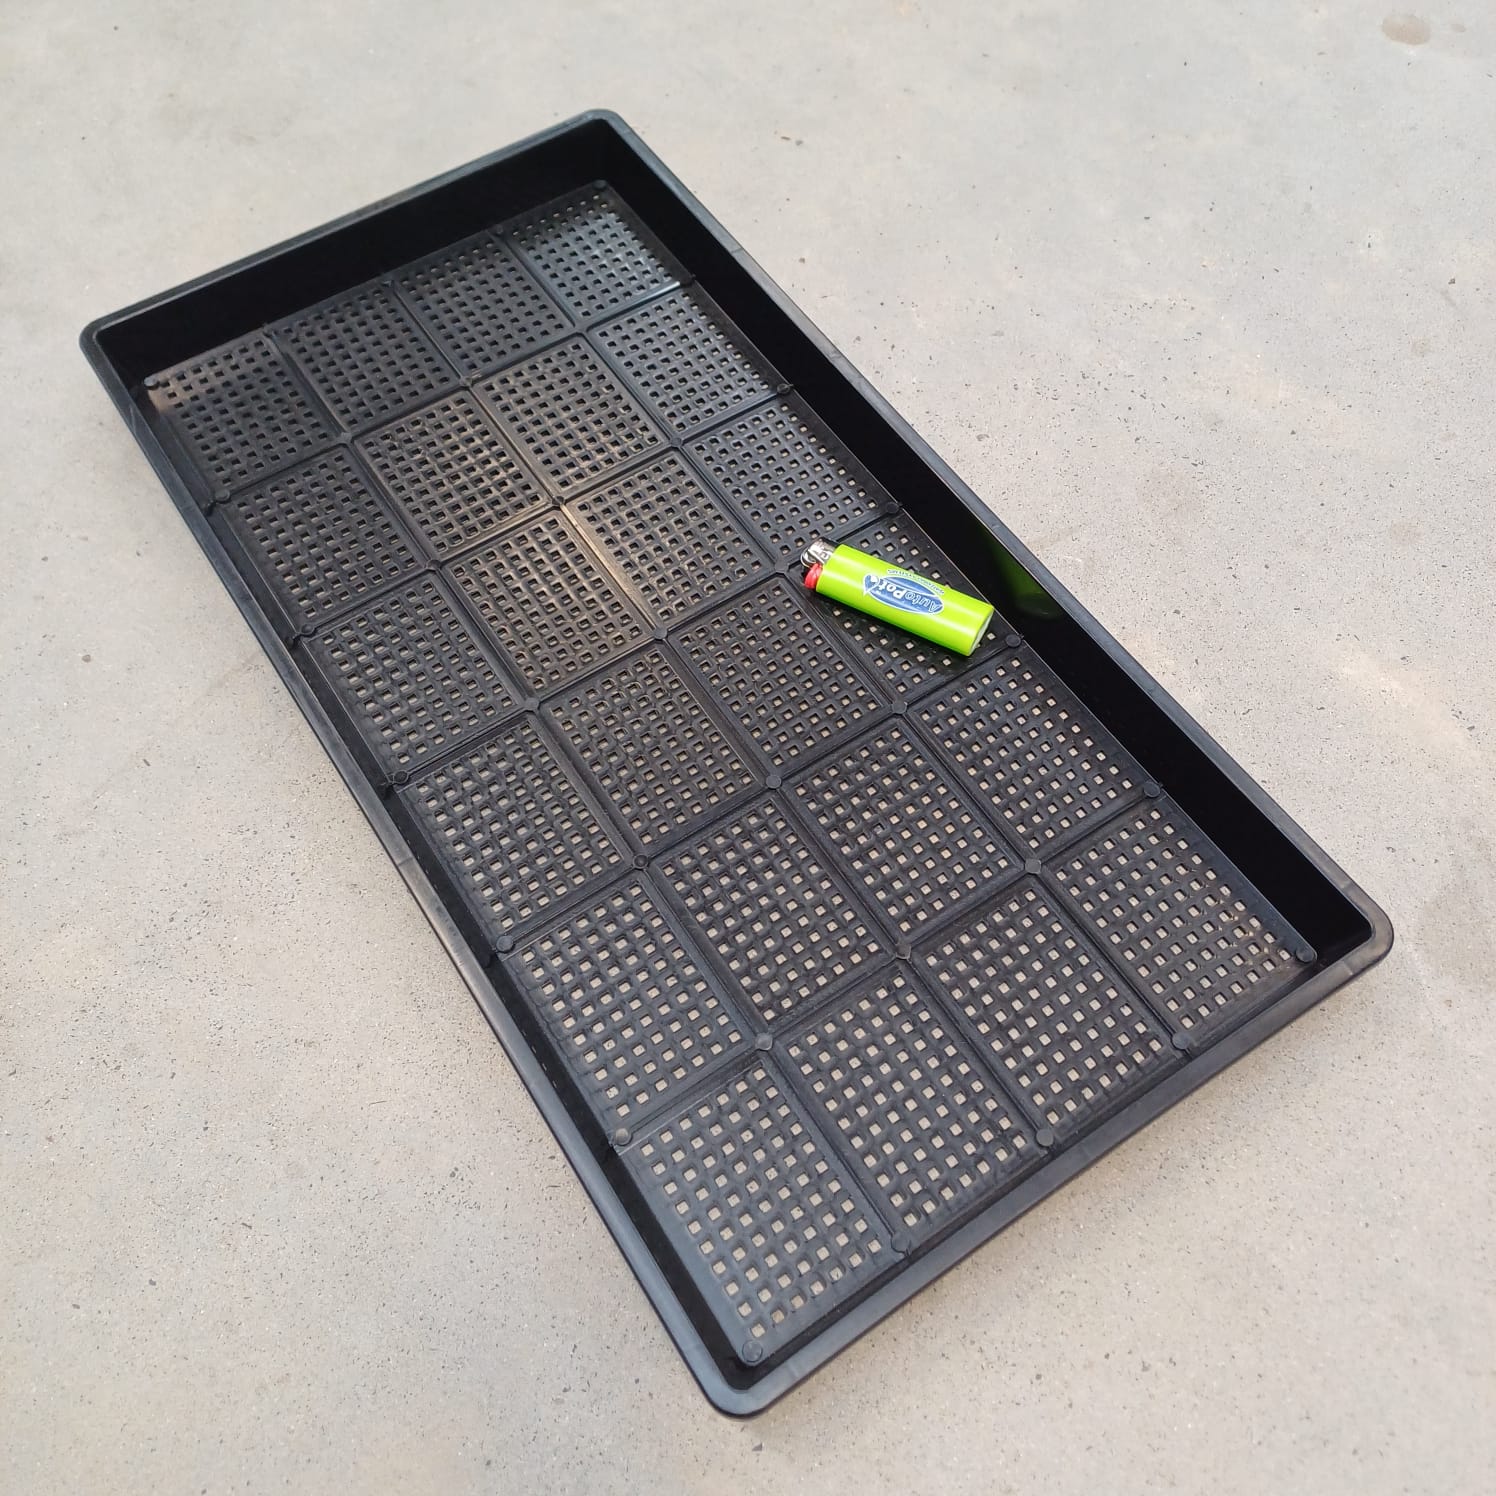
The 30mm Microgreen Tray Mesh Bottom is 275mm wide and 535mm long. The mesh bottom makes this tray suitable for multiple uses.
With its low 30mm height, it can be filled to the brim using only about 4.5 liters of growing medium.
Coco coir based substrates/growing mediums are a very popular choice for growing microgreensat home, as it is a soft and airy medium with great moisture retention. Because the microgreen growing cycle is so short, with the seedling relying mostly on nutrients stored inside the seed itself, adding any supplements or additional nutrients to your substrate is not a necessity at all, although a lot of people do add a little bit of worm castings to their mixes, claiming better results.
Once you have added your substrate into the 30mm Microgreen Tray With Holes, water or mist spray lightly if the substrate is on the dry side and tamp the substrate down very lightly by hand, to get it to settle and flatten out nicely. Then gently sprinkle your seeds across the surface. Once this is done, a VERY thin layer of additional substrate may be sprinkled over the top of the seeds (using a baking sieve, for example)
Place the trays into a suitable environment for germination and mist or spray the top of the substrate regularly to prevent it from drying out. (A propagation dome will help keep substrate moist until your seeds have germinated, saving you a lot of effort. Remove the ). Do not overspray, as this will cause overly wet “swampy” subsurface conditions! Just keep the substrate slightly moist at all times.
Once your seeds have sprouted and grown to a harvestable size, you are able to clip off the delicious micro-leaves for your dishes and salads with a pair of pruning scissors.
30mm Microgreen Tray Mesh Bottom trays can also be used for other home and hobby purposes, like sifting out Mealworm Beetles if you are breedingthem, or to sift grains, seeds, Perlite, etc.
“Saboten” means “Cactus” in Japanese, in case you were wondering.
Japanese high quality stainless steel – durable, razor sharp heat treaded finish
Fluorine coating reduces resin and sap build up
Bonsai style ergonomic handle
Blade type: Extra slim, straight blade
Blade cutting length: 35 mm
Overall scissor length: 160 mm
Pruner type: Angled/L-shaped (handle and blade are at an angle from each other)
Cushioning: Magnetic (Magnets that repel each other are built into the handles)
Handy ruler markings along scissors for quick measurements while you work
Colour of handle: Dependent on stock available at the time
Get your pair of Saboten Professional Pruners PT-16 today!
Saboten’s philosophy is to bring smiles to the faces of all customers engaged in gardening and farming. For more than 90 years, their craftsmanship has been devoted to suppling user friendly and the highest quality products from Miki, Japan. They keep rising to the challenge of improving pruning shear and trimming saw quality that always satisfies their customers.
The importance of ergonomics and ease of use in plant pruning scissor design cannot be overstated, especially for both professional and hobbyist gardeners who spend considerable time tending to their plants. Ergonomically designed pruning scissors reduce strain on the hands and wrists, minimizing the risk of fatigue and repetitive strain injuries during prolonged use. A well-designed handle with comfortable grips and ergonomic contours ensures a natural hand position, allowing for precision and control while pruning. Additionally, easy-to-use features such as spring-loaded mechanisms or lightweight materials further enhance usability, enabling gardeners to prune with efficiency and accuracy. By prioritizing ergonomics and ease of use in scissor design, gardeners can work comfortably for extended periods, leading to more enjoyable gardening experiences and healthier, well-maintained plants.
“Saboten” means “Cactus” in Japanese, in case you were wondering.
Japanese high quality stainless steel – durable, razor sharp heat treaded finish
Uncoated
Bonsai style ergonomic handle
Blade type: Slim, straight blade
Blade cutting length: 35 mm
Overall scissor length: 160 mm
Pruner type: Angled/L-shaped (handle and blade are at an angle from each other)
Cushioning: Passive (no spring or magnet)
Handy ruler markings along scissors for quick measurements while you work
Colour of handle: Dependent on stock available at the time
Get your pair of Saboten Professional Pruners PT-13 today!
Saboten’s philosophy is to bring smiles to the faces of all customers engaged in gardening and farming. For more than 90 years, their craftsmanship has been devoted to suppling user friendly and the highest quality products from Miki, Japan. They keep rising to the challenge of improving pruning shear and trimming saw quality that always satisfies their customers.
The importance of ergonomics and ease of use in plant pruning scissor design cannot be overstated, especially for both professional and hobbyist gardeners who spend considerable time tending to their plants. Ergonomically designed pruning scissors reduce strain on the hands and wrists, minimizing the risk of fatigue and repetitive strain injuries during prolonged use. A well-designed handle with comfortable grips and ergonomic contours ensures a natural hand position, allowing for precision and control while pruning. Additionally, easy-to-use features such as spring-loaded mechanisms or lightweight materials further enhance usability, enabling gardeners to prune with efficiency and accuracy. By prioritizing ergonomics and ease of use in scissor design, gardeners can work comfortably for extended periods, leading to more enjoyable gardening experiences and healthier, well-maintained plants.
“Saboten” means “Cactus” in Japanese, in case you were wondering.
Japanese high quality stainless steel – durable, razor sharp heat treaded finish
Fluorine coating reduces resin and sap build up
Bonsai style ergonomic handle
Blade type: Slim, straight blade
Blade cutting length: 35 mm
Overall scissor length: 160 mm
Pruner type: Angled/L-shaped (handle and blade are at an angle from each other)
Cushioning: Passive (no spring or magnet)
Handy ruler markings along scissors for quick measurements while you work
Colour of handle: Dependent on stock available at the time
Get your pair of Saboten Professional Pruners PT-2 today!
Saboten’s philosophy is to bring smiles to the faces of all customers engaged in gardening and farming. For more than 90 years, their craftsmanship has been devoted to suppling user friendly and the highest quality products from Miki, Japan. They keep rising to the challenge of improving pruning shear and trimming saw quality that always satisfies their customers.
The importance of ergonomics and ease of use in plant pruning scissor design cannot be overstated, especially for both professional and hobbyist gardeners who spend considerable time tending to their plants. Ergonomically designed pruning scissors reduce strain on the hands and wrists, minimizing the risk of fatigue and repetitive strain injuries during prolonged use. A well-designed handle with comfortable grips and ergonomic contours ensures a natural hand position, allowing for precision and control while pruning. Additionally, easy-to-use features such as spring-loaded mechanisms or lightweight materials further enhance usability, enabling gardeners to prune with efficiency and accuracy. By prioritizing ergonomics and ease of use in scissor design, gardeners can work comfortably for extended periods, leading to more enjoyable gardening experiences and healthier, well-maintained plants.
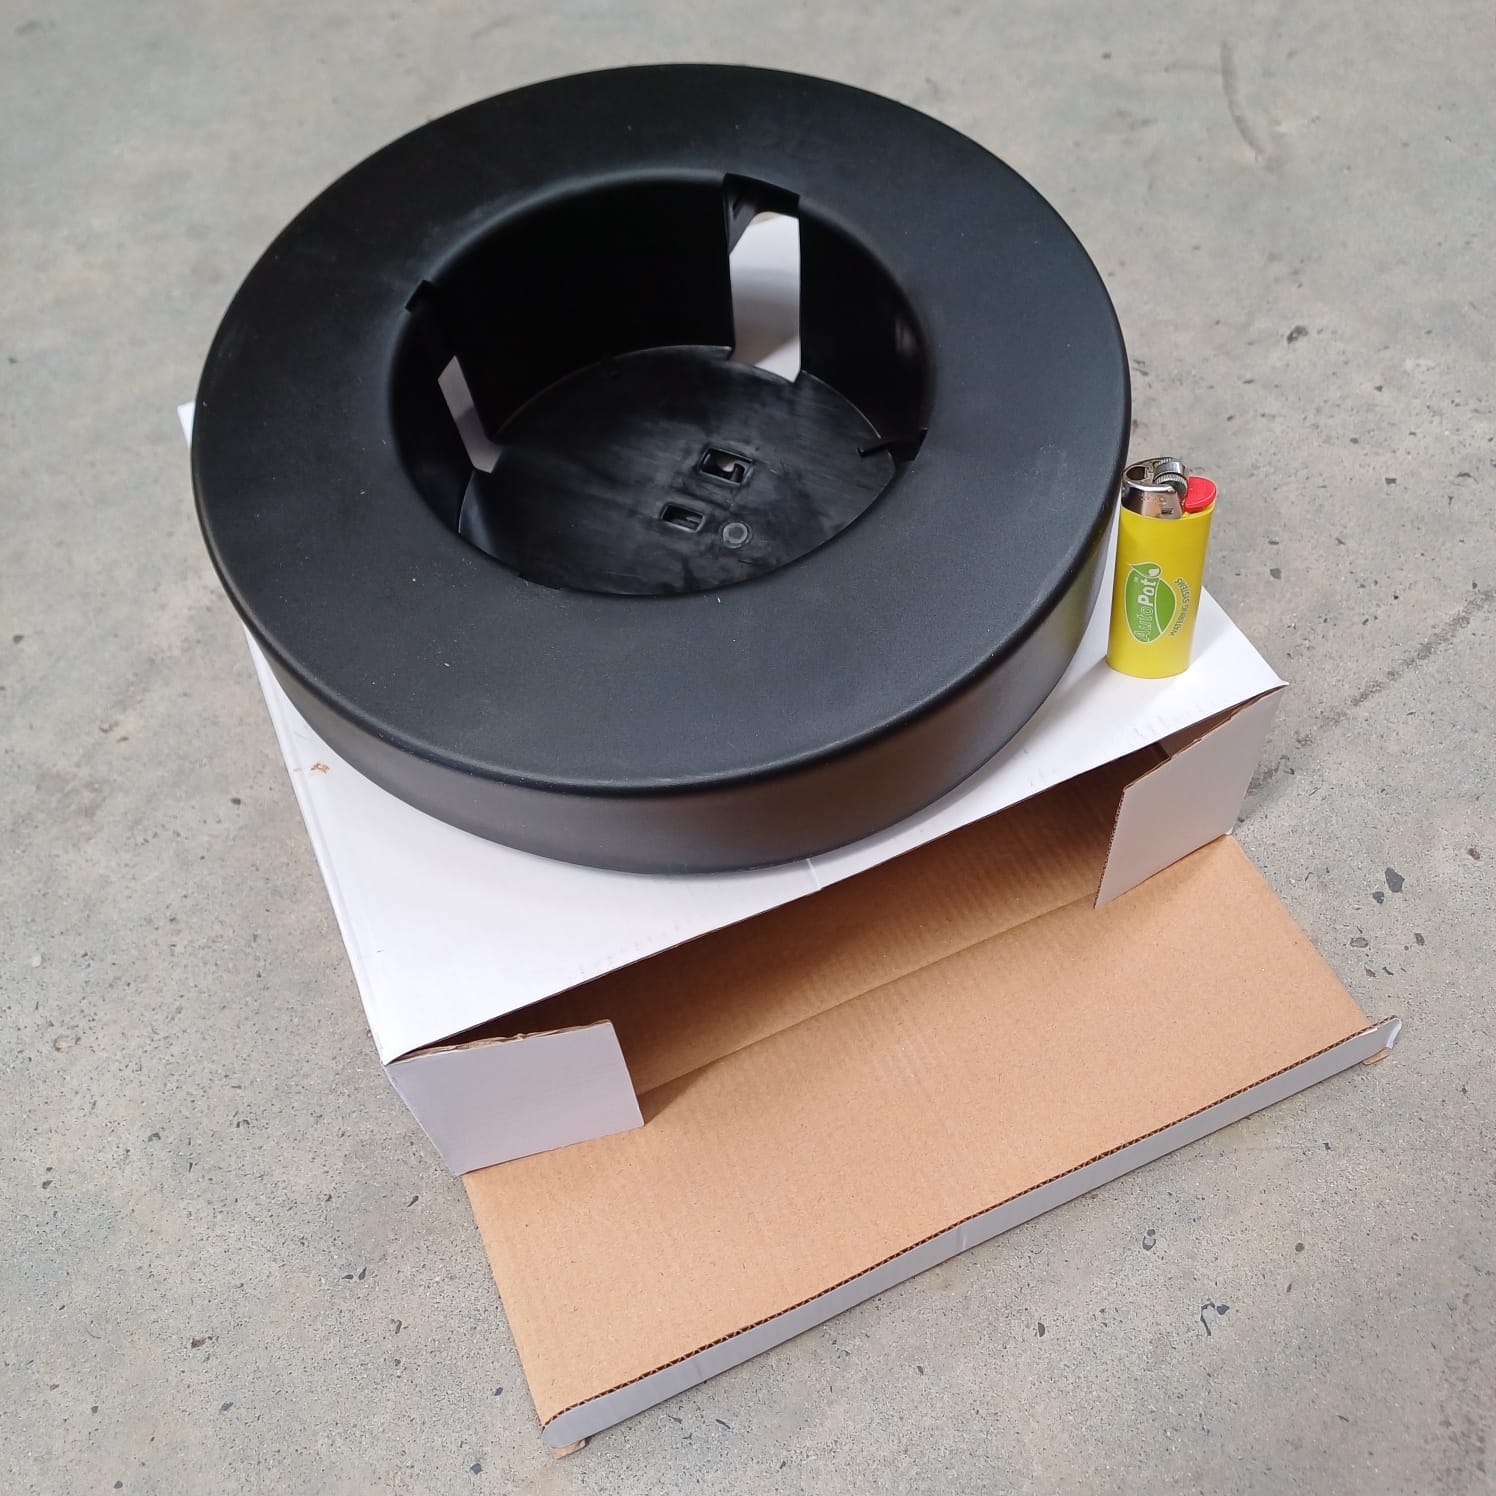
A MistMaker 12 Float allows a Mistmaker 12‘s mist head to float freely around a water filled container at the idea depth below the water’s surface. As the water is atomized by the ultrasonic ceramic disks housed inside the mist head, the water level in the container will recede over time. This can happen quite quickly, with the capacity of the MistMaker 12 Ultrasonic Humidifier being 6.5lt /per hour.
The float allows the mist head to recede as the water recedes, always being at the right level beneath the water’s surface. This is obviously a vast improvement over having a static mist head, where a lower water level can quickly cause the MistMaker to cut out. (A built-in safety feature of these units).
The Mistmaker 12 mist head’s dimensions are: 150mm diameter, 55mm height (incl. water level sensor) and this float is made to accommodate it at the optimal level beneath the water.
The diameter of the float is 28cm and its full height is 7.5cm.
********************
The MistMaker 12 Ultrasonic Humidifier is a great tool to use to increase humidity in an enclosed space. The MistMaker can also be used for foliar feeding or aeroponic root feeding, as plant leaves and roots are able to absorb the minute water particles very easily.
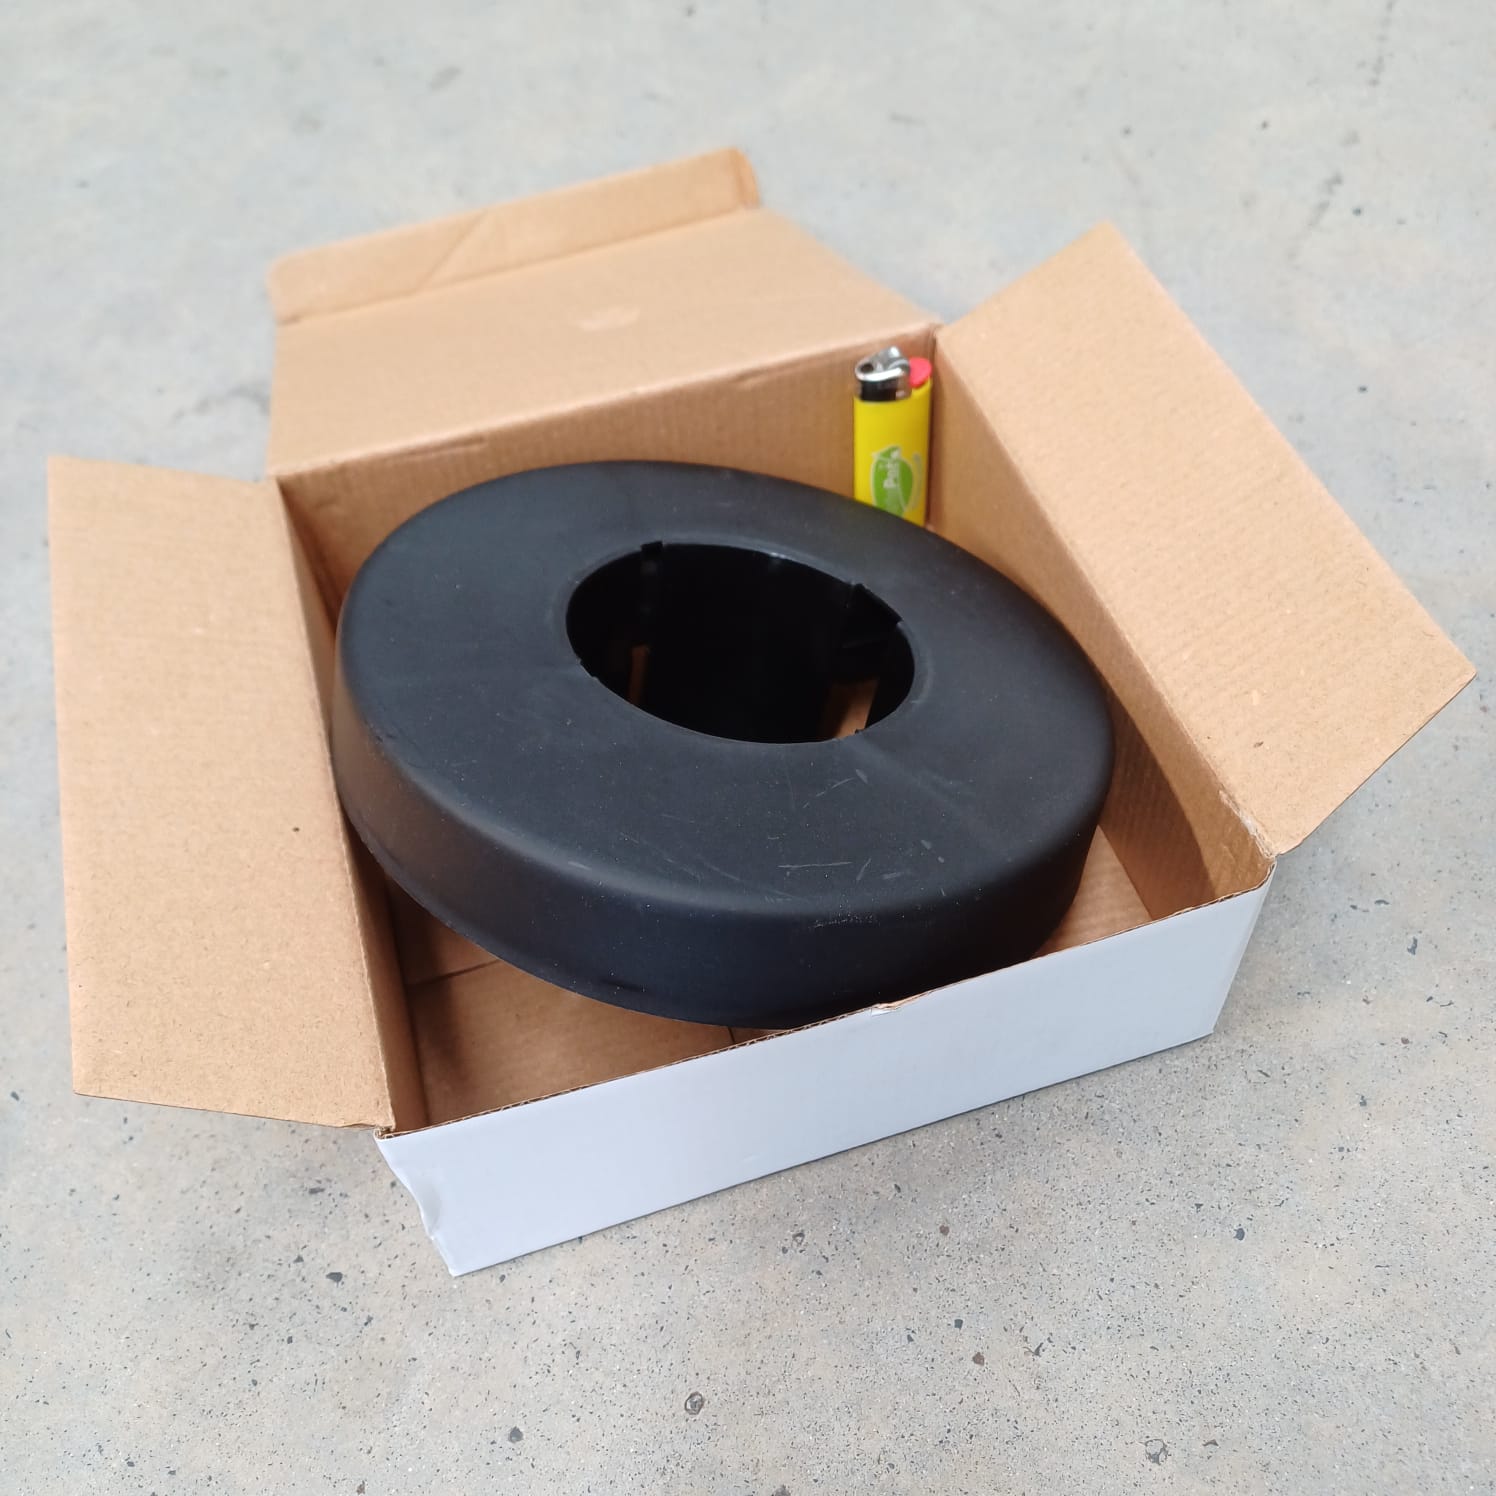
A MistMaker 5 Float allows a Mistmaker 5‘s mist head to float freely around a water filled container at the idea depth below the water’s surface. As the water is atomized by the ultrasonic ceramic disks housed inside the mist head, the water level in the container will recede over time. This can happen quite quickly, with the capacity of the MistMaker 5 Ultrasonic Humidifier being 1.6lt /per hour.
The float allows the mist head to recede as the water recedes, always being at the right level beneath the water’s surface. This is obviously a vast improvement over having a static mist head, where a lower water level can quickly cause the MistMaker to cut out. (A built-in safety feature of these units).
The Mistmaker 5 mist head’s dimensions are: 85mm diameter, 55mm height (incl. water level sensor) and this float is made to accommodate it at the optimal level beneath the water.
The diameter of the float is 20cm and its full height is 7.5cm.
********************
The MistMaker 5 Ultrasonic Humidifier is a great tool to use to increase humidity in an enclosed space. The MistMaker can also be used for foliar feeding or aeroponic root feeding, as plant leaves and roots are able to absorb the minute water particles very easily.
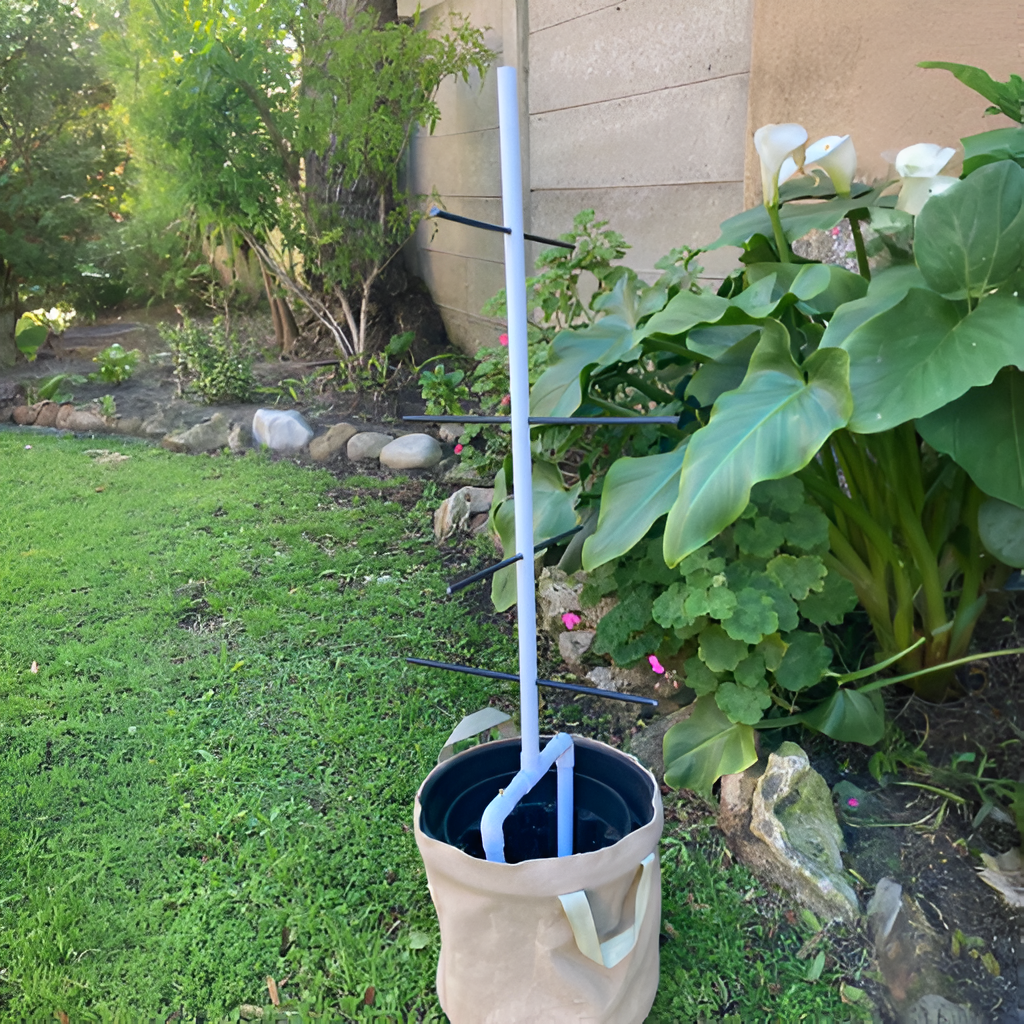
Pot Scrog Pot Stake – Making it easier to trim, train, and secure your favorite plants, the Pot Stake takes up less space than a Pot SCROG Scrog Frame and can be installed next to an established plant quickly.
The horizontal bar that will rest on the surface of your potting medium is 22cm long, with 4 screw-heads that can be used to tie down branches during low stress training using a roll of Twist Tie, for example. The 2 vertical prongs that will provide stability to the Pot Stake are 21cm long, while the height of the stake from the horizontal bar is 74cm. The stake has 4 horizontal supports spaced along its height, providing ample anchoring or training support for your plant.
Use Green Stretchy Tape for softer stems, to not damage the plant tissue while tying down.
This stake is ideal for holding up maturing Cannabis stalks, especially in windy environments, as well for growing small Chili varieties , Beans, Peas and other vines or creepers.
* Pot not included – for illustration purposes only
Ah, the drama of mature plant stalks – they’re like the divas of the garden, always threatening to make a grand entrance by dramatically falling over. It’s as if they’ve been rehearsing a Shakespearean tragedy and decided, “To lean or not to lean, that is the question.” Picture your plants swaying like elegant ballerinas, but when they get tired, instead of a graceful curtsy, they opt for a dramatic collapse. Enter the plant stakes – the unsung heroes of the garden. These stakes are like the backstage crew, working tirelessly to ensure that your plants stay on their feet and avoid a horticultural catastrophe. So, here’s to the mature plant stalks and their penchant for theatrics, and here’s to the sturdy stakes that keep the garden stage upright, saving us from a Shakespearean tragedy in the veggie patch!
Basil Culinary Blend – Why plant one type of basil when you can plant them ALL? This mixed pack includes Genovese, Corsican, Lemon and Cinnamon Basil. Because variety is the spice of life. (Sorry, we can’t help ourselves). Basil and tomatoes go together like mac ‘n cheese. (Just way better for you). Genovese works especially well in pestos, and fish dishes will benefit from a touch of this fragrant herb. Curious about the Cinnamon variety? It tastes like Christmas. If Christmas were basil.
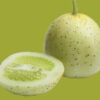
Cucumber Crystal Apple – We were going to start with a cucumber joke, but we’re not that kind of brand. Instead, we’ll tell you how this unusual variety got its name. It was once dubbed “Apple Cucumber,” due to its size and shape, whilst others called it “Crystal Lemon” for its pale yellow colour. The names were mushed together and the plant is now known as the Crystal Apple Cucumber. (Creative stuff, eh?). When mature, the Crystal Apple’s pale, greenish-white skin resembles a Granny Smith apple. To appreciate the smooth, creamy fruits, enjoy them while they’re young. In addition to being the butt of the joke we’ll never tell you, they make a bright, scrumptious addition to salads.
Kale Dinosaur – The Italians call it Cavolo Nero, and yes, that sounds like the name of an eccentric millionaire who wears suits on yachts. Imagine our disappointment when we found out that it actually means “black cabbage.” In an effort to never be misled by the musical beauty of their language again, we’re firmly calling it Dinosaur Kale and brainstorming T-Rex jokes like the heathens we are. Take that, Italy. A hearty cooking green, this variety offers up more than 100% of your daily vitamin A and K requirements, which is particularly impressive if you had no idea that there was such a thing as vitamin K. Use it to make caldo verde, which is Portuguese for “green soup” (seriously, English is the most boring language) and slurp on it whilst watching Jurassic Park.
Kale Vates Blue Curled – When something hails from Scotland, you know it’s going to be hardy, tough to pronounce and happiest in cool weather. This variety of kale has finely curled blue-green leaves and grows low to the ground. Use a “cut-and-come-again” approach for best results, and trim the inner leaves as they mature. If you haven’t heard of the kale revolution, your favourite food is probably hotdogs and you still listen to Dubstep. Just joking. (Or are we?). Kale can be baked like potato chips, cooked in traditional dishes, blended in smoothies, added to salads… it’s super nutritious and quite possibly the trendiest leaf on the planet right now.
Lettuce Gourmet Salad Blend – A tasty, colourful mix of five loose leaf varieties. They range from shades of green to red, with textures from oak leaf to tightly ruffled. Sow this exciting mix every week to ten days for a constant supply of fresh salad leaves throughout the season. Goodbye, soggy packets of store-bought fridge lettuce. Fast-growing, tender, and selected for a long harvest, our Gourmet Salad Blend is best when picked minutes before your meal. You can practically taste the sunshine on your plate.
Micro Greens Old Mexico – Tacos, tequila and and this blend of micro greens are just a few of the (admittedly stereotypical) things we love about Mexico. It consists of coriander, red beets, cabbage, radish and pepper cress, which would probably all taste surprisingly good in a taco. How did we only think of that now… Micro greens look great on a plate and add a flavour kick, which is why they’re primarily used in fine dining restaurants – but you don’t have to be a fancy chef to grow them. Hey, we just gave you that amazing taco idea.
Micro Greens Oriental Mix – Like any great eighties mixtape, this combination includes some spicy covers (rocket, red mustard) and smooth originals (coriander, Asian cabbage). Throw in some names you’ve never heard of (Mizuna, Hon Tsai Tai) and you’ve got a soundtrack for the perfect salad. Man, we love mixtapes. And metaphors about microgreens. Good on roasted root veg? Definitely. Tasty atop an Asian stir fry? Obviously. Delicious sprinkled over a meat dish? Why, of cou- (We can go all day, but have only a few lines left, so we’ve decided to let you harvest the young shoots of this delicate blend and discover for yourself that they work with ANY dish).
Micro Greens Rainbow Blend – Some say that size isn’t everything (that’s a debate for another day) but when it comes to this blend of micro greens, we agree with them. This colourful flavour combo of beetroot, Asian cabbage, kohlrabi, Italian broccoli and radish is easy to grow and super tasty. Sow every 5-10 days and snip with scissors when 2-4cm high. Harvest the smallest, most delicate shoots of this blend and sprinkle liberally on summer salads, roasted root veggies and just about any meat dish. Their explosive flavour will win over any lettuce-hater. (Also, why are you friends with lettuce-haters?)
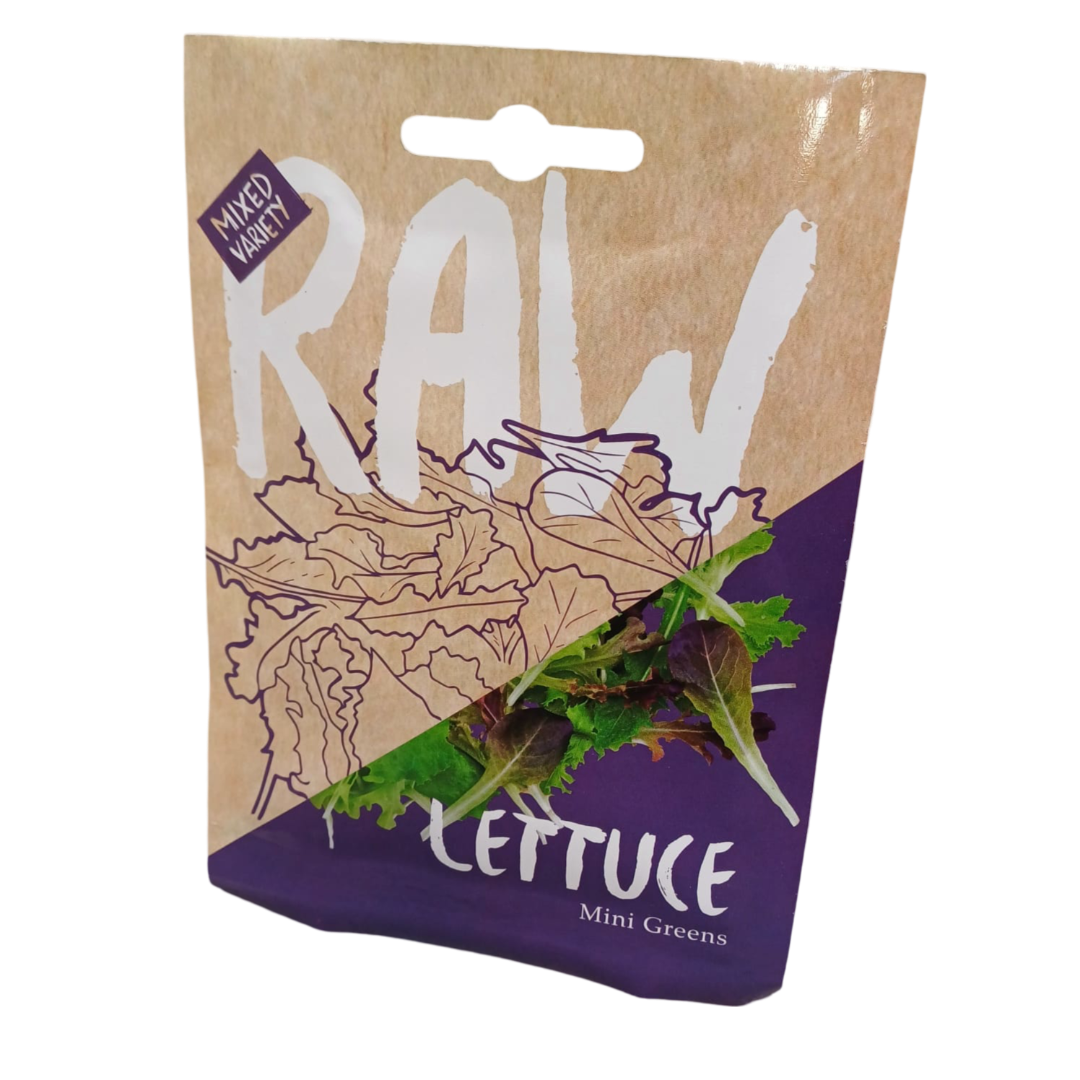
Lettuce Mini Greens – No, they’re not sprouts, and they’re not baby greens either. They are a complete veggie in miniature form – a colourful mixture of red and green lettuce varieties that just happen to be adorably small. Unlike the teacup pig you bought from that totally legit guy on the side of the road, they will not “grow up” to be any bigger than they are at 15 days.
Pepper Chilli Ghost Chilli / Bhut Jolokia (BEYOND HOT) – The Bhut Jolokia is better known as the “ghost chilli” or “ghost pepper”, and was once considered the hottest chilli in the world. It cracks a whopping 1 million units on the Scoville Scale of hotness (which has nothing to do with its looks, and everything to do with how it can burn your lips off). Cut rather than pull the ripe fruit, and stake big plants to one meter. This fiery pepper originated in the land of all things spicy: Northern India. Its orange / red lantern-shaped fruits have a hint of citrus flavour, but we doubt you’ll taste that for very long once you’ve bitten into one. Ideal for pot growing, this variety produces an abundance of pods with breathtakingly intense heat.
Pepper Chilli Habanero Mixed Colours – Ready to set your garden on fire? No, not like that, put the blowtorch down, we didn’t mean that… This selection of spicy Habaneros comes in a unique range of colours and are great for growing in large pots. The lantern-shaped fruits ripen to mature colours of chocolate, mustard, orange, peach, red, white and yellow. Habanero chillies have a deliciously pungent, smoky quality. The official heat scale for chillies is known as the Scoville Scale (developed by Wilbur Scoville in 1912) and Habaneros score at a terrifying 200,000 to 300,000. In the words of Paris Hilton, “that’s hot.”
Pepper Sweet Mini Belle Blend – Every garden needs at least one adorable veggie. The dwarf, compact plants of the Sweet Pepper Mini Belle produce a huge crop of small, block-shaped peppers. They come in red, orange and chocolate colours, and are almost too cute to eat. Almost. This variety is sweet with few seeds, so they produce very little waste. They are thinner-skinned than larger peppers and their texture withstands grilling and cooking well. Essentially they’re perfect in every way.
Pepper Sweet Pepperone Corno di Torro Rosso – The name of this Italian heirloom translates to “horn of the bull”, which makes it sound like a fiery beast of a pepper that might just kill you. However, its name is actually a tribute to the pepper’s full, tapered shape. (Phew). It does have a subtle heat, of course – which gently increases as the pepper matures – but this variety ripens to a bright red fruit with a sweet, crisp flavour. The Corno di Toro (we could say that all day) has a thick flesh that is encased in a thin skin. It’s delicious raw, fried, stuffed or just grilled on the braai. We can basically hear you nodding in approval.
Tomato Artisan Bumble Bee Mix – In the world of tomatoes, we just know the Bumble Bee Mix is strutting its stuff in Prada. Each one is a striped sensation, outside and in, comprising pink, purple, and sunrise Bumble Bee tomatoes – it’s a blend that’s as unique as it is stylish. Just like fashion icons, these cherry tomatoes are big on production, ensuring a bountiful yield throughout the season. These juicy delights are not just for show; they’re big on flavour, perfect for snacking right off the vine or adding a touch of chic to your salsa, and when mixed together, they create a stunning salad ensemble, reminiscent of a high-quality fashion collection.
Tomato Black Krim – This delicious heirloom tomato originates from Crimea, and if you don’t know where that is, join the club. The dark brownish-red tomatoes look almost rotten, but have a wonderful smoky-sweet taste that is totally unique to the variety. They’re hardy and heat tolerant, but help them out a little and stake for support. We might not know anything about Crimea, but we do know a thing or two about eating these beefsteak tomatoes. Heirloom tomatoes are bred for flavour, and simple preparation allows the intense taste of Black Krim to shine.
Tomato Green Zebra – Oh Mother Nature, you clever thing. This beauty has exquisite emerald skin, dark green vertical stripes and gently flavourful flesh. It’s a rich tomato with a sweet, sharp bite and requires staking for support. For best flavour, keep Green Zebras at room temperature. The acidity of green tomatoes works well in different dishes, but they’re most famous for being fried. (If you haven’t watched the movie, now you have an excuse to.)
Tomato Heirloom Rainbow Mix – Give a man tomatoes, feed him for a day. Give him the seeds to grow them, and he’ll frolic in a rainbow-colored field of this tasty heirloom variety forever. This mix includes purple, green, red, pink, yellow, black, orange and a white variety, all of which were originally grown by Thomas Jefferson, the USA statesman and experimental farmer. Follow his lead and stake them for support. This beefsteak mix has been described as “super cool” (by us) and its flavors range from mild, to sweet, to tangy. Heirloom tomatoes are fragile and bruise easily, so they should be used immediately upon ripening. Challenge accepted.
Tomato Principe Borghese – Tomayto, tomahto… nope, definitely tomahto. Sorry America. This plum-shaped variety is an Italian heirloom, and its meaty fruits are best when sundried. Plant marigold lemon drop nearby to prevent nematode infection of the soil, and stake plants for support. (How smart did we sound there?). In dry areas, hang up branches of these tomatoes until leathery – then store in olive oil till needed. We could tell you about how great they are when roasted and tossed into salads, or how the rich flavour does something wonderful to sauces… but we’ll let you find that out for yourself.
Tomato Rainbow Cherry Mix – This is our special magical mix of cherry tomatoes: red, yellow, orange, pink, white, green, brown, bi-colour. Juicy, sweet and colourful! Impress family and friends with this and make meals and snacks more fun. This mix of small tomatoes will add interest and taste to a whole host of tomato dishes. The fruits have a delicious flavour and a high level of sweetness. Stake plants for support.
Tomato San Marzano – Legend has it that the first seed of the San Marzano Tomato came to Campania in 1770, as a gift from the Kingdom of Peru to the Kingdom of Naples. Hey, we would’ve preferred a chest of gold… but now we all get to grow this classic Italian plum tomato, so that’s also pretty cool. Thanks, Peru. San Marzano is considered by many chefs to be the best in the world. We tend to agree with those chefs. Its skin is an intense red and it peels off easily, which is always a plus. Very little has to be done to these tomatoes to make them taste awesome. That always gets our vote.
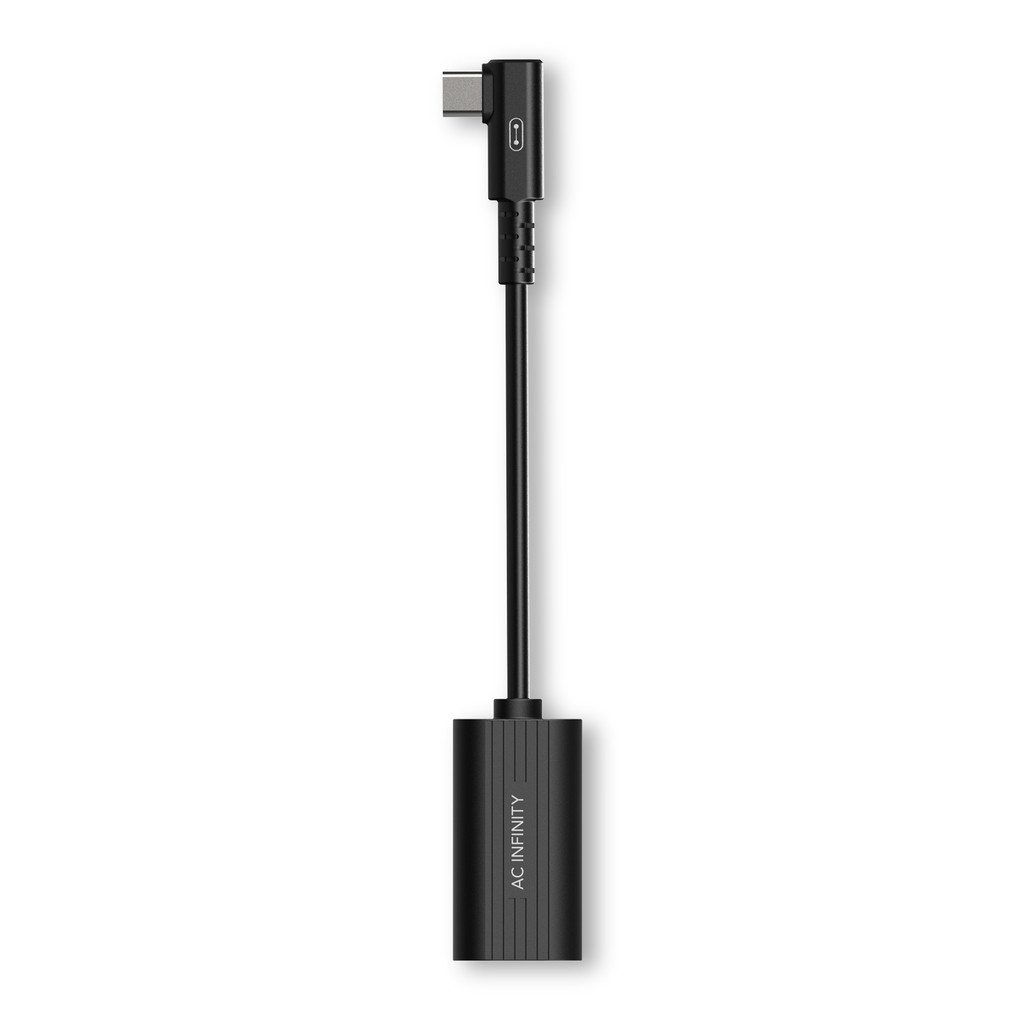
AC Infinity UIS 2-in-1 Splitter, daisy chain adaptor dongle
A splitter dongle that expands control to multiple AC Infinity devices using a single UIS port.
Links same-type UIS devices together via splitters in a sequential daisy chaining arrangement.
Compatible with programming digital controllers including CONTROLLER 69 PRO and CONTROLLER 69.
Connects many grow devices like EC motor fans and LED grow lights in grow room and greenhouse settings.
Gives multiple UIS devices access to smart controls like triggers, timers, grow cycles, and schedules.
AC Infinity UIS 2-in-1 Splitter PRODUCT DESCRIPTION
A 2-in-1 splitter dongle designed to sequentially connect multiple same-type grow devices to our UIS controllers. Daisy-chain growing equipment like inline fans, grow lights, humidifiers, and more through a single port to set synchronized smart programming and expand your grow operation. Its compact build is engineered with premium cables to ensure a firm connection with UIS ports and connectors. Compatible with AC Infinity controllers like CONTROLLER 69 and CONTROLLER 69 PRO.
APPLICATIONS
This dongle is used to daisy chain multiple same-type smart devices together in a sequence to a single UIS controller port. Designed for use with male-to-male cords included with UIS devices and available for purchase individually. Compatibility includes future UIS devices, as well as the following:
We use cookies to ensure that we give you the best experience on our website. If you continue to use this site we will assume that you are happy with it. Privacy policy