ROOTiT Seedling Trays

ROOTiT Seedling Trays Both - New 60 Cell

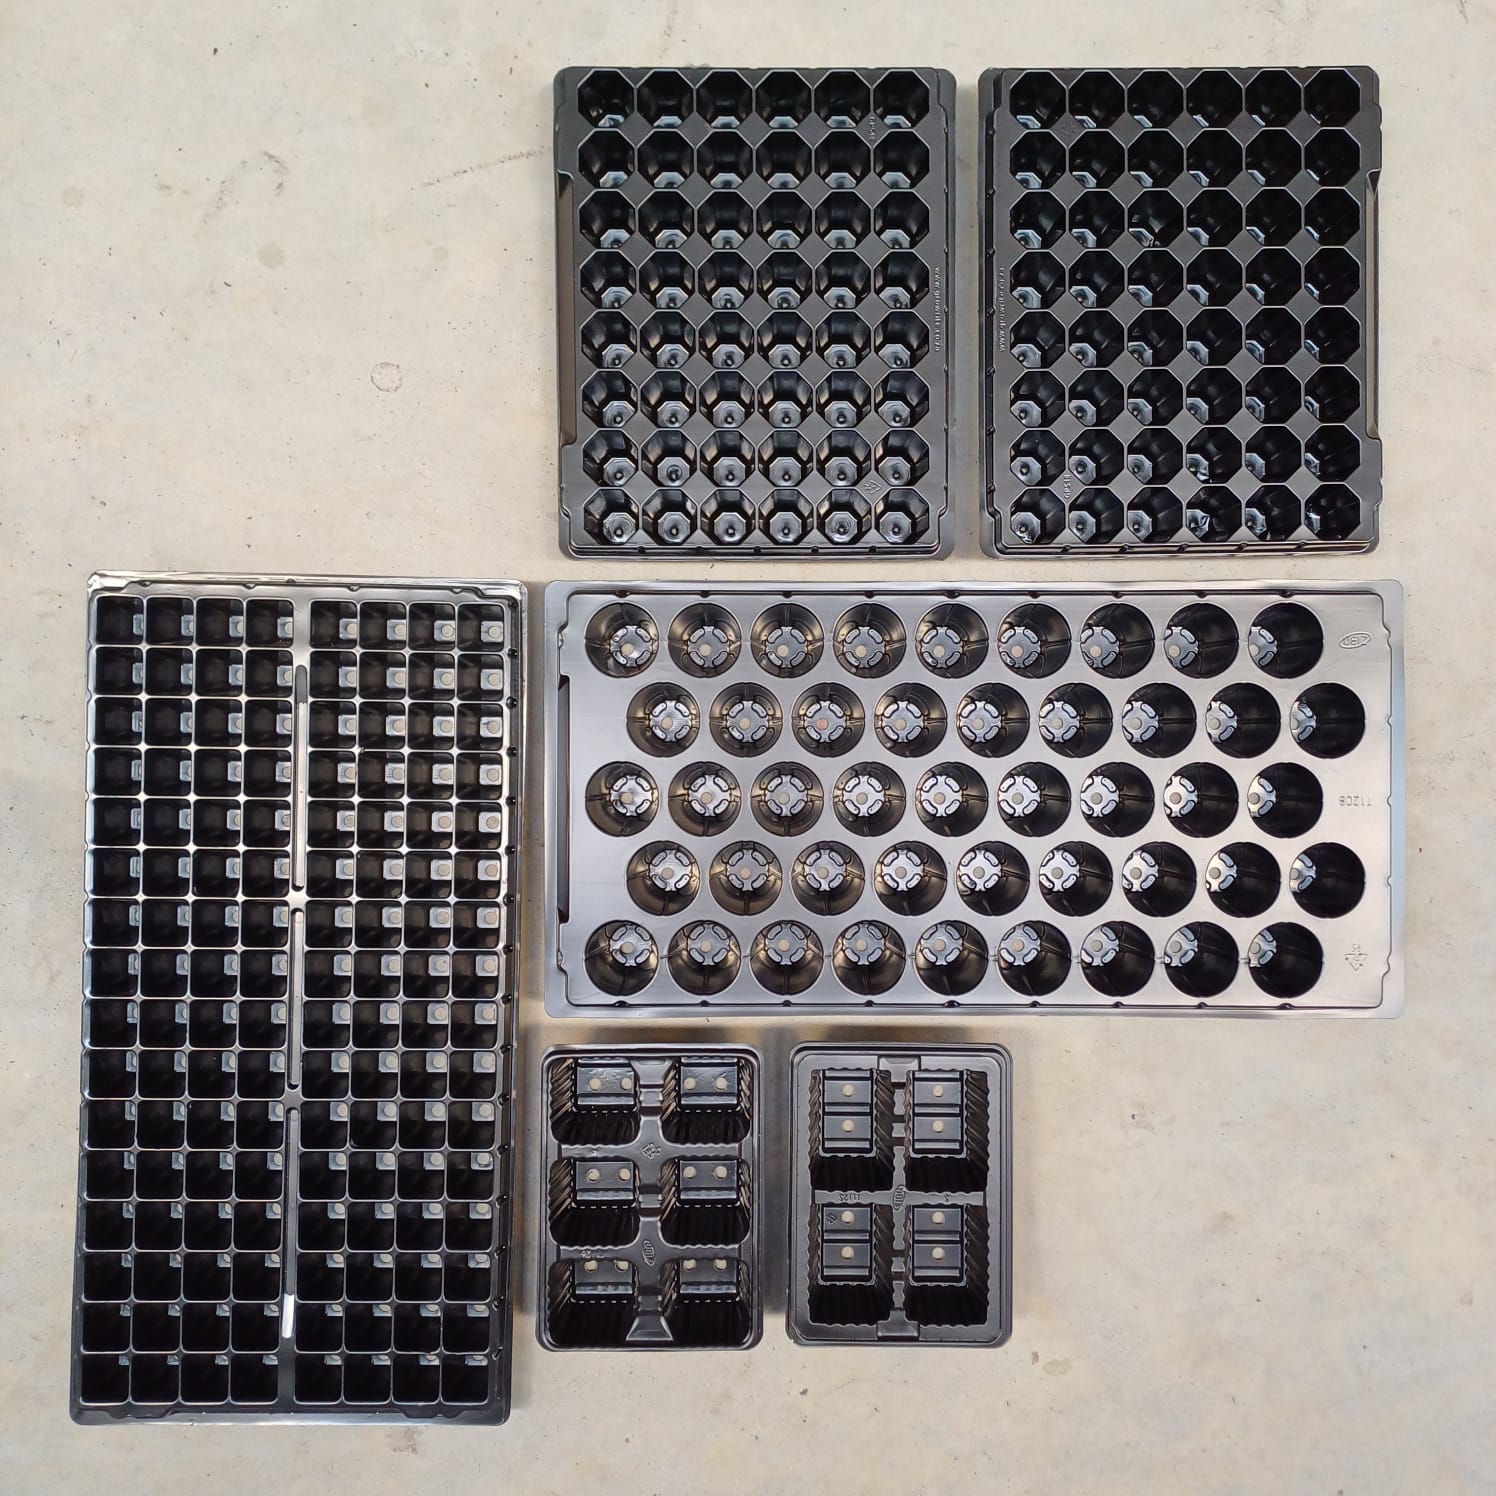
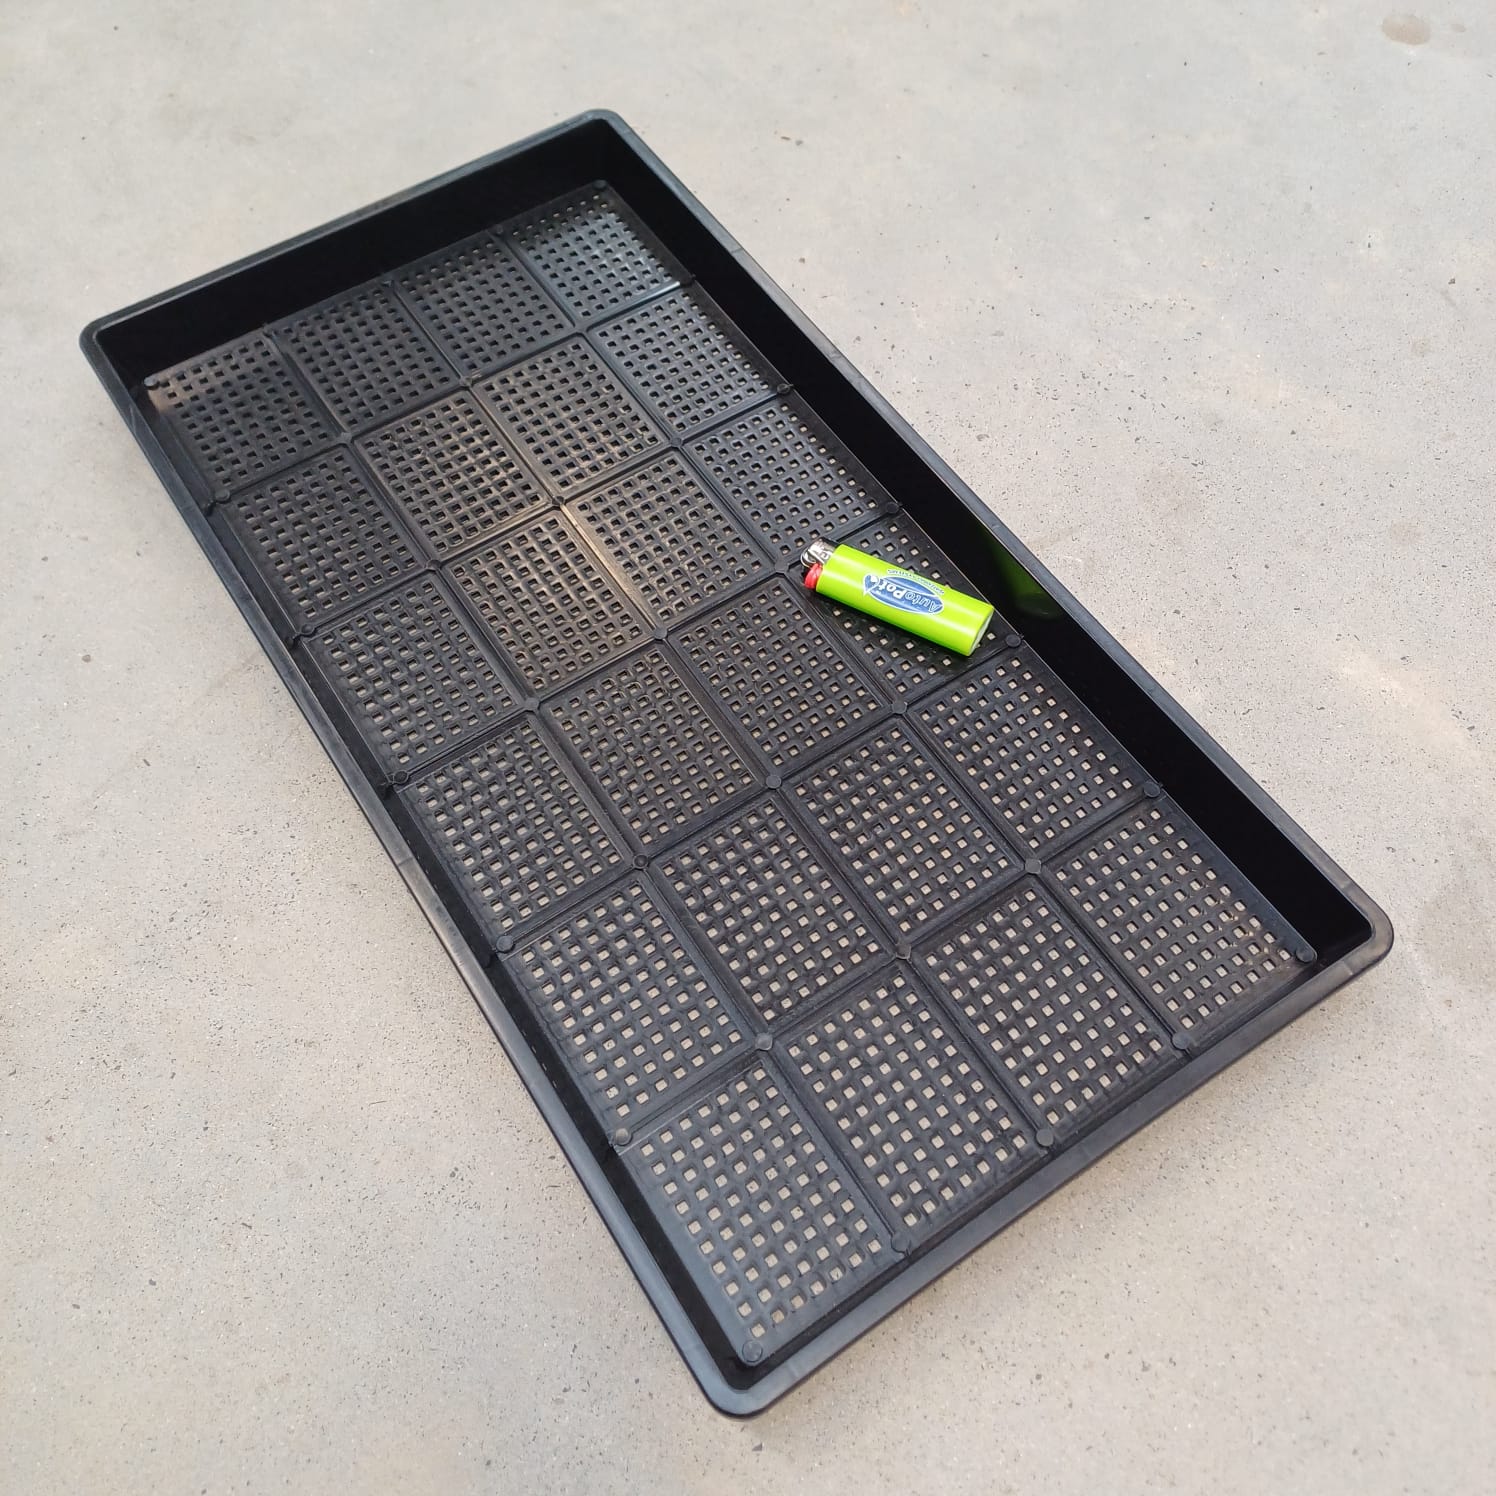
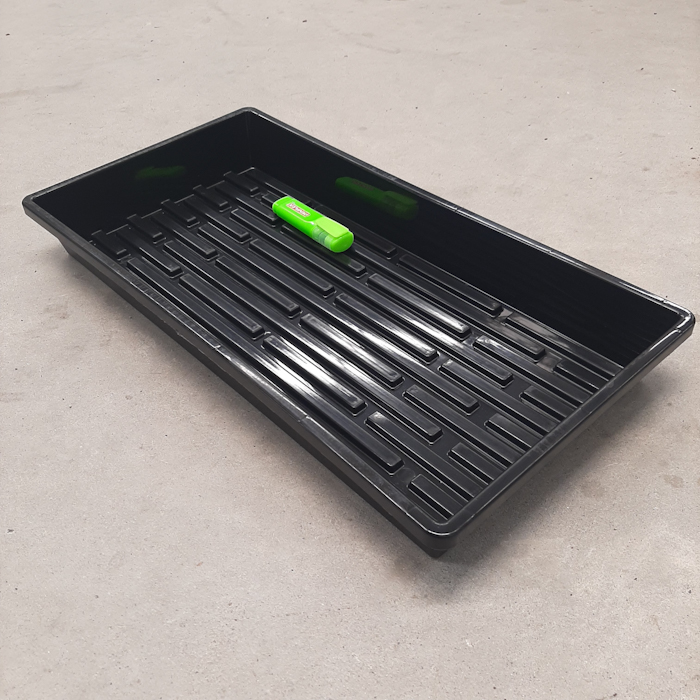
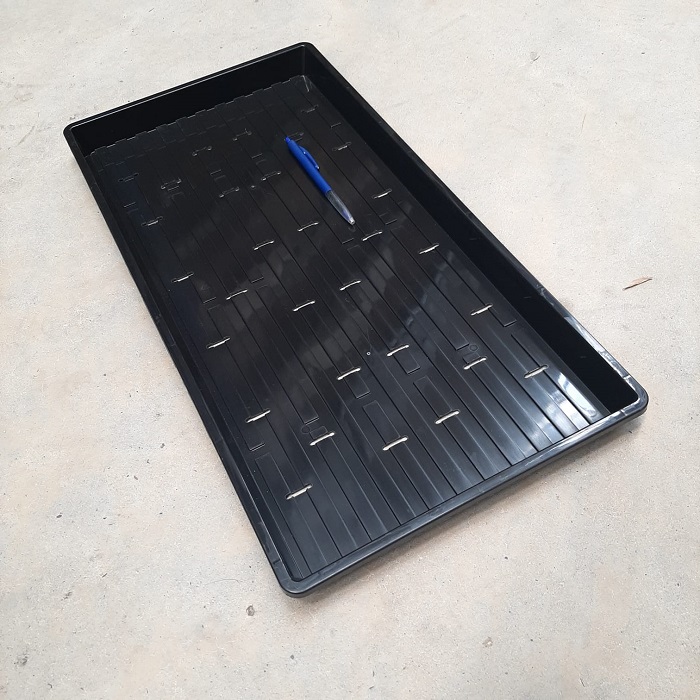
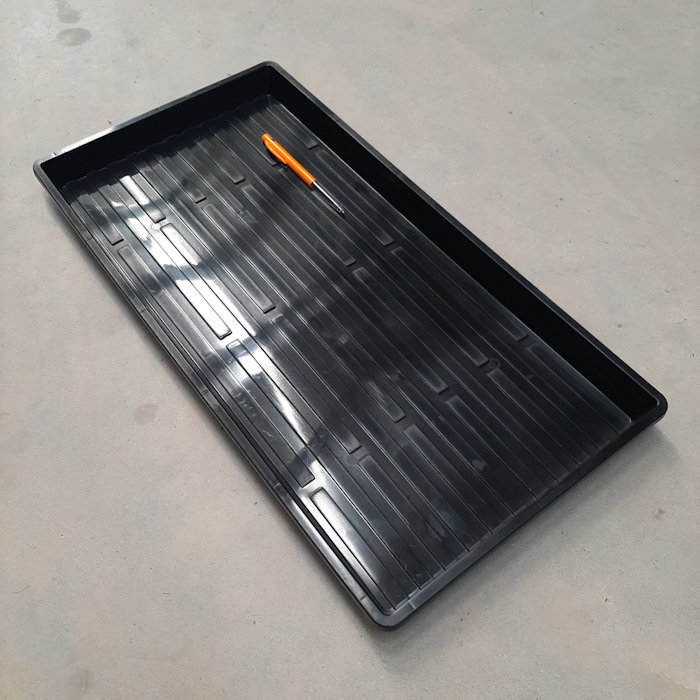
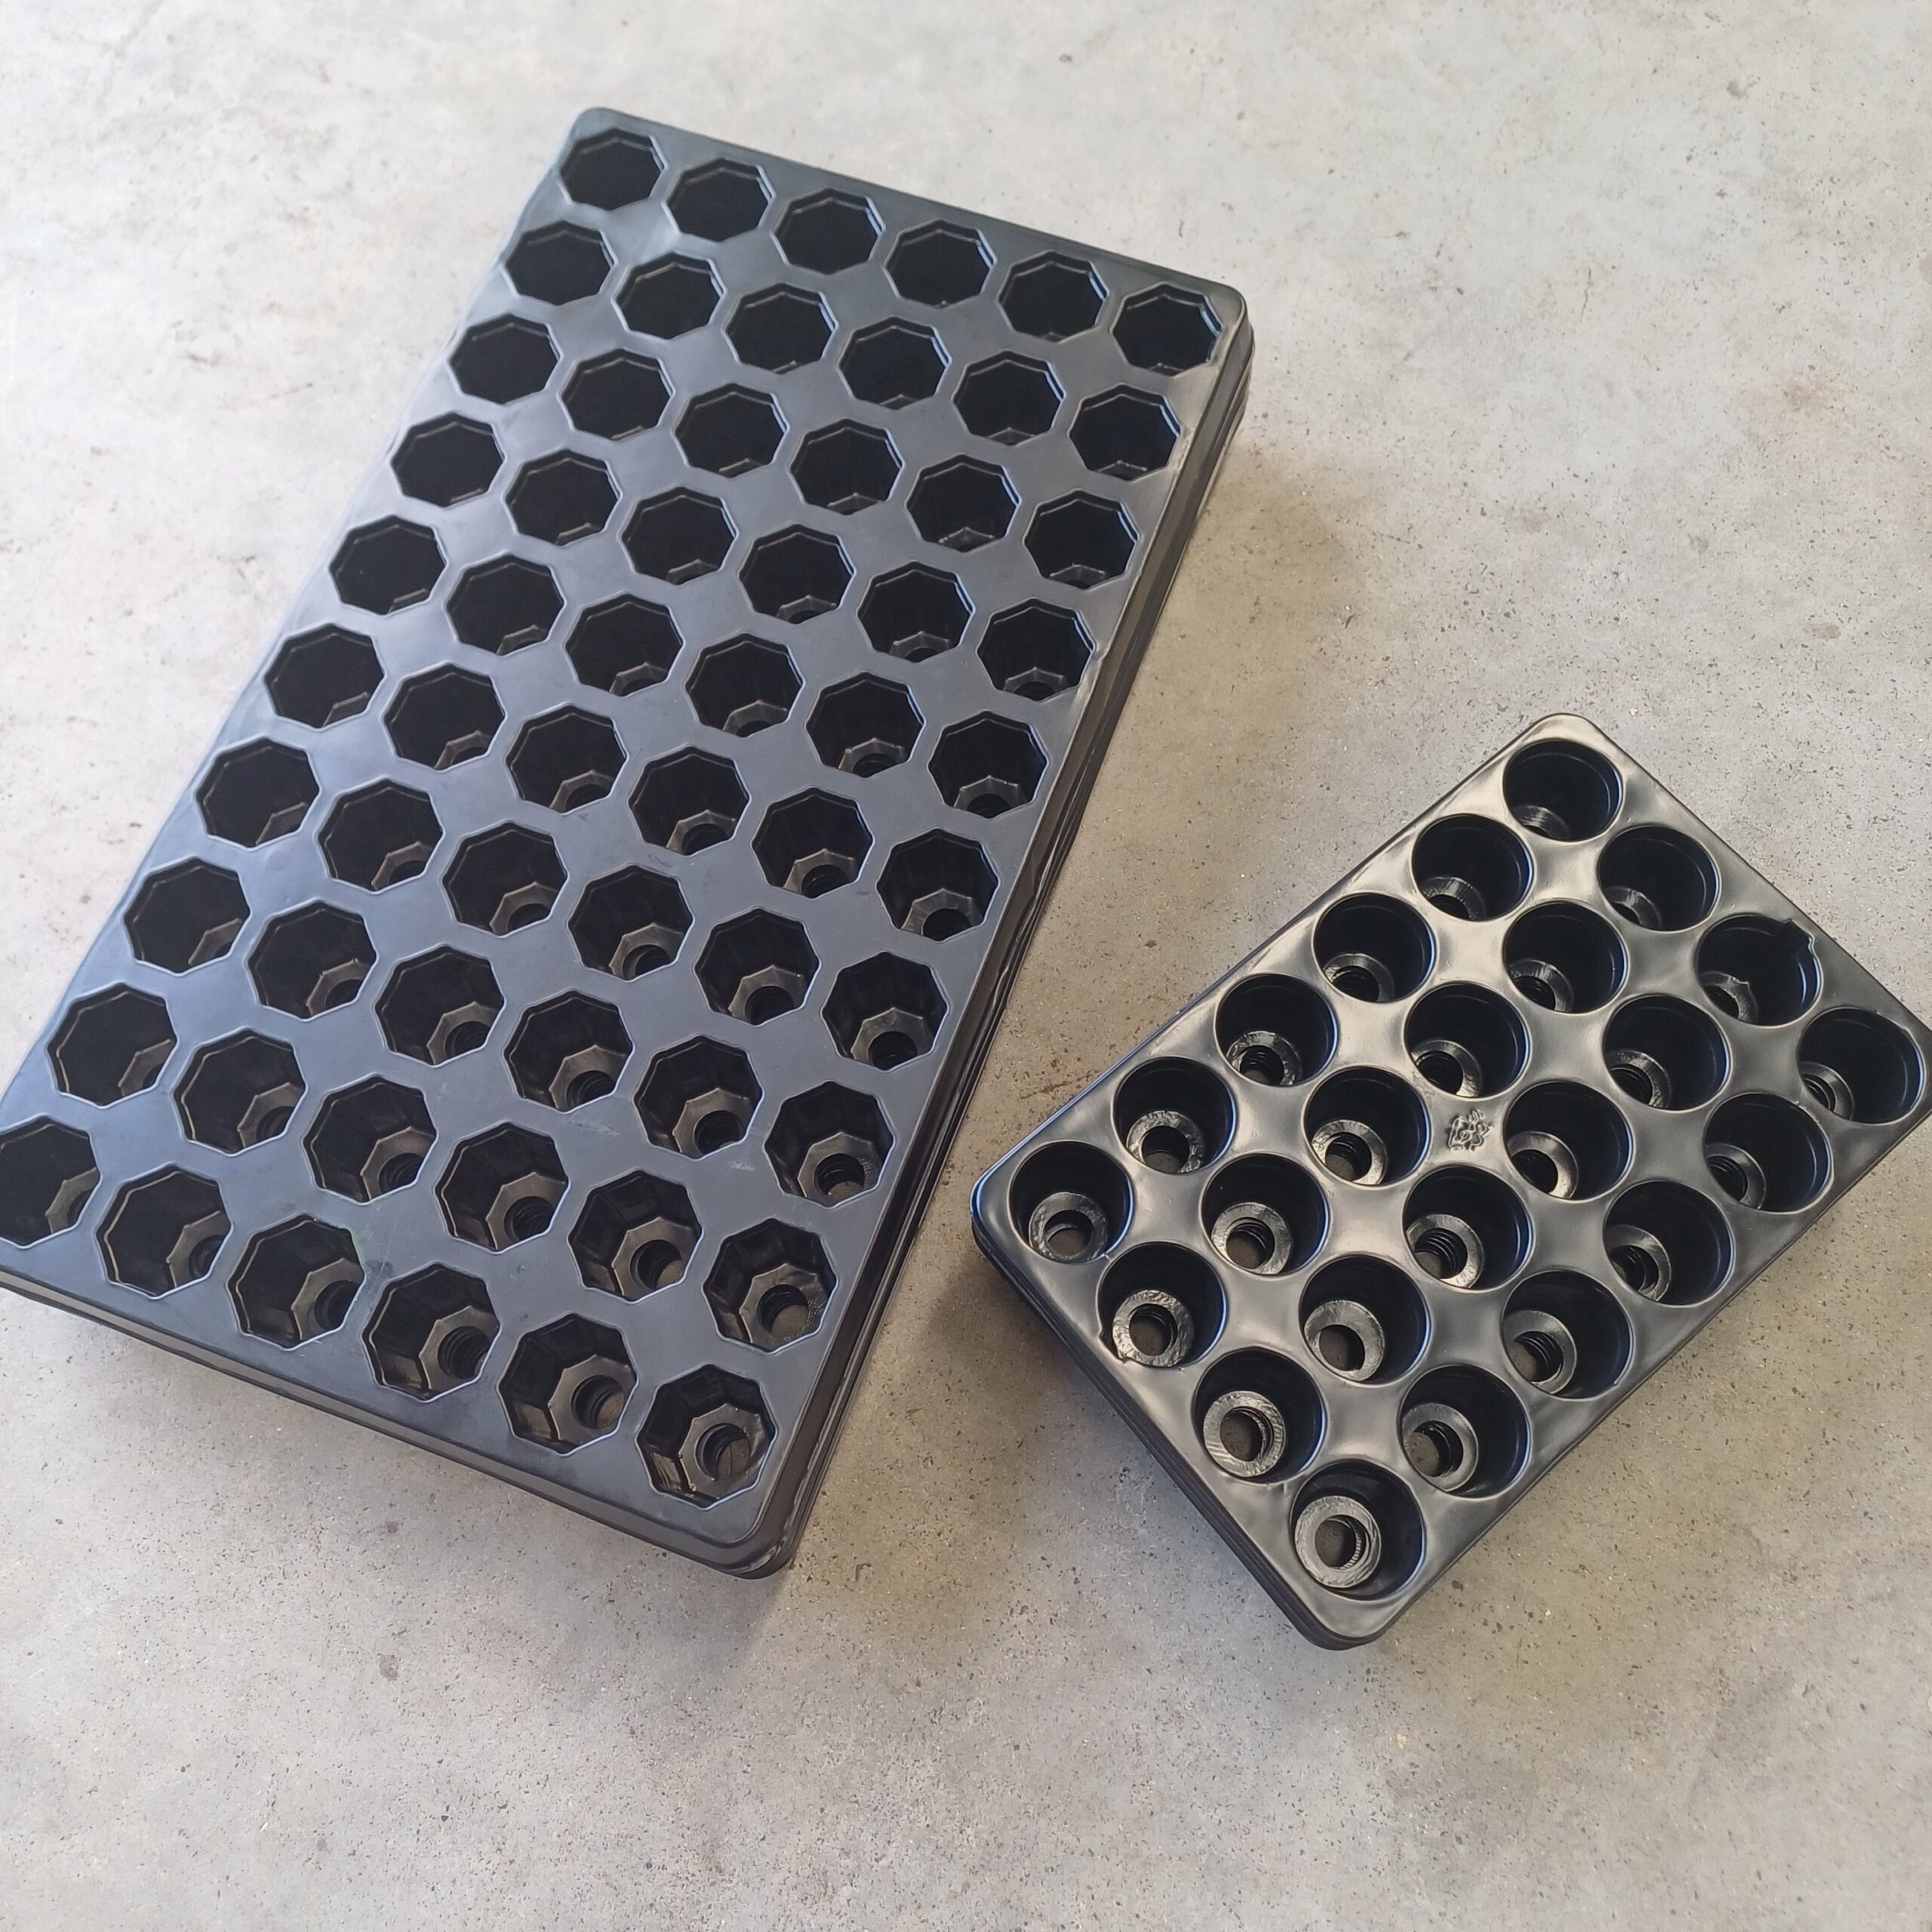
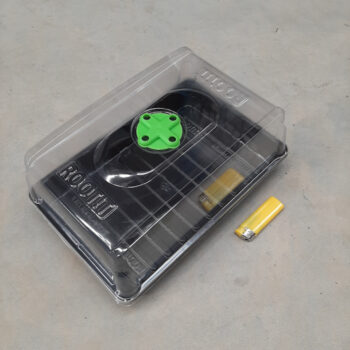
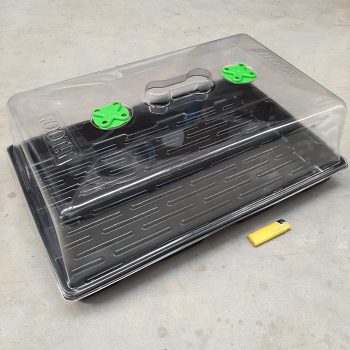
ROOTiT Seedling Trays are now available and are made to fit into the 2 sizes of ROOTiT Propagators that are available on our website.

ROOTiT Seedling trays are suitable for plant propagation, seed germination, plant cuttings, etc.

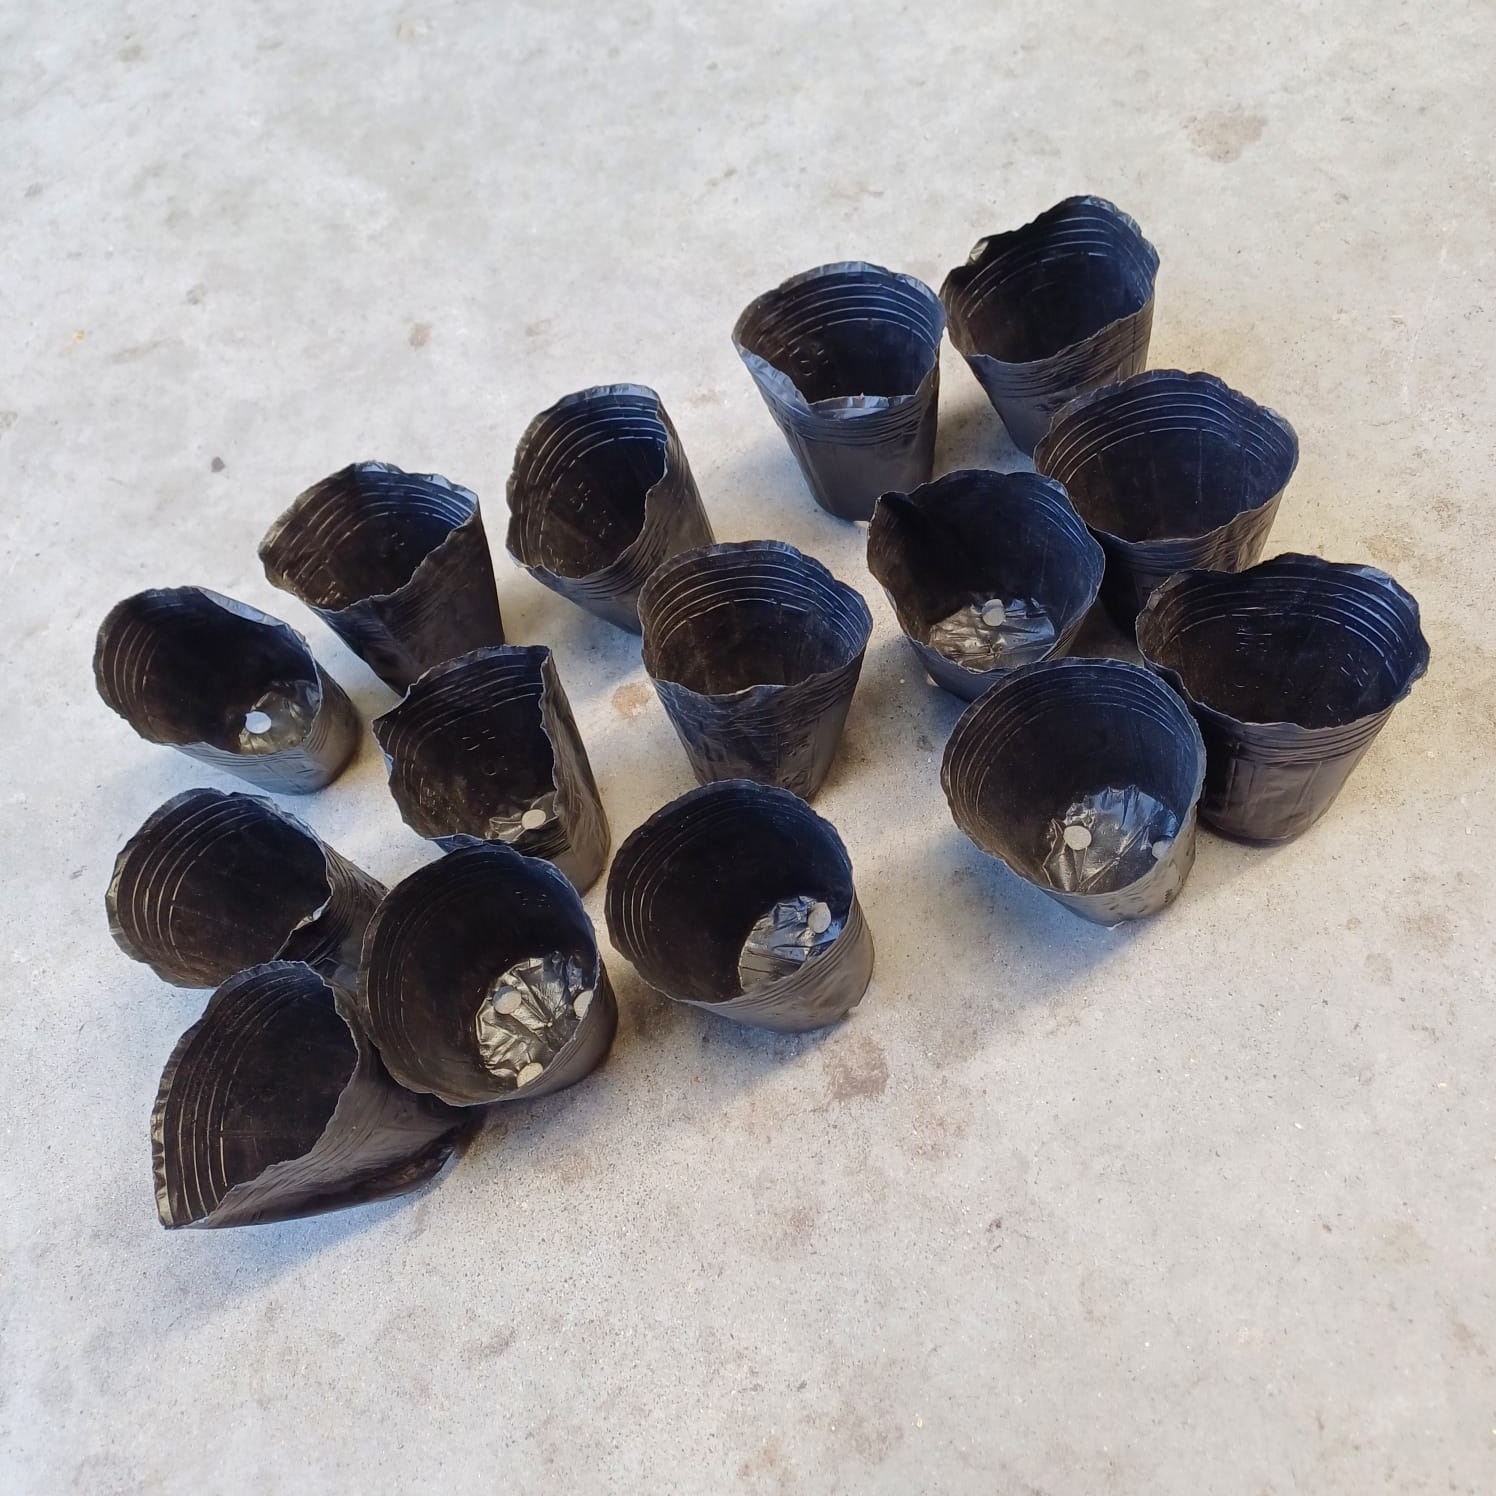
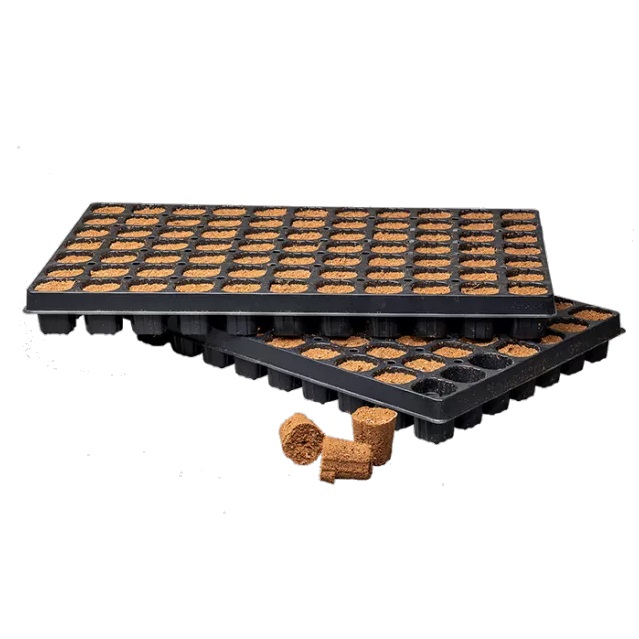
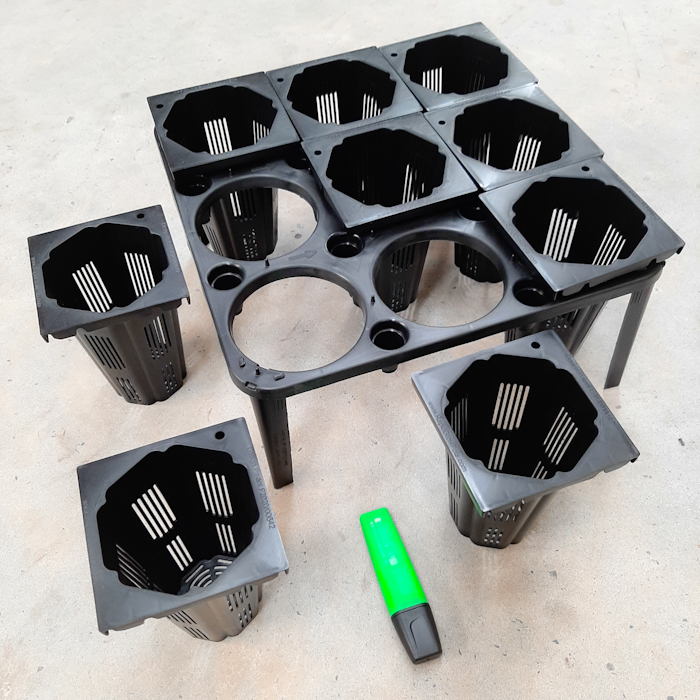
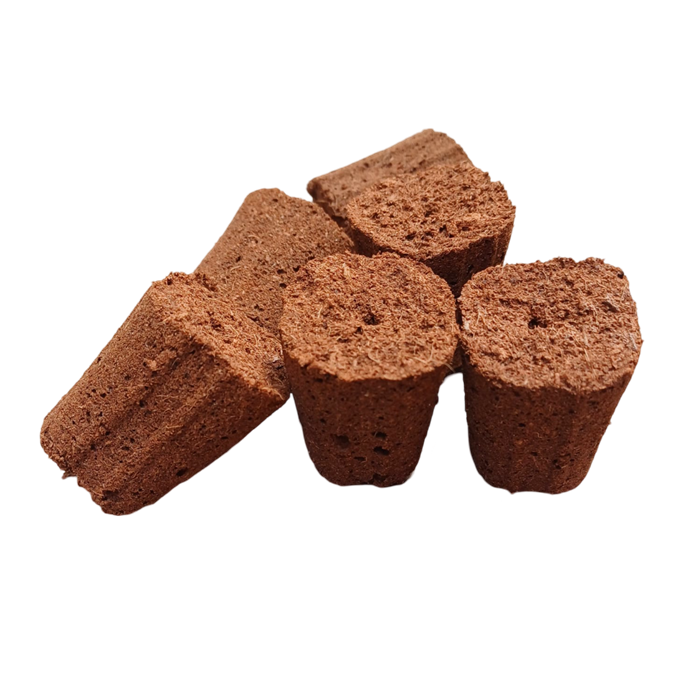
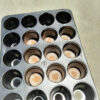
The trays have cells (42mm diameter on the top lip, reducing in size towards the bottoms of the cells) that will hold most pre-formed propagation media, e.g. Rock Wool plugs or Jiffy Preforma (“Glue)” plugs.

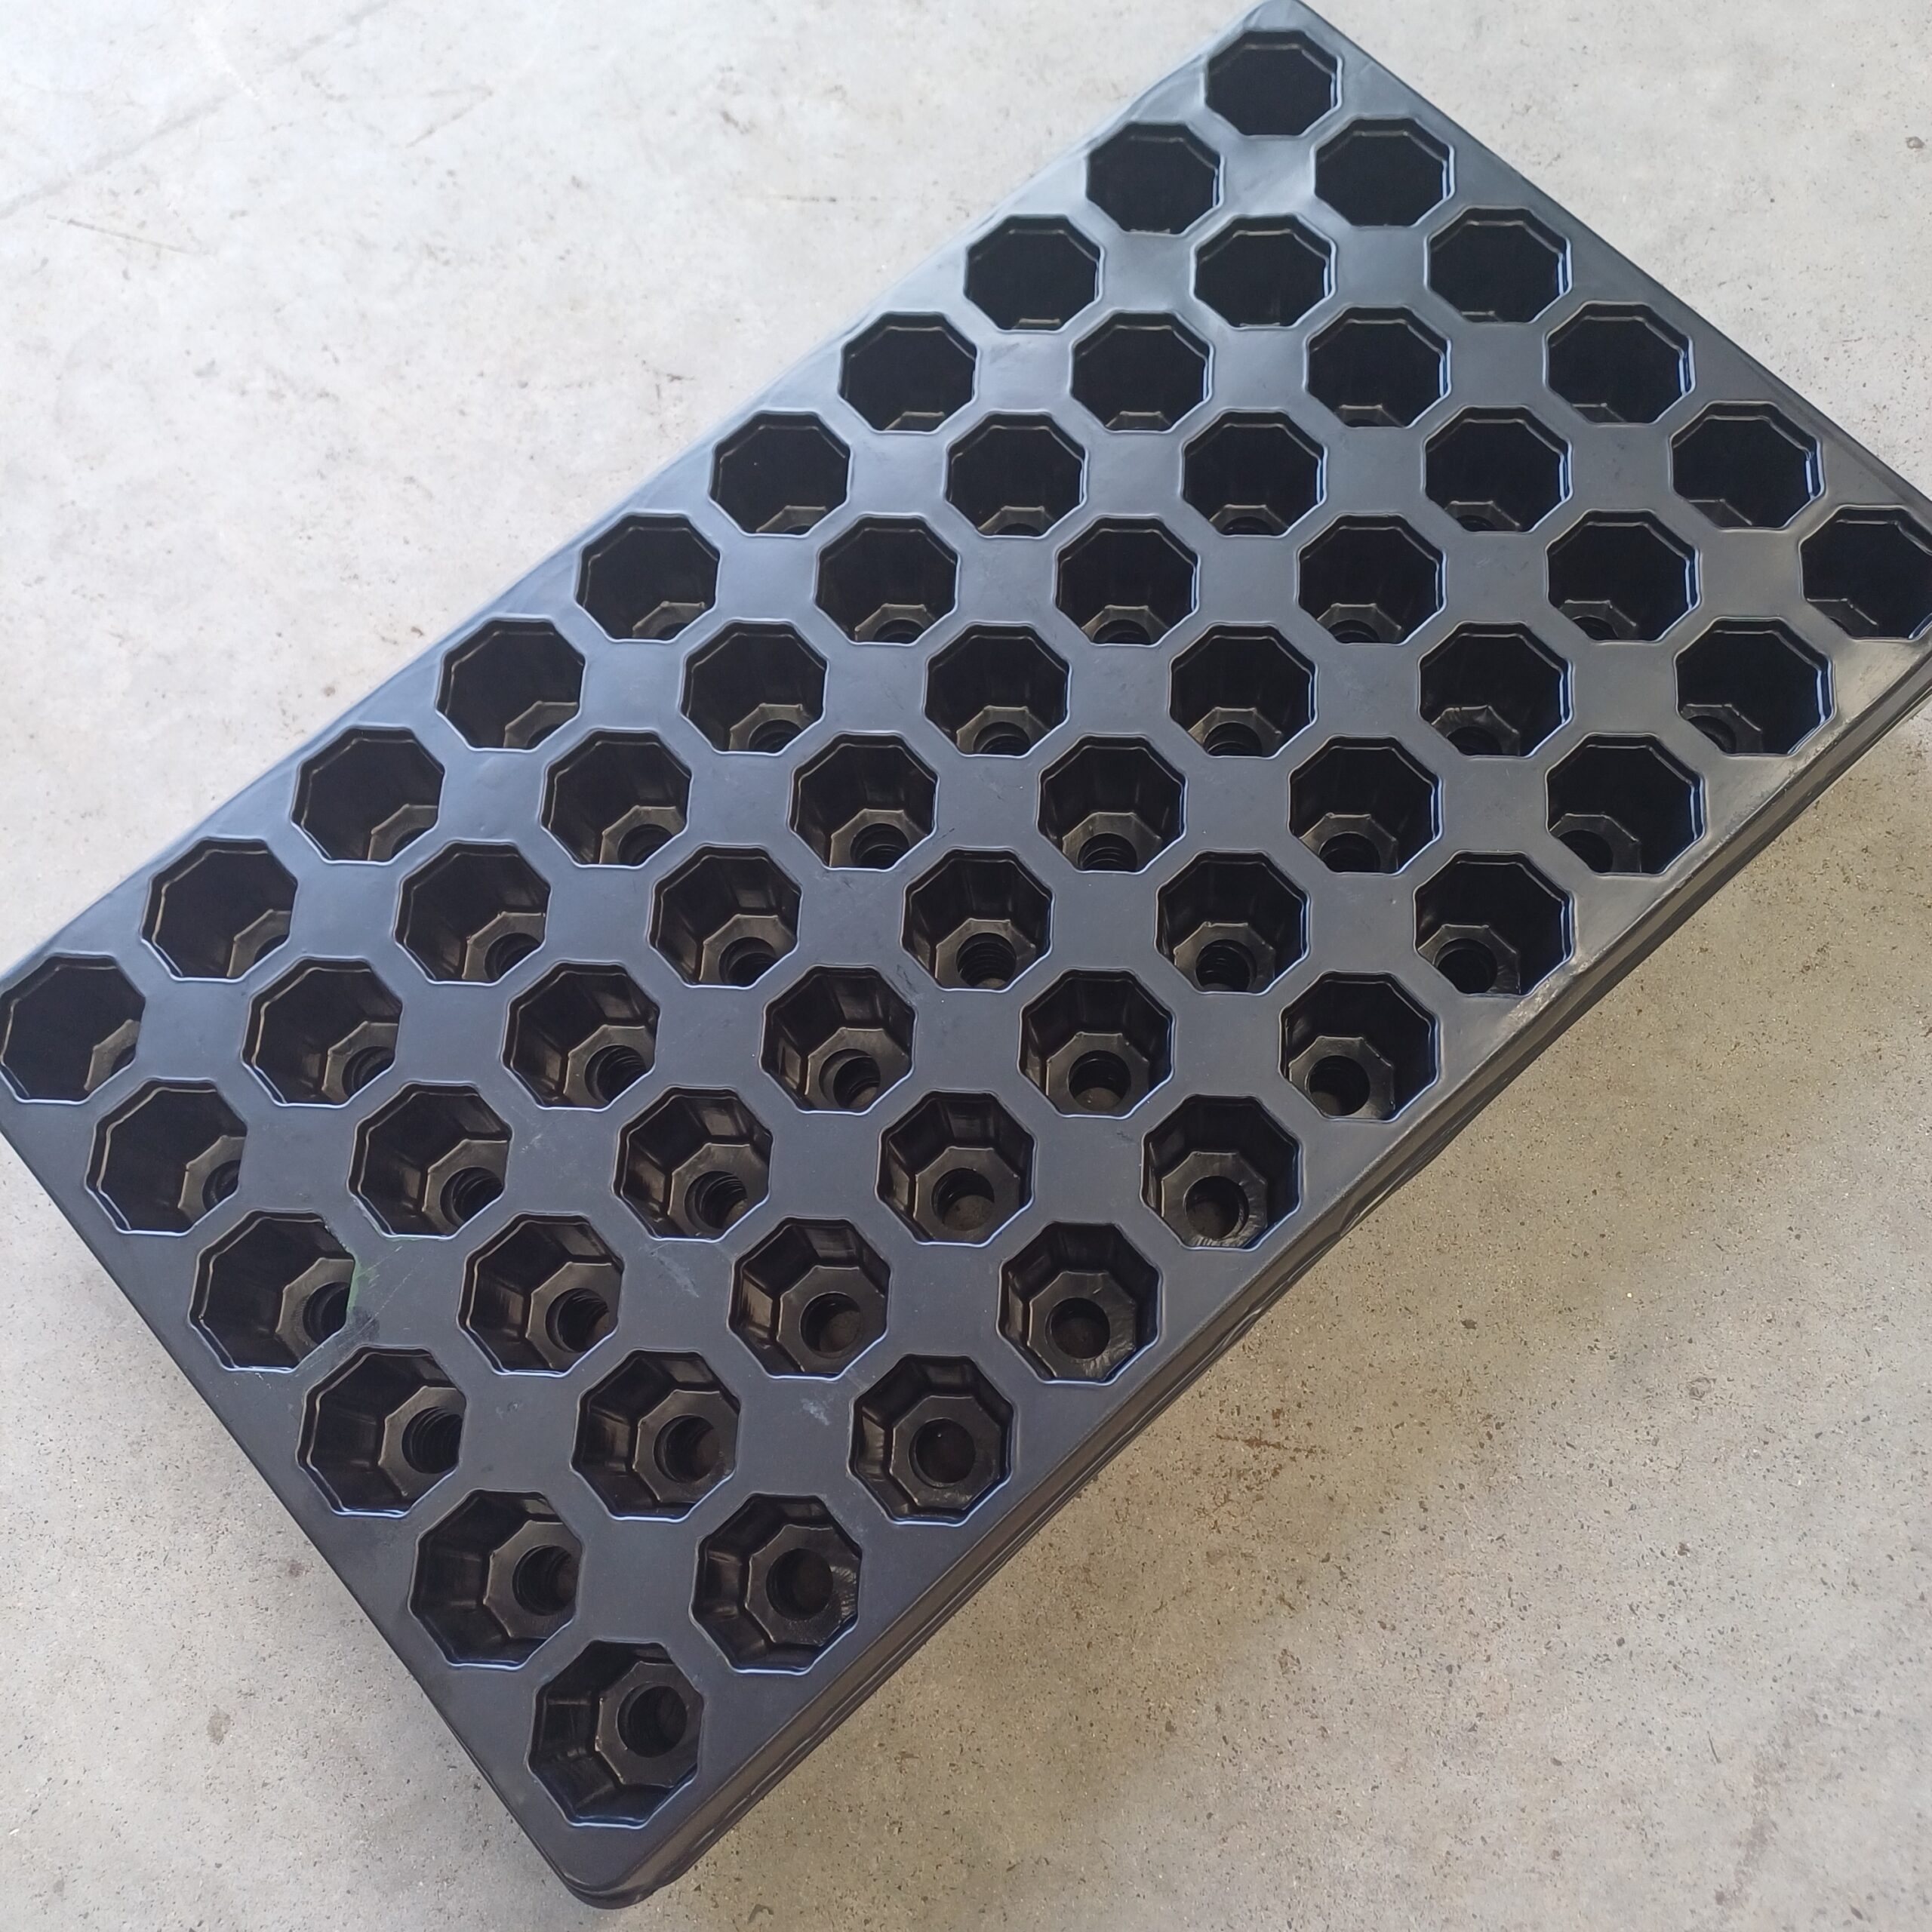
PLEASE NOTE: The new 60 Cell Tray design has octagonal sides, but is still the same sized cavity…

New 60 Cell ROOTiT Seedling Tray

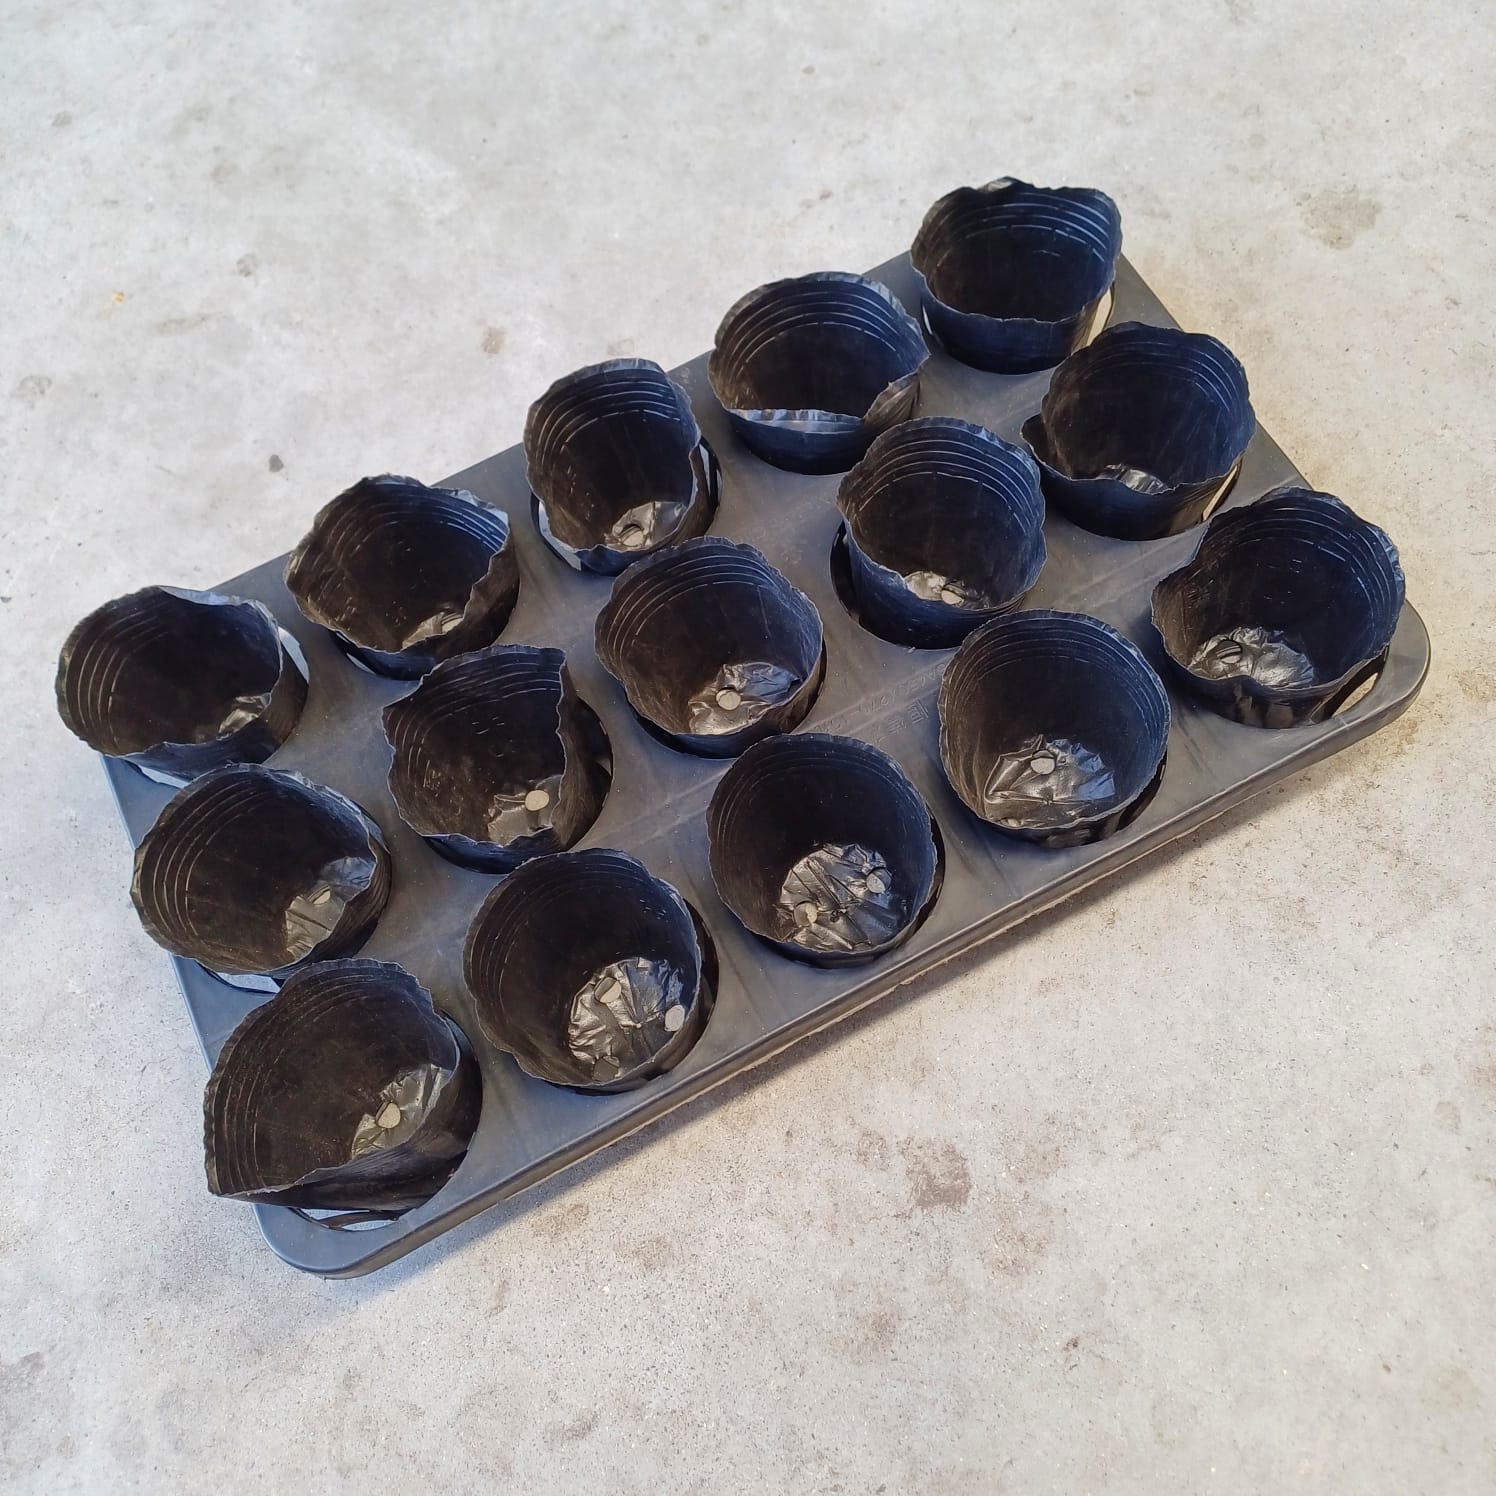
Smaller, 33mm Jiffy 7 Pellets fit perfectly into these tray cells…

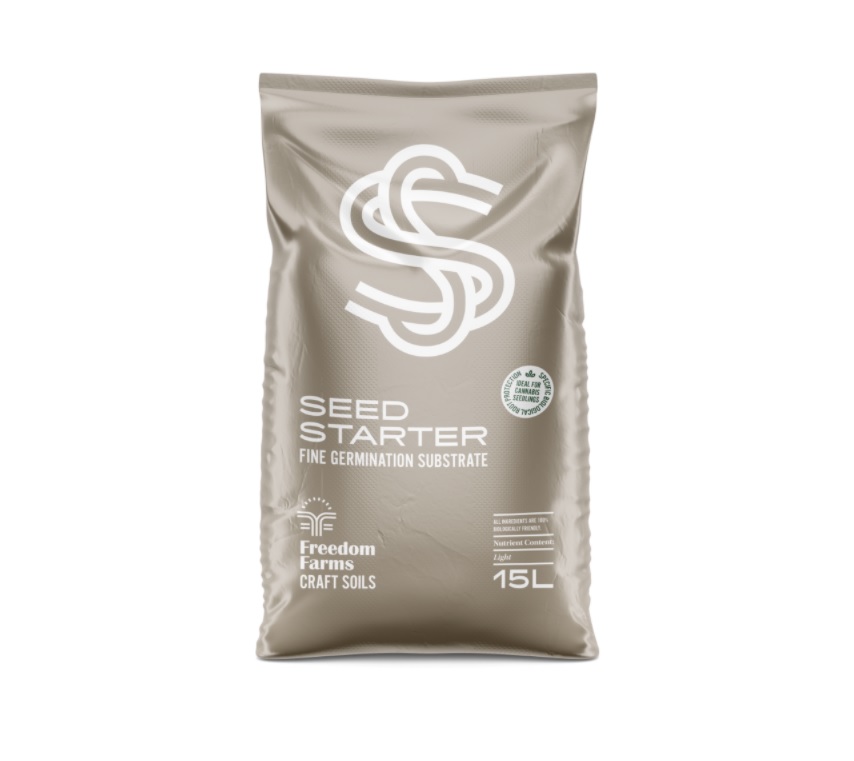
Alternatively, use your favorite seedling mix in the trays.


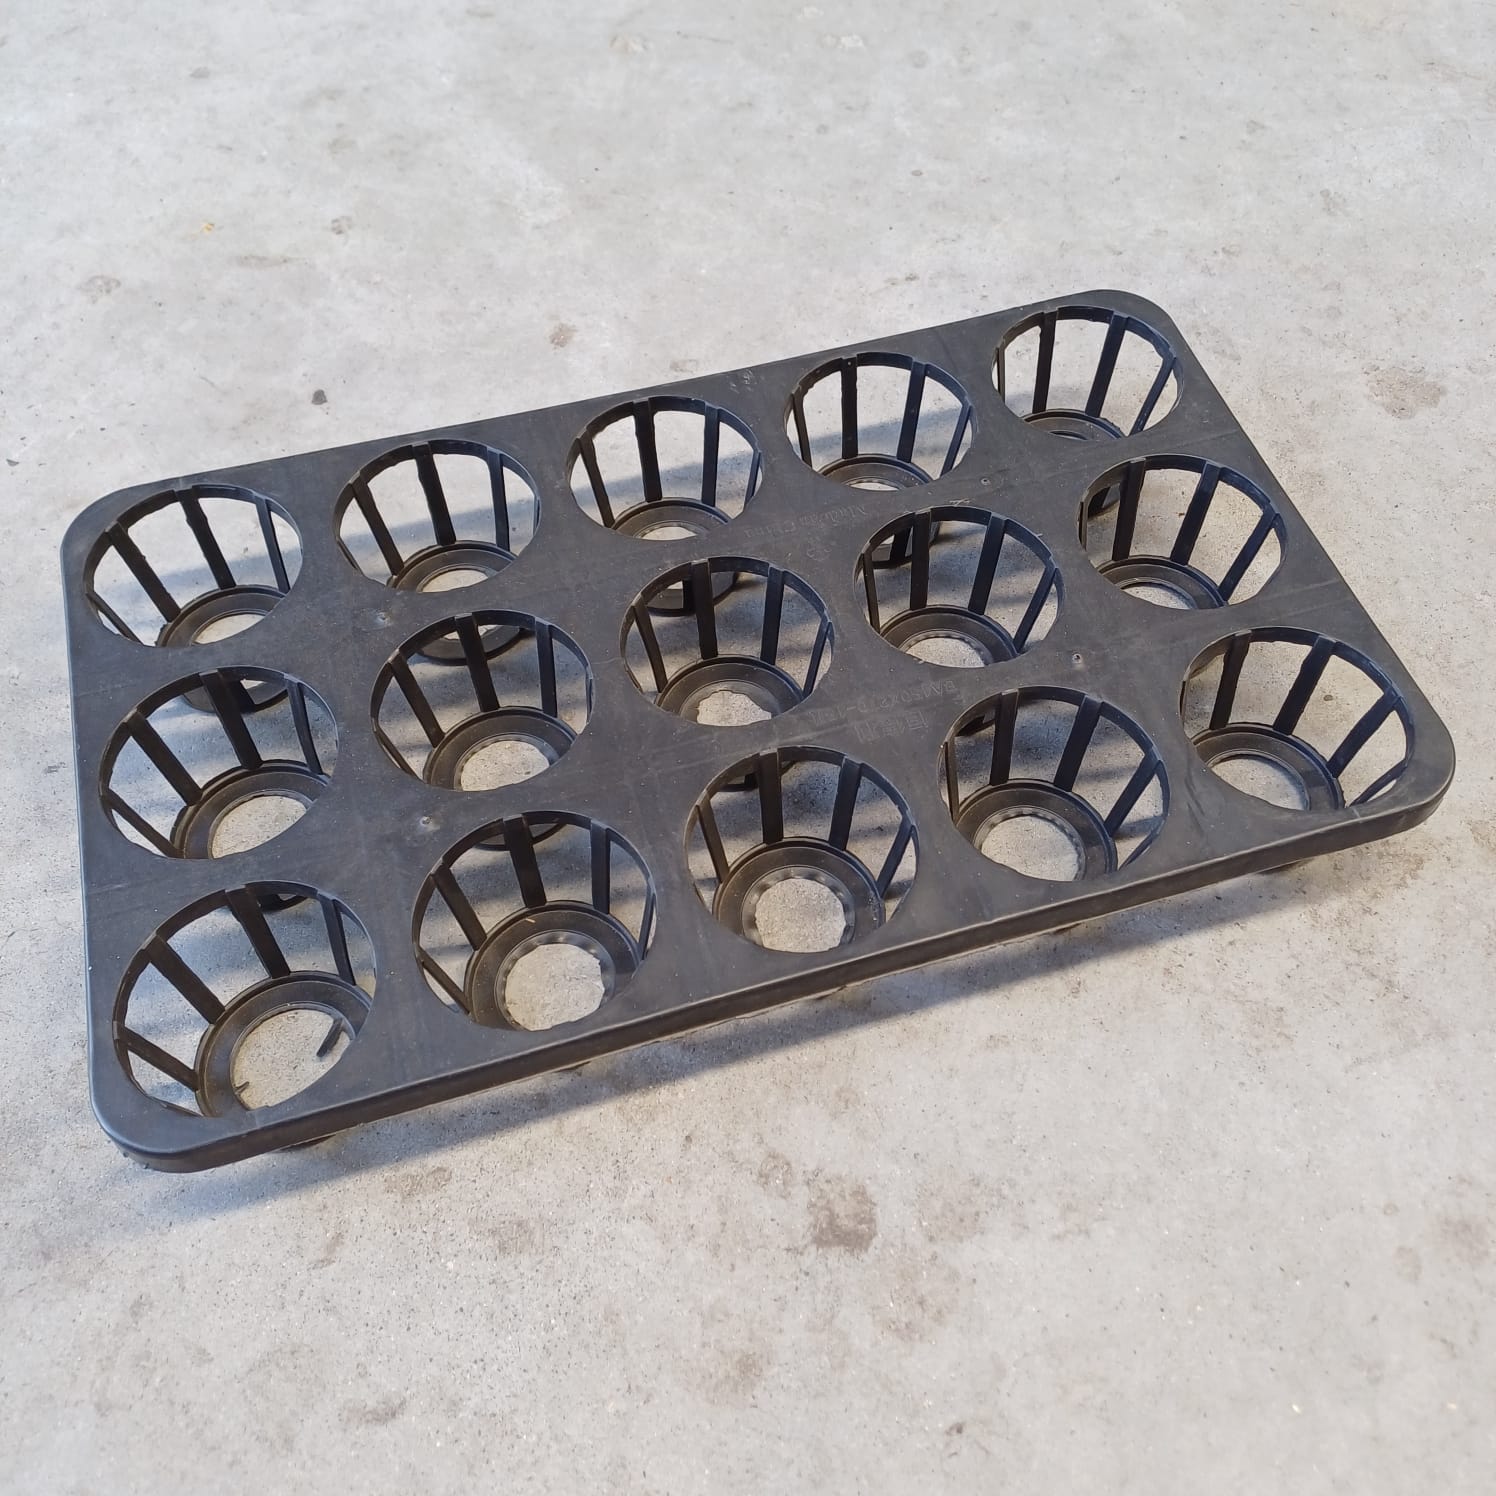
24 Cell Tray Dimensions:

Length: 290mm
Width: 190mm
Shape: Round
Cell Diameter: 42mm
Cell Depth: 45mm

ROOTiT Small Propagator
Fits perfectly into the ROOTiT Small Propagator. (Propagator sold separately) 


45 Cell Tray Dimensions :

Length: 520mm
Width: 315mm
Shape: Round
Cell Diameter: 50mm (Fits J7 Jiffy 41mm pucks!)
Cell Depth: 33mm

ROOTiT Large Propagator
Fits perfect into the ROOTiT Large Propagator. (Propagator sold separately) 


60 Cell Tray Dimensions (New type – octagonal holes) :

Length: 515mm
Width: 295mm
Shape: Octagonal
Cell Diameter: 42mm
Cell Depth: 40mm

ROOTiT Large Propagator
Fits perfect into the ROOTiT Large Propagator. (Propagator sold separately) 


Seedling Trays

Seedling Trays 2024 1-1

Seedling trays are suitable for starting seeds or cuttings.

Most sizes will hold Jiffy Pellets or Rock Wool plugs (36mm x 40mm). Alternatively, use your seedling substrate of choice in the trays

45 Cell Tray

Length: 540mm
Width: 275mm
Shape: Round
Diameter: 48mm
Depth: 60mm

48 Cell Tray (For Preforma Plugs / loose seedling mix / 33mm Jiffy Pellets)

Length: 305mm (2 of these trays fit into a Large Rootit Propagation dome / Garland XL High Dome Propagator)

Width: 255mm
Shape: Roundish
Cavity Top Diameter: 35mm
Cavity Bottom Diameter: 25mm
Depth: 50mm


128 Cell Tray (For Preforma Plugs / loose seedling mix. Preforma plugs will sit proud inside this shallow tray, as they are taller than the tray)

Length: 540mm. Will need to be trimmed shorter along one short side (using scissors / box cutter) to fit flat into a ROOTiT Large Propagator.
Width: 275mm
Shape: Square
Cavity Top: 28mm
Cavity Bottom: 15mm
Depth: 40mm


77 Cell Tray (For EazyPlugs or Rockwool Plugs)

Length: 530mm
Width: 315mm
Shape: Square
Length: 37mm
Depth: 30mm

Seeds:

Soak seeds for 24 hours in distilled water

Plant seeds twice as deep as the width of the seed.

Germinating seeds 21°C – 32°C (25°C), shadowy warm location. Top of Fridge

Keep evenly moist

Rockwool: slice open – root must be 1.5cm long so doesn’t heave up and out.

7 – 10 days: Cotyledon Leaves

10 – 14 days: True leaves

Can apply quarter-strength Nuts now

Growing medium – evenly moist

Keep growing medium 2°C – 5°C warmer than ambient air temperature

Ambient temperature 24°C – growing medium 25°C – 27°C

Seedlings need at least 16 hours of light for 2 to 3 weeks

Seedlings require less intense light.

Seedling Grow Tray

Seedling Grow TraySeedling Grow Tray

Seedling Grow Tray – dimensions: 45cm x 27cm x 6cm (H)

A 15-cavity seedling bag tray designed to hold 15 individual 250ml seedling plant bags (sold separately) and it can also hold solo cups! Made from durable plastic, the tray features open slats in each cavity. Its compact size makes it ideal for supporting and handling of sets of young plants during the early stages of development, whether in a greenhouse, garden, or indoor growing environment. The tray provides stability, making it easy to manage multiple seedlings at once while ensuring they remain well-spaced and sorted per tray if cultivating multiple types of plants.

This Seedling Grow Tray is an essential tool for gardeners looking to efficiently organize and nurture their young plants – easy to transport and handle multiple seedlings at once without disturbing their individual containers. Whether you’re starting herbs, vegetables, or flowers from seeds, this tray is a versatile and practical addition to your gardening setup, helping to streamline the growing process while keeping your plants neatly organized and supported.

This 15-cavity seedling tray isn’t just for growing your garden—it’s your new sidekick for impressing friends and family with your green thumb. Imagine rolling up to your next gathering, casually carrying a tray full of future tomatoes, basil, or sunflowers like a plant-toting superhero. Forget boring old gift bags—these seedlings say, “I care about you, and also, I’ve got way too many plants.” The sturdy design ensures that even the bumpiest car ride won’t turn your back seat into a mini jungle, and thanks to the perfect fit for solo cups or seedling bags, you’ll arrive looking organized (for once). Whether you’re making deliveries to fellow plant lovers or forcing your latest gardening obsession onto unsuspecting relatives, this tray has your back—literally full of plants and possibilities.

When Used with 250ml Seedling Plant Bags:

Autopot Tray2Grow Kit AQUAValve5

Autopot Complete Tray2Grow Kit AQUAValve5

Autopot Tray2Grow Kit AQUAValve5 (1115mm(Length) x 410mm(Width) x 95mm(Depth)) – the award-winning power-free watering system that offers you five ways to feed and water your plants. Multi-purpose – it can grow microgreens, germinate seeds, house seedlings, house potted plants, and can even fit a 107 liter fabric grow box!

  • An award-winning multi-functional watering system
  • Offers five ways to grow
  • Accommodates seed trays, small pots, grow bags, or a planter
  • Power-free
  • No mains water required
  • Zero waste
  • Includes fittings and pipework
  • Complete with click-fit filter for easy reservoir connection


WATCH THE SETUP VIDEO

Download Tray2Grow Instructions

Tray2Grow Do’s and Don’ts

Tray2Grow is the world’s first multi-functional watering system, offering you no less than five ways to water and feed your plants. Seed trays, small pots, grow bags, micro herbs, and planters, can each be accommodated, making this the most versatile product in the AutoPot range

Endorsed by the Royal Horticultural Society (RHS) this versatile device can satisfy the needs of everything from sprouting seeds to vast vines, heady herbs to balmy blooms and voluminous veg.

Without any need for electricity, Tray2Grow represents a sustainable, low cost way to garden, that can be left safely unattended, and positioned practically anywhere.

100% manufactured from recycled plastics.

The Autopot Tray2Grow Kit AQUAValve5 includes:

1x Tray2Grow Tray & Lid
1x AQUAvalve5
2x 9mm Grommet
1m of 9mm Pipe
16-9mm Click-Fit Filter
1x 9mm Golf Filter
1x 9mm in-line tap
1x 9mm tee connector
1x 6mm Overflow Grommet
3x Circular Spirit Level
10x Capillary Spikes
1x Capillary Matting
1x Root Control Sheet
4x Seed Trays
1x Slug Repellent Copper Tape


250ml Seedling Plant Bags – Pack of 15

250ml Seedling Plant Bags

250ml Seedling Plant Bags, Pack of 15, for use with the Seedling Grow Tray.

( PACK OF 15 )


250ml Seedling Plant Bags – Pack of 15 is a must-have for any gardener looking to start plants from seed or propagate cuttings with ease. Each bag is designed to hold just the right amount of soil, providing the perfect environment for young plants to establish their root systems. Their compact size is ideal for starting herbs, vegetables, or flowers, giving your seedlings a strong start before transplanting them into larger pots or garden beds.

What makes these seedling plant bags particularly useful is their flexibility and convenience. Unlike rigid pots, these bags can easily be filled with soil and placed directly into your tray system or any growing area without taking up much space. They’re lightweight and easy to move around, so you can arrange your seedlings based on their specific light or watering needs. When it’s time to transplant, simply peel away the bag, and the soft structure ensures minimal disturbance to the roots, allowing for a smooth transition to the garden or larger containers.

And let’s be real, these bags are also perfect for showing off your plant-growing prowess. You could show up to a friend’s house with store-bought flowers, but where’s the fun in that? Instead, arrive with a tray of these 250ml plant bags in the Seedling Grow Tray, full of future homegrown produce, and bask in the admiration of your botanical skills. It’s like giving them a piece of your garden that fits in their hands—who wouldn’t appreciate a gift that grows? Plus, they make it easy to transport your mini plant army without turning your car into a soil spill disaster. Perfect for those times when you need to look like a gardening pro, but also like to keep things tidy!

When Used with Seedling Grow Tray:

30mm Microgreen Tray Mesh Bottom

30mm Microgreen Tray Mesh Bottom

The 30mm Microgreen Tray Mesh Bottom is 275mm wide and 535mm long. The mesh bottom makes this tray suitable for multiple uses.

With its low 30mm height, it can be filled to the brim using only about 4.5 liters of growing medium.

Coco coir based substrates/growing mediums are a very popular choice for growing microgreens at home, as it is a soft and airy medium with great moisture retention. Because the microgreen growing cycle is so short, with the seedling relying mostly on nutrients stored inside the seed itself, adding any supplements or additional nutrients to your substrate is not a necessity at all, although a lot of people do add a little bit of worm castings to their mixes, claiming better results.

Once you have added your substrate into the 30mm Microgreen Tray With Holes, water or mist spray lightly if the substrate is on the dry side and tamp the substrate down very lightly by hand, to get it to settle and flatten out nicely. Then gently sprinkle your seeds across the surface. Once this is done, a VERY thin layer of additional substrate may be sprinkled over the top of the seeds (using a baking sieve, for example)

Place the trays into a suitable environment for germination and mist or spray the top of the substrate regularly to prevent it from drying out. (A propagation dome will help keep substrate moist until your seeds have germinated, saving you a lot of effort. Remove the ). Do not overspray, as this will cause overly wet “swampy” subsurface conditions! Just keep the substrate slightly moist at all times.

Once your seeds have sprouted and grown to a harvestable size, you are able to clip off the delicious micro-leaves for your dishes and salads with a pair of pruning scissors.

30mm Microgreen Tray Mesh Bottom trays can also be used for other home and hobby purposes, like sifting out Mealworm Beetles if you are breeding them, or to sift grains, seeds, Perlite, etc.


* Lighter for scale only

50mm Microgreen Tray Without Holes

50mm Microgreen Tray Without Holes

The 50mm Microgreen Tray Without Holes has no drainage holes and is 275mm wide and 535mm long.

With its 50mm height, it can be filled to the brim using only about 7.5 liters of growing medium.

Coco coir based substrates/growing mediums are a very popular choice for growing microgreens at home, as it is a soft and airy medium with great moisture retention. Because the microgreen growing cycle is so short, with the seedling relying mostly on nutrients stored inside the seed itself, adding any supplements or additional nutrients to your substrate is not a necessity at all, although a lot of people do add a little bit of worm castings to their mixes, claiming better results.

Once you have added your substrate into the tray, water or mist spray lightly if the substrate is on the dry side and tamp the substrate down very lightly by hand, to get it to settle and flatten out nicely. Then gently sprinkle your seeds across the surface. Once this is done, a VERY thin layer of additional substrate may be sprinkled over the top of the seeds (using a baking sieve, for example)

Place the trays into a suitable environment for germination and mist or spray the top of the substrate regularly to prevent it from drying out. (A propagation dome will help keep substrate moist until your seeds have germinated, saving you a lot of effort. Remove the ). Do not overspray, as this will cause overly wet “swampy” subsurface conditions! Just keep the substrate slightly moist at all times.

Once your seeds have sprouted and grown to a harvestable size, you are able to clip off the delicious micro-leaves for your dishes and salads with a pair of pruning scissors.

The 50mm Microgreen Tray Without Holes can also be used as a drip tray for potted plants, which will catch runoff during watering or flushing.


* Highlighter for scale only

Garland Standard Garden Tray

Garland Standard Garden Tray

Garland Standard Garden Tray – The smallest in Garland’s range of tough injection molded garden trays. An ideal water reservoir tray for pots and seed trays.

9 Liter internal capacity, made from recycled polypropylene.

Size: 57cm Long x 38.5cm Wide x 5cm High (External)

Garland Standard Garden Tray 2

A Garland Standard Garden Tray can come in handy for a number of uses, including:

  • Microgreen cultivation
  • Decompressing small coco coir bricks
  • Mixing small amounts of custom substrates and additives together
  • Can be used as a bin when trimming plants, especially in a grow tent, where space may be limited
  • Use as watering tray with an Easy2Go self-watering kit
  • Can be used to catch runoff when flushing or watering potted plants
  • Can be used to water seedling trays from underneath, so that newly germinated seedlings don’t get pushed over by water from above

Garland garden trays are also available in various larger sizes:

  • 1.2 Meter Square Tray
  • 1 M Square Tray
  • 80 cm Square Tray
  • 60 cm Square Tray
  • Rectangle Tray (100cm Long, 40cm Wide, 5cm High)
  • Giant Plus Tray 1.2m x 55cm x 5cm
  • Titan Tray (Dimensions, external (lip included): 100cm Long, 55cm Wide, 15cm High)

Although the trays can be used for many reason, they are most commonly used as drip/catchment trays or hydroponic grow beds (filled with clay balls) when gardening is concerned.


RapidGrow Rooting Pots with Tray

RapidGrow Rooting Pots with Tray

RapidGrow Rooting Pots with Tray features 9 x 500 ml slotted pots that are narrow (+- 8cm diameter) and deep (13cm tall). This makes it ideal for quickly rooting seeds, seedlings or clones into a good sized root volume – ready to transplant into a larger container!

CAN BE BLACK OR GREY PLASTIC, depending on availably.

The slotted pots of the RapidGrow Rooting Pots with Tray are similar to net pots and air pruning pots – allowing for great drainage and aeration of the roots and substrate, factors that all play a role in root development.

The 9 pot tray makes it easy to handle, move, water and maintain multiple seedlings or clones at once. The tray with the 9 pots inside of it measures 30 cm x30 cm x 16 cm high.

*Highlighter for scale only

If you are looking to generate healthy root mass quickly, we recommend using Cosmocel Cosmoroot Rooting Promoter as early feeding for clones and seedlings.

Cosmoroot promotes and strengthens root formation and root development. Cosmoroot is a Bio-stimulant and should be used in conjunction with a regular nutrient feeding plan.

To increase yields you need to increase root mass. The bigger the root mass the more nutrients can be absorbed by the plant. A good root system results in healthy vascular tissue formation, this means well developed fruit or flowers. Roots synthesize the hormones responsible for cell division and enlargement, so the more roots you have the bigger the yield.

30mm Microgreen Tray With Holes

30mm Microgreen Tray With Holes

The 30mm Microgreen Tray With Holes (drainage slots, to be precise) and is 275mm wide and 535mm long. The drainage provided will help prevent overly wet substrates and potential rot.

With its low 30mm height, it can be filled to the brim using only about 4.5 liters of growing medium.

Coco coir based substrates/growing mediums are a very popular choice for growing microgreens at home, as it is a soft and airy medium with great moisture retention. Because the microgreen growing cycle is so short, with the seedling relying mostly on nutrients stored inside the seed itself, adding any supplements or additional nutrients to your substrate is not a necessity at all, although a lot of people do add a little bit of worm castings to their mixes, claiming better results.

Once you have added your substrate into the 30mm Microgreen Tray With Holes, water or mist spray lightly if the substrate is on the dry side and tamp the substrate down very lightly by hand, to get it to settle and flatten out nicely. Then gently sprinkle your seeds across the surface. Once this is done, a VERY thin layer of additional substrate may be sprinkled over the top of the seeds (using a baking sieve, for example)

Place the trays into a suitable environment for germination and mist or spray the top of the substrate regularly to prevent it from drying out. (A propagation dome will help keep substrate moist until your seeds have germinated, saving you a lot of effort. Remove the ). Do not overspray, as this will cause overly wet “swampy” subsurface conditions! Just keep the substrate slightly moist at all times.

Once your seeds have sprouted and grown to a harvestable size, you are able to clip off the delicious micro-leaves for your dishes and salads with a pair of pruning scissors.


* Pen for scale only

30mm Microgreen Tray Without Holes

30mm Microgreen Tray Without Holes

The 30mm Microgreen Tray Without Holes is 275mm wide and 535mm long.

With its low 30mm height, it can be filled to the brim using only about 4.5 liters of growing medium.

Coco coir based substrates/growing mediums are a very popular choice for growing microgreens at home, as it is a soft and airy medium with great moisture retention. Because the microgreen growing cycle is so short, with the seedling relying mostly on nutrients stored inside the seed itself, adding any supplements or additional nutrients to your substrate is not a necessity at all, although a lot of people do add a little bit of worm castings to their mixes, claiming better results.

Once you have added your substrate into the tray, water or mist spray lightly if the substrate is on the dry side and tamp the substrate down very lightly by hand, to get it to settle and flatten out nicely. Then gently sprinkle your seeds across the surface. Once this is done, a VERY thin layer of additional substrate may be sprinkled over the top of the seeds (using a baking sieve, for example)

Place the trays into a suitable environment for germination and mist or spray the top of the substrate regularly to prevent it from drying out. (A propagation dome will help keep substrate moist until your seeds have germinated, saving you a lot of effort. Remove the ). Do not overspray, as this will cause overly wet “swampy” subsurface conditions! Just keep the substrate slightly moist at all times.

Once your seeds have sprouted and grown to a harvestable size, you are able to clip off the delicious micro-leaves for your dishes and salads with a pair of pruning scissors.

The 30mm Microgreen Tray Without Holes can also be used as a drip tray for potted plants, which will catch runoff during watering or flushing.


* Pen for scale only

Sowing Tray Without Holes

Sowing Tray Without Holes

This multi-purpose Sowing Tray Without Holes can be used for cultivating microgreens and sprouting seeds in a range of grow medium. Ideal for placing multiple small seedling trays inside or can be used for water catchment for larger pots.

Size: 35cm x 48cm x 7cm

How to germinate seeds

Each type of seed has slightly different growing requirements, but the basics are the same:

  1. Use shallow containers (5 to 8cm deep) with drainage holes. It is easiest to monitor moisture in containers that are no more than  8cm deep and they require less growing medium!
  2. Use a lightweight seedling mix. These mixes are made primarily of ground peat moss or with coco coir as a base, and have sometimes been sterilized, so they are less apt to contain weed seeds, fungi, and bacteria that may hamper growth than garden soil. These mixes also provide good drainage, providing both the aeration and moisture seedlings need. Avoid using garden soil, as it won’t provide sufficient aeration and can introduce disease-causing organisms.
  3. Moisten the seedling mix before placing it in containers, like the Sowing Tray Without Holes. If you can squeeze a handful of the mix and water comes out, it is too wet and you’ll need to add more of the dry mix. The ideal moisture level feels like a well-wrung sponge.
  4. Fill the containers with moistened seedling mix to about 1.5 to 2.5cm  below the rim of the container. Rap the container against the counter top to settle the mix.
  5. Follow the recommended planting depth on the seed packet when sowing seeds. This is generally 1-1/2 to 2 times the width of the seed. However some seeds need light to germinate and must be “surface sown” meaning they should simply pressed into the surface of the potting mix and not be covered at all; the seed packet will note if this is the case.
  6. Water seeds after planting using the mist setting on a spray bottle to avoid dislodging seeds with a strong stream of water. Check daily to make sure the mix is stays even moist, but not soggy. Seeds must stay moist in order to germinate properly.
  7. If the air in your room is very dry, you can maintain adequate moisture for germination by creating a tent over the pots or flats with clear plastic wrap. Prop the plastic wrap off the surface of the planting mix using Popsicle sticks or other ‘posts’ so seedlings don’t stick to it. Remove any coverings gradually as germination begins.
  8. Most seeds germinate best in warm conditions. Although average room temperature (21°C) is generally adequate for most seed germination, you’ll get faster and more consistent germination if you place newly seeded containers in a warm spot (21 to 26 degrees C) or on top of a heat mat (available from garden stores). With the right conditions, most garden seeds should germinate in 7 to 14 days (unless otherwise noted on the seed packet). Once seeds have germinated and produced their first set of true leaves (the very first you see are called seed leaves, and all that grow after that are true leaves), move containers of seedlings off the heat mats.
  9. Good light is essential. Once you see the first signs of germination, move the seed trays to a light-filled area. Seedlings need full sun from a south- or west-facing window or, even better, CFL lights positioned 5cm – 15cm above the foliage. Use a timer to keep fluorescent lights on for 12 to 16 hours a day. Suspend the light fixtures so that you can move them up as your plants grow, keeping them a consistent height above the tops of the seedlings. Leggy or pale green seedlings are an indication that plants need more light. If your seedlings are growing on a windowsill, rotate containers regularly to keep plants from reaching toward the light source.
  10. Keep the soil moist but never wet, as this encourages rot. At first, lightly mist the soil. Once seedlings emerge, place the containers in a tray and water from the bottom to encourage deep root development. Check daily and do not let the soil mix dry out.
  11. Wait to fertilize until the seedlings’ true leaves (the second set) appear. Then use a weak solution which will help the seedlings develop a strong root system.
  12. When seedlings have one to three sets of true leaves and are about 5cm tall, transplant them to a deeper container for growing on until planting time.

Get your Sowing Tray Without Holes today!

Canna RootPlugs Loose Singles

Canna RootPlugs Loose Singles

Canna RootPlugs Loose Singles: A cultivator’s key to optimal cutting and seedling rooting. Designed for seamless integration with natural substrates like coco and peat-based mixes, these plugs promise rapid and vigorous root development. Ideal for kickstarting your crops, as they absorb water rapidly while maintaining precise humidity levels.

These plugs fit nicely into our Rootit 60 Cell Seedling Trays and 45 Cell Seedling Trays

  • Suitable for all seeds and cuttings
  • Quick and easy water absorption
  • Easy transplanting & fast rooting, cutting down pre-veg time
  • Perfect balance between aeration & moisture retention
  • Compatible with all natural substrates, such as coco and peat-based potting mixes
  • Fully compostable and degradable
  • Packaged dry for a longer shelf life

Application

  • Fully soak the CANNA Rootplug using plain water or liquid fertilizer with an EC of 1.5 and pH 5.5
  • Place plugs to allow excess water to drain away
  • Insert the cutting or seed into the pre-cut hole.

Canna RootPlugs Loose Singles Technical specs

  • Ingredients: Coco coir & Peat
  • EC: 0,6* and pH: 5.4-6.8 (pH and EC measured in 1:1.5 extract with demineralized water.)
  • Initial Moisture: 10-20%
  • Moisture Retention: 89%
  • Height: 48mm
  • Diameter: 40mm
  • Loose Singles DO NOT come with a seedling tray

Rooting plant cuttings is like performing magic tricks in the garden…

Valuable grow info from CANNA: HERE

You take a snip from a plant, wave your green thumb wand, and voilà! A new plant is born! Well, almost. It’s more like a science experiment meets a gardening adventure. You carefully select a healthy stem or leaf cutting, strip it of some excess baggage (aka extra leaves), and plop it into a cozy rooting medium—be it water or soil or a “glue plug”. Then, it’s all about providing the right conditions, like a plant spa day. You sprinkle a dash of sunlight, a splash of water, and a sprinkle of love. Before you know it, those little cuttings start sprouting roots like they’ve got places to grow! It’s like witnessing tiny miracles unfold right before your eyes. And hey, who knows, maybe one day you’ll have a whole garden of plants cloned from your green thumb genius. Just don’t forget to wear your magician’s hat while you’re at it!

Narrow Budget Large Propagator

Narrow Budget Large Propagator

Narrow Budget Large Propagator

The outside dimensions of this humidity dome is approx. 24 cm (H), 28 cm (W),  54 cm (L).

The INSIDE dimensions of the tray cavity is approx. 49cm x 24cm x 5cm. Dome lid is about 18cm high.

This narrower humidity dome DOES NOT fit larger seedlings trays and one will have to get creative with a box-cutter and some seedling trays to optimize the entire dome area in a lot of cases! Examples below…

Narrow Tray housing a 48-cell Seedling tray


Narrow Tray housing 6-cell Seedling trays


Using a humidity dome like the Narrow Budget Large Propagator when propagating plant clones or cuttings is an essential step to ensure successful rooting. Start by selecting healthy, disease-free parent plants and trim them to include a few leaves and a node where roots will emerge. Dip the cut end of each cutting into a rooting hormone to encourage faster root development and improve success rates. Insert the cuttings into a growing medium such as peat, perlite, or a soilless mix, ensuring each cutting is firm and stable. Place the cuttings inside a propagation tray and cover them with a humidity dome. The dome helps maintain high humidity levels, crucial for preventing the cuttings from drying out since they lack roots to absorb water.

Position the tray in a location with indirect light or use a grow light set to a low intensity to avoid scorching the tender cuttings. Aim to keep the humidity levels inside the dome around 90-100% for the first few days, then gradually reduce it to 80-85% as roots begin to develop. Monitor the moisture of the growing medium and mist the cuttings if necessary to maintain adequate humidity. Ventilate the dome periodically to allow fresh air exchange, which helps prevent mold and fungal growth. Once the cuttings have established roots, usually within 1-3 weeks, you can begin acclimating them to the external environment by gradually increasing the time the dome is removed each day.


Budget Heat Mat 22W

Budget Heat Mat 22W

Budget Heat Mat 22W for Plant Propagation, (25cm x 52cm) with 2-pin plug.

Ensure your seeds and cuttings thrive with this 22W Heat Mat for Plant Propagation. Designed for indoor gardening enthusiasts and professional horticulturists alike, this heat mat provides consistent, gentle warmth to accelerate germination and rooting. The durable, waterproof construction ensures long-lasting performance, while the easy-to-clean surface makes maintenance a breeze.

Key Features:

  • Powerful 22W Heating: Delivers steady, optimal warmth to seed trays and plant cuttings, promoting faster germination and healthy root development.
  • Even Heat Distribution: Ensures uniform heat across the mat’s surface, preventing hot spots and ensuring all plants receive the same care.
  • Waterproof and Durable: Built to last with waterproof materials, making it safe for use in humid greenhouse environments and easy to clean.
  • Energy Efficient: Low power consumption means you can keep your plants warm without a significant increase in energy costs.
  • Versatile Size: Ideal for a variety of applications, from small seedling trays to larger propagation projects.

Use Cases:

  1. Seed Germination: Place your seed trays on the heat mat to provide a warm environment that speeds up the germination process, giving your seeds a strong start.
  2. Cutting Propagation: Create the perfect conditions for cuttings to develop roots quickly by using the heat mat to maintain a consistent temperature.
  3. Vegetable and Flower Seedlings: Ensure your vegetable and flower seedlings grow strong and healthy by providing a warm, nurturing environment from the start.

Elevate your plant propagation success with the Budget Heat Mat 22W, a reliable and efficient solution for all your indoor gardening needs.

Improving the process of rooting cuttings or germinating seeds can be significantly enhanced by adding a Heat Mat Temperature Controller to a heat mat. This combination allows for precise and consistent temperature regulation, creating an optimal environment for plant development. The controller automates temperature settings, ensuring that the heat mat maintains the ideal warmth without the need for constant monitoring, thus preventing overheating and fluctuations that can stress plants. This results in a more reliable and efficient propagation process, leading to healthier root development and faster germination, ultimately making plant propagation a smoother and more successful endeavor.