Surgical Scalpels

Surgical Scalpels

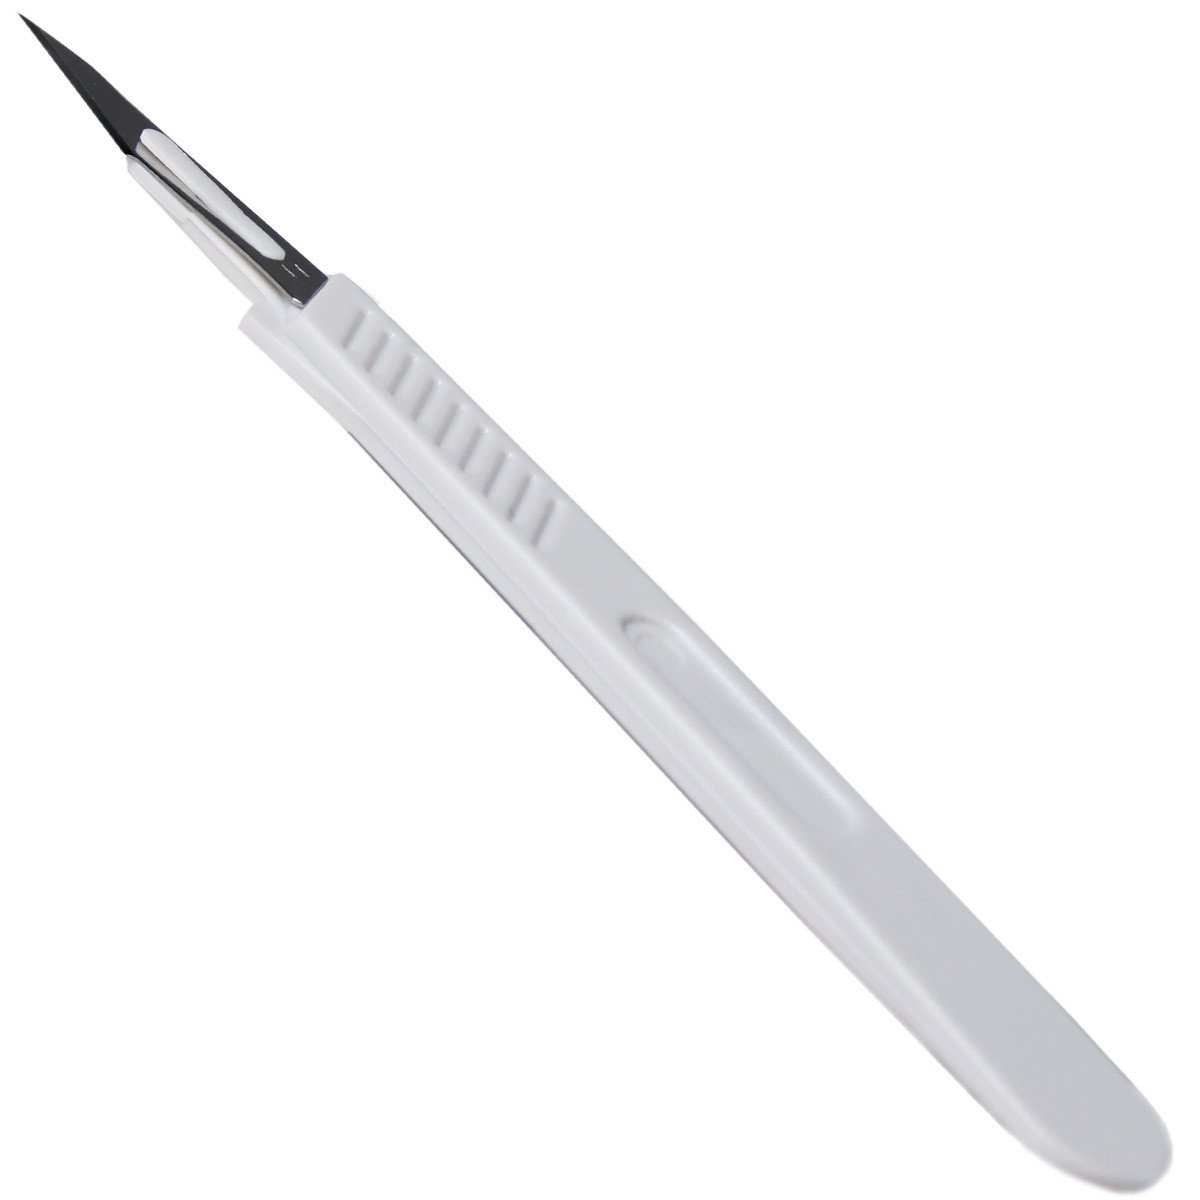
Sterile surgical scalpels are used to take cuttings from plants-  fresh Surgical Scalpels need to be used every time that you decide to take new cuttings.

Taking cuttings is one of the most popular ways to propagate a plant. Also referred to as cloning, it offers the ability to get multiple plants that are genetically identical to the mother plant. Many people feel intimidated by the process, and are a bit leery to attempt it. If you are one of those people, relax, it’s a relatively easy process.
What follows are step by step instructions for a simple procedure that works for both hardwood and softwood plants. (NOTE: Not all plants can be cloned in this manner. Some plants are virtually impossible to get cuttings from, even for experts.)

Why Take Cuttings?

There are several reasons that you may want to clone your plant, one being, that it does not require seeds. Cloning may be your only option for obtaining a certain variety of plant when no seeds are available. Another reason is to maintain consistent quality control of your crop. Every seed, like every human being, is slightly different. Aside from identical twins, genetically, no two people are exactly the same. DNA works in plants the same way it does in humans. So if you have a plant that is just what you want it to be, you can take cuttings and have as many perfect clones of your special plant as you want.

Another big factor which makes cloning so popular is that in most cases, it’s much faster than starting from seed. The majority of plant species will produce a rooted, growing plant from a clone before the seeds of the same species can even sprout, saving a lot of time.

What You’ll Need

  • A SINGLE EDGE RAZOR BLADE – Must be sharp!!
  • BACK-UP BLOCK – A piece of Styrofoam, wood or plastic approximately 2″x2″.
  • SHOT GLASS – Or similar small glass or plastic container.
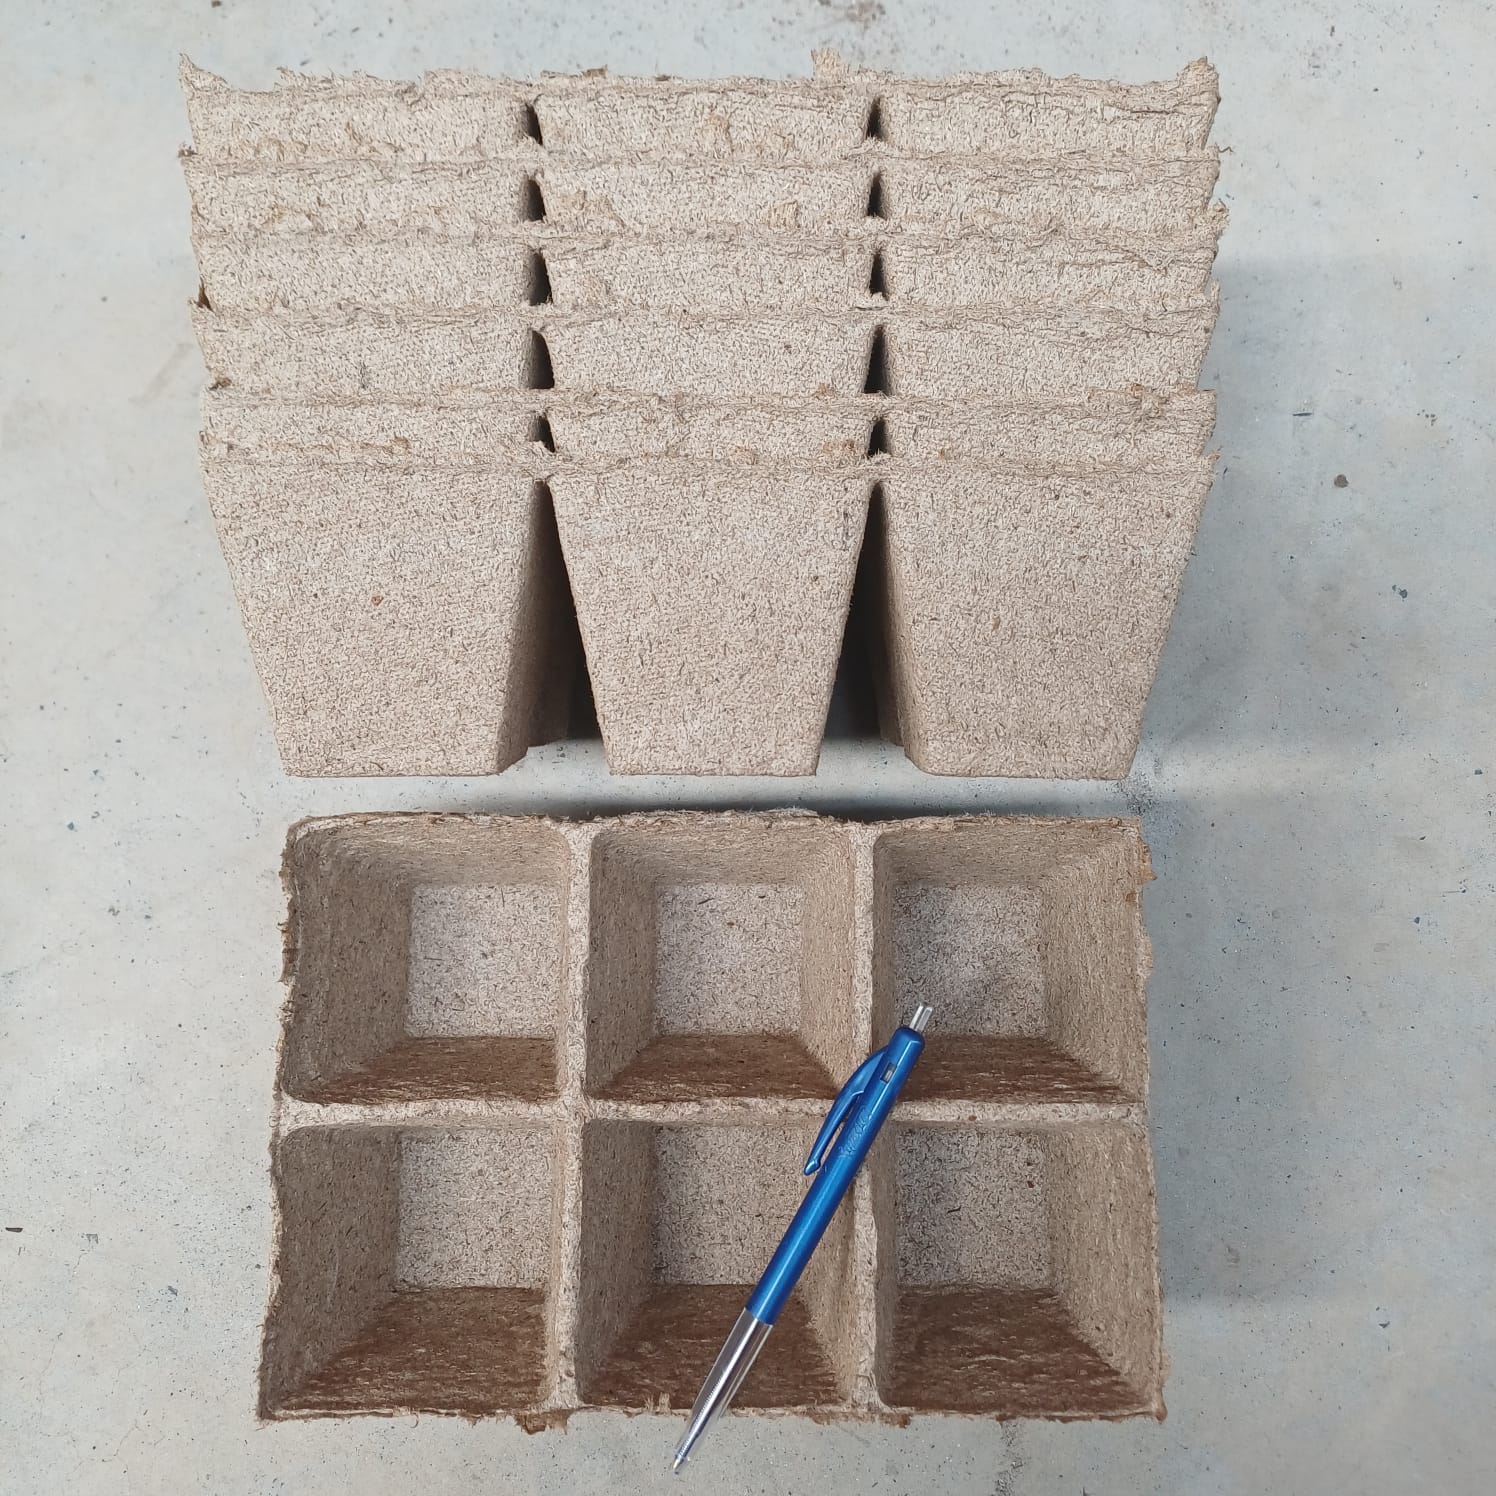
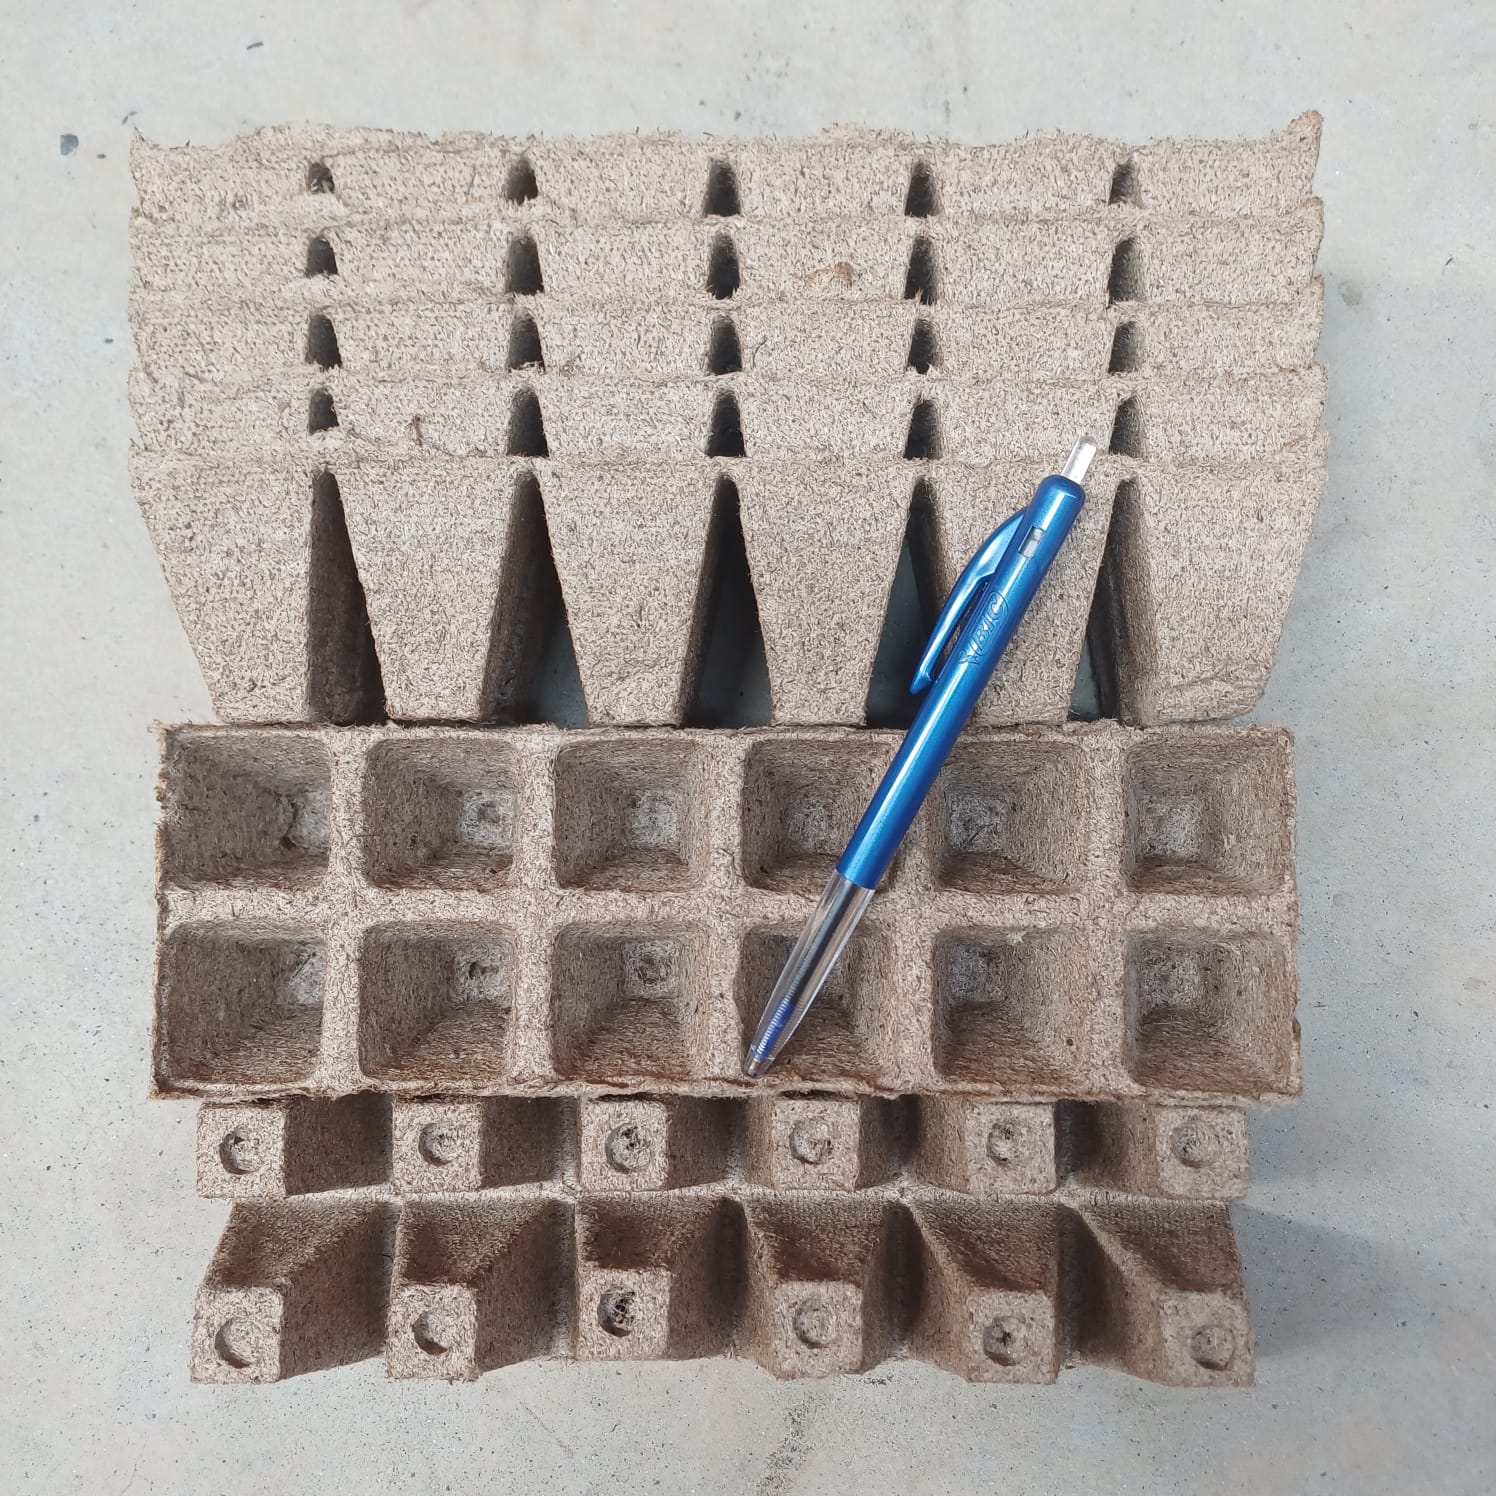
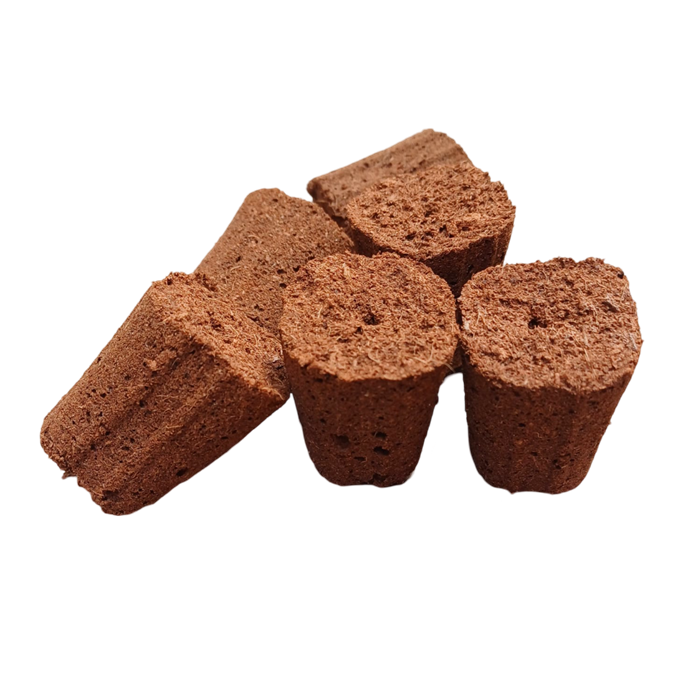
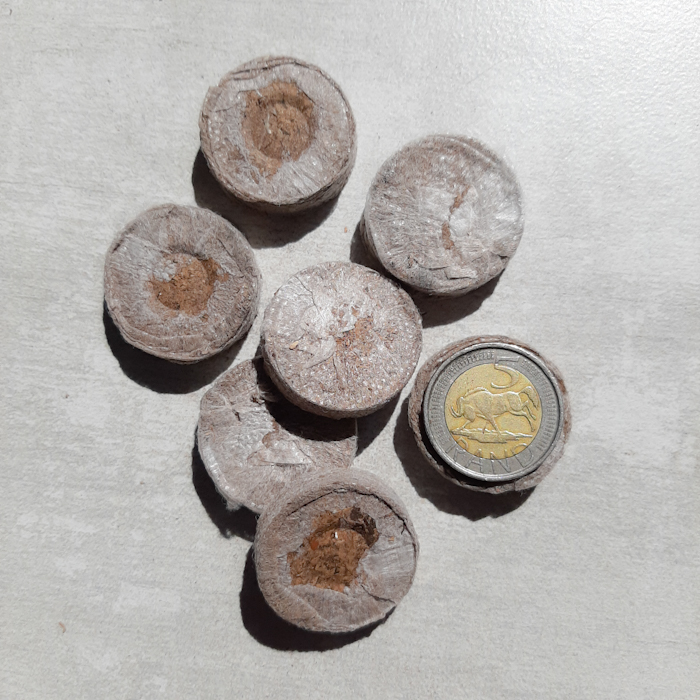
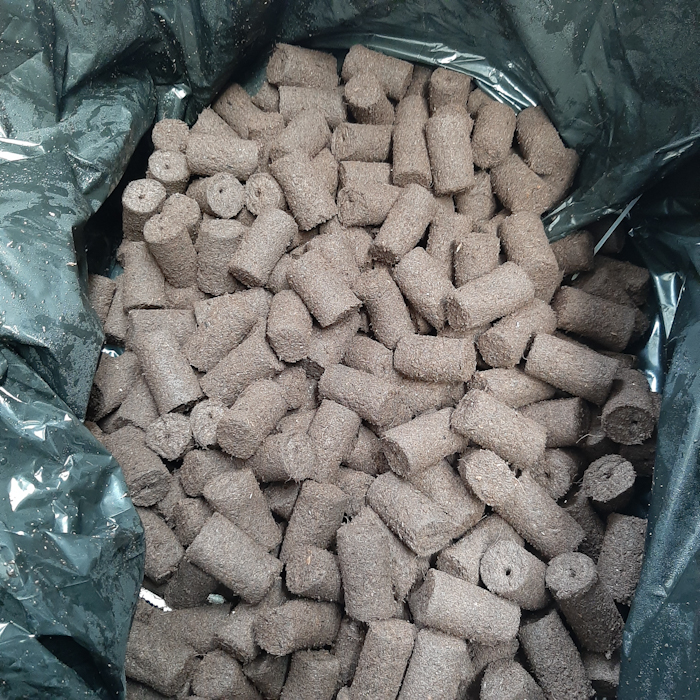
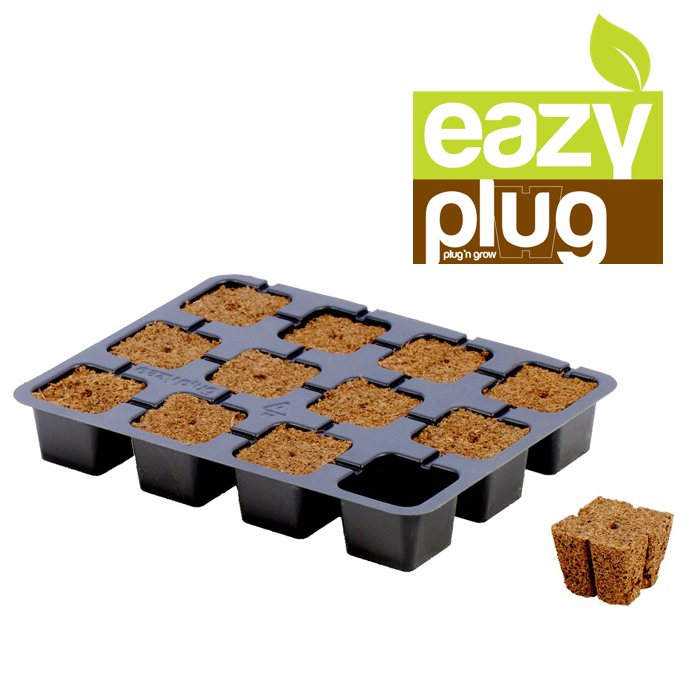
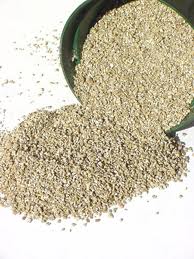
  • GROWING MEDIUM – Jiffys, Rockwool or Oasis cubes, Pro-mix, coconut fiber or one of several other suitable growing media.
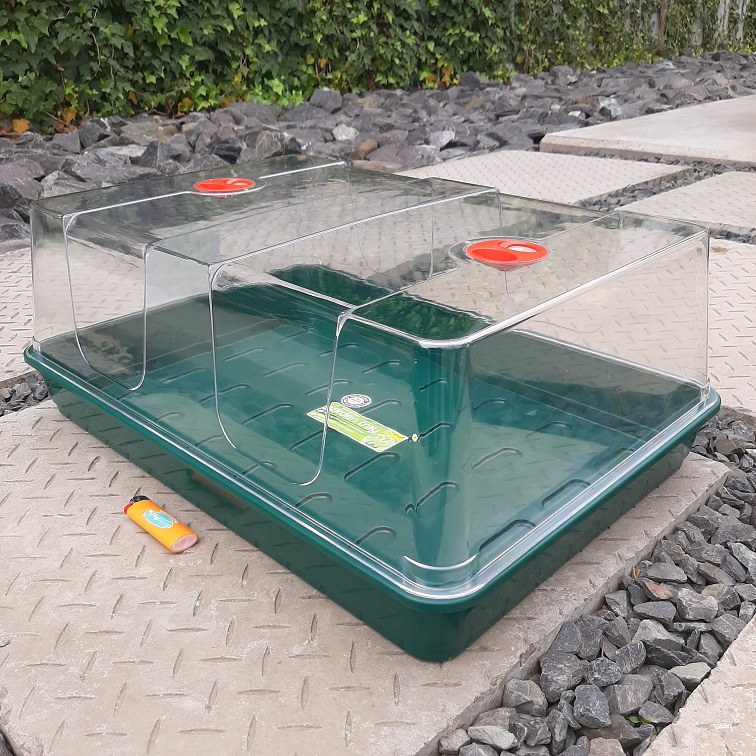
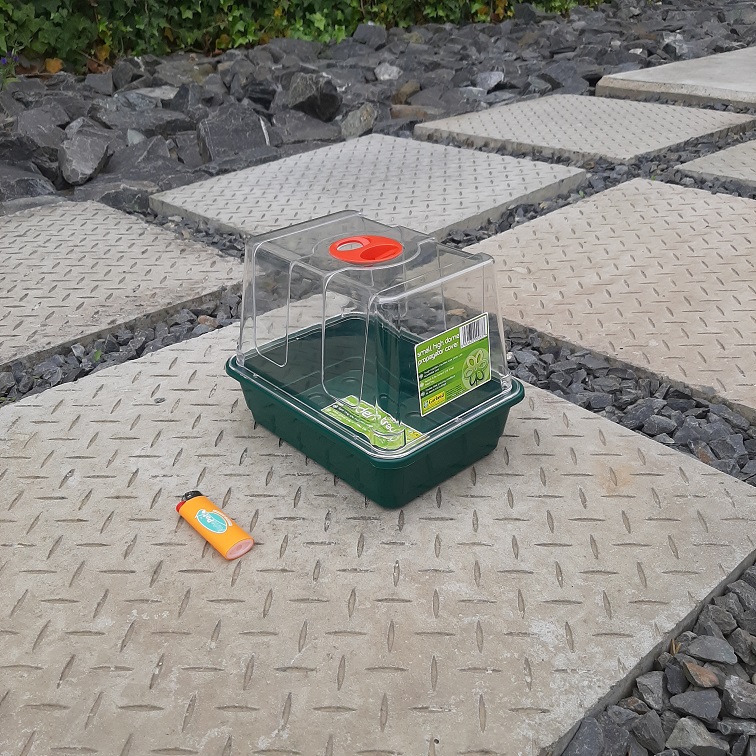
  • SEED TRAY WITH CLEAR HUMIDITY DOME
  • ROOTING HORMONE – You will need a good quality gel, liquid or powdered rooting hormone. Although you can use a powdered rooting hormone, in our opinion they are much harder to work with resulting in a reduced success rate.
  • SPRAY BOTTLE WITH WATER
  • RUBBING ALCOHOL
Before You Start

This might sound obvious, but you should only take cuttings from healthy plants. The healthier the mother plant, the better success you will have with your clones. You should take a few more cuttings than you need and then select the best ones to use and dispose of the rest.

You will need to leach the nitrogen out of the mother plant(s) by watering them heavily with pH adjusted water only (no fertilizer) for two or three days before you take the cuttings. This is an important step because the nitrogen stored in the plant will retard rooting.

Decide what you are going to use for growing medium. Most people use Jiffys, Rockwool or Oasis cubes.  You can also use many different mediums successfully. Use plastic cups with holes cut in the bottom to hold coconut fiber, a Perlite & Vermiculite mix or other loose type growing medium. .You will need to pre-soak your growing medium before you start, using pH balanced water. Distilled water is the best thing to use, but any good, chlorine free water source will work. (NOTE: Most growing medium need to be soaked in pH 5.5 to pH 6.5 water. Rockwool needs to be soaked for 24 hours with water adjusted to a pH of 4.5 to 5.5).

Make a hole in the top of the growing medium which is about the same size or a little smaller than the stem of the cutting. You do not want to force the cutting into the growing medium.

It is critical that you sterilize everything before you start, because cuttings are very susceptible to fungus, viruses and diseases until they root. Use rubbing alcohol on your hands, the razor blade and the cutting block. Rinse the shot glass (or whatever you are using) with alcohol, dry it and then fill it 3/4 full with rooting hormone, and set it aside for now.

Work quickly but carefully. When you make the cut that separates the clone from the mother, you must get it into the rooting hormone as quickly as possible to prevent air from getting pulled into the stem. Please be careful not to cut yourself with the razor blade. (The lawyers made us say that).

Take the Cuttings
  1. cutting1Take a growing tip from your plant 3″ to 6″ long with at least one leaf internode, two is better but not always possible. (A leaf internode is where the leaf connects to the stem, See diagram 1).
  2. cutting2With a Sharp single edge razor blade, carefully cut off one or two leaves (or small branches) flush with the stem. (See diagram 2).
  3. cutting3Make a cut approximately 1/4″ below the internode(s) where you just trimmed the leaves. Cut at a 45 to 60 deg. angle. (See diagram 3). Hold the back-up block tightly behind the stem where you are going to cut. This supports the stem and protects your fingers. Make this cut as quick and clean as you can as you do not want to tear or crush the stem.
  4. cutting4Quickly insert the cutting into the rooting hormone (See diagram 4). If you are using a liquid hormone you can let the cutting soak for 30-60 seconds. With a gel type hormone you just dip the cutting and then insert it into the growing medium. If you are using a powdered hormone you need to wet the stem with water and then carefully roll it in the powder.
  5. cutting5Gently insert the cutting into the growing medium (see diagram 5). Do not push the cutting all the way thru the medium. You need to leave room for the roots to develop. Make sure that the cut(s) you made at the leaf internode(s) are below the surface of the growing medium.
  6. Lightly pack the growing medium up against the cutting. Make sure there is good contact between the cutting and the growing medium.
Care and Feeding Instructions

You have successfully taken cuttings. Now the challenge is to keep them alive long enough to root. The cuttings are obviously very vulnerable at this point and must be handled with care. If you follow the steps below you should have few problems.

  1. Once you have your cuttings in the growing medium, mist them with the spray bottle filled with water and place them in the tray. Mist the inside of the clear humidity dome and place the dome over the tray. (NOTE: The cuttings need some ventilation and a couple of small holes in the dome will usually do the trick).
  2. Remove the dome and mist the cuttings 2 or 3 times a day. This keeps the cuttings from drying out and also changes the air under the dome. This step is critical as the cuttings have no way to replenish lost moisture until they develop roots. Mist the inside of the dome and replace on tray. The humidity under the dome needs to be about 90% until roots appear on the cuttings. (NOTE: Be careful that the air under the dome doesn’t get too warm. If it does, you may have to increase the amount of venting, as well as the number of mistings per day). Cuttings need to be kept between 72° and 80° Fahrenheit. Too hot or too cold will inhibit root growth. If you live in a cold climate you may need a heated propagation mat.
  3. The cuttings will require lighting at this time. Dappled sunlight is fine if you are leaving your cuttings outside. Indoors, we recommend  fluorescents. They are cooler and more energy efficient then metal halides and provide equal to superior results. Keep in mind that fluorescent lights don’t penetrate so you must keep the lights 1-2 inches above the plants.If you are using a Metal Halide or High Pressure Sodium fixture you must keep the cuttings much further away (2 – 3 feet away for 175 – 400 watt bulbs and 4 – 6 feet for a 1000 watt bulb).The lights should be turned on for 18 to 24 hours a day.
  4. To water the cuttings we suggest using either plain distilled water or RO (reverse osmosis) water. It is recommended but not absolutely necessary to add a very mild fertilizer such as Olivia’s Cloning Solution or Wilder’s Clone Root Concentrate at this time. You can also use your hydroponic fertilizer at 1/4 strength. Don’t forget to adjust the pH of the water/nutrient solution at 5-5.5 for Rockwool and 5.5-6.5 for most everything else.
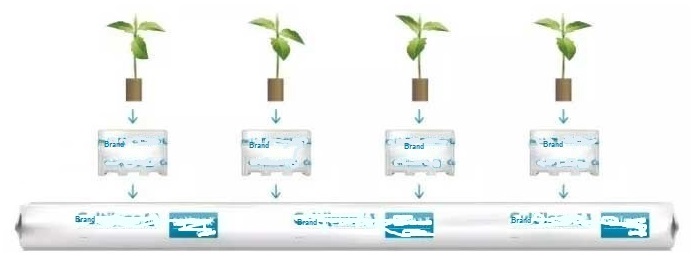
  5. Water the cuttings approximately every 2 days unless you live in a very dry climate in which case you will probably need to water every day. Never let the growing medium dry out. Do not let it set in water either, or the stem will rot. A great method for watering the cuttings is to use two trays, one with holes and the other without. Fill the tray without holes about half way with water and then slowly lower the tray with the holes and the cuttings, into it. Let sit for a few moments and then slowly raise the tray back out and let it drain. Small Hydroponic systems are available to automate the watering cycles of the cuttings, greatly reducing the amount of manual labor.
  6. After about a week you can test to see if your plants have started to root. Remove the humidity dome and leave it off for an hour or two. If the plants have not wilted at all then they probably have enough root development to support themselves. If no wilt is noticed leave the dome off. If they are wilted, spray the cuttings and dome and replace the dome on the tray. Once you have determined that the plants can support themselves, stop misting the cuttings and leave the humidity dome off. (NOTE: Once the plants have roots, constant misting can actually be harmful to the plants).
  7. If the lower leaves start to turn yellow and die, don’t worry. This is perfectly normal. It is the plant feeding off of itself to sustain life, moving valuable nutrient and water from the older growth. Do not remove any dead growth until the plant is well rooted. If you remove the dying growth the plant can starve and die completely.
  8. When the cuttings are completely rooted you can move them into your hydroponic system or the soil.
Final Notes

Cloning is easy once you get the hang of it. Just remember that every step must be done properly. Skipping a small, seemingly insignificant step can have very significant consequences. We suggest that the first time you take cuttings, take twice as many as you need. With a little practice this method of propagation should produce a 95 to 100 percent success ratio.

The use of distilled or RO water can drastically increase your success ratio, especially if you don’t have good quality water where you live. Do not continue using distilled water once the plants have gone into the hydroponic system or soil as it can lead to mineral deficiencies. RO or other chlorine/chloramine free water should be used at this time.

This is one tried and true method of propagation that works well on most types of plants. There are several other ways to clone your plants, including, air layering, dividing, and tissue culture. There are even hydroponic systems that do a good job of rooting cuttings using no growing medium at all. Once the cuttings form roots you simply transplant them to whatever growing medium you will be using.

JiffyPot Plug Strip 8cm x 8cm x 6cavity

JiffyPot Plug Strip 8cm x 8cm x 6cavity

JiffyPot Plug Strip 8cm x 8cm x 6cavity

An eco-friendly, beginner-friendly way to start seeds and root cuttings at home. Each strip contains 6 individual plug-pots, made from natural peat and wood pulp, offering a fully biodegradable and organic-approved alternative to plastic propagation trays.

Natural Materials for Stronger Roots

These Jiffy pots encourage healthier growth by allowing roots to naturally penetrate the pot walls. As the peat softens and breaks down, roots remain undisturbed, developing into a dense, fibrous system. This makes transplanting effortless — simply plant the entire plug into soil or a larger container without removing the seedling.

Perfect for Home Propagation

Jiffy strips are ideal for:

  • Starting herbs, vegetables, flowers, and ornamentals

  • Propagating sensitive species such as proteas

  • Rooting softwood cuttings

  • Indoor, balcony, and home greenhouse growing

Benefits for Home Growers

  • 100% biodegradable and organic-approved

  • No transplant shock — plant pot and all

  • Cleaner, more sustainable alternative to plastic

  • Supports strong early root development

  • Simple, reliable propagation for beginners and experts

JiffyPot Plug Strip 8cm x 8cm x 6cavity Handling Notes

Because the pots are made from peat and wood pulp, they naturally soften when wet. This is normal for biodegradable materials — just handle gently when fully saturated.

JiffyPot Plug Strip 4cm x 5cm x 12cavity

JiffyPot Plug Strip 4cm x 5cm x 12cavity

JiffyPot Plug Strip 4cm x 5cm x 12cavity

An eco-friendly, beginner-friendly way to start seeds and root cuttings at home. Each strip contains 12 individual plug-pots, made from natural peat and wood pulp, offering a fully biodegradable and organic-approved alternative to plastic propagation trays.

Natural Materials for Stronger Roots

These Jiffy pots encourage healthier growth by allowing roots to naturally penetrate the pot walls. As the peat softens and breaks down, roots remain undisturbed, developing into a dense, fibrous system. This makes transplanting effortless — simply plant the entire plug into soil or a larger container without removing the seedling.

Perfect for Home Propagation

Jiffy strips are ideal for:

  • Starting herbs, vegetables, flowers, and ornamentals

  • Propagating sensitive species such as proteas

  • Rooting softwood cuttings

  • Indoor, balcony, and home greenhouse growing

Benefits for Home Growers

  • 100% biodegradable and organic-approved

  • No transplant shock — plant pot and all

  • Cleaner, more sustainable alternative to plastic

  • Supports strong early root development

  • Simple, reliable propagation for beginners and experts

JiffyPot Plug Strip 4cm x 5cm x 12cavity Handling Notes

Because the pots are made from peat and wood pulp, they naturally soften when wet. This is normal for biodegradable materials — just handle gently when fully saturated.

Canna RootPlugs Loose Singles

Canna RootPlugs Loose Singles

Canna RootPlugs Loose Singles: A cultivator’s key to optimal cutting and seedling rooting. Designed for seamless integration with natural substrates like coco and peat-based mixes, these plugs promise rapid and vigorous root development. Ideal for kickstarting your crops, as they absorb water rapidly while maintaining precise humidity levels.

These plugs fit nicely into our Rootit 60 Cell Seedling Trays and 45 Cell Seedling Trays

  • Suitable for all seeds and cuttings
  • Quick and easy water absorption
  • Easy transplanting & fast rooting, cutting down pre-veg time
  • Perfect balance between aeration & moisture retention
  • Compatible with all natural substrates, such as coco and peat-based potting mixes
  • Fully compostable and degradable
  • Packaged dry for a longer shelf life

Application

  • Fully soak the CANNA Rootplug using plain water or liquid fertilizer with an EC of 1.5 and pH 5.5
  • Place plugs to allow excess water to drain away
  • Insert the cutting or seed into the pre-cut hole.

Canna RootPlugs Loose Singles Technical specs

  • Ingredients: Coco coir & Peat
  • EC: 0,6* and pH: 5.4-6.8 (pH and EC measured in 1:1.5 extract with demineralized water.)
  • Initial Moisture: 10-20%
  • Moisture Retention: 89%
  • Height: 48mm
  • Diameter: 40mm
  • Loose Singles DO NOT come with a seedling tray

Rooting plant cuttings is like performing magic tricks in the garden…

Valuable grow info from CANNA: HERE

You take a snip from a plant, wave your green thumb wand, and voilà! A new plant is born! Well, almost. It’s more like a science experiment meets a gardening adventure. You carefully select a healthy stem or leaf cutting, strip it of some excess baggage (aka extra leaves), and plop it into a cozy rooting medium—be it water or soil or a “glue plug”. Then, it’s all about providing the right conditions, like a plant spa day. You sprinkle a dash of sunlight, a splash of water, and a sprinkle of love. Before you know it, those little cuttings start sprouting roots like they’ve got places to grow! It’s like witnessing tiny miracles unfold right before your eyes. And hey, who knows, maybe one day you’ll have a whole garden of plants cloned from your green thumb genius. Just don’t forget to wear your magician’s hat while you’re at it!

Narrow Budget Large Propagator

Narrow Budget Large Propagator

Narrow Budget Large Propagator

The outside dimensions of this humidity dome is approx. 24 cm (H), 28 cm (W),  54 cm (L).

The INSIDE dimensions of the tray cavity is approx. 49cm x 24cm x 5cm. Dome lid is about 18cm high.

This narrower humidity dome DOES NOT fit larger seedlings trays and one will have to get creative with a box-cutter and some seedling trays to optimize the entire dome area in a lot of cases! Examples below…

Narrow Tray housing a 48-cell Seedling tray


Narrow Tray housing 6-cell Seedling trays


Using a humidity dome like the Narrow Budget Large Propagator when propagating plant clones or cuttings is an essential step to ensure successful rooting. Start by selecting healthy, disease-free parent plants and trim them to include a few leaves and a node where roots will emerge. Dip the cut end of each cutting into a rooting hormone to encourage faster root development and improve success rates. Insert the cuttings into a growing medium such as peat, perlite, or a soilless mix, ensuring each cutting is firm and stable. Place the cuttings inside a propagation tray and cover them with a humidity dome. The dome helps maintain high humidity levels, crucial for preventing the cuttings from drying out since they lack roots to absorb water.

Position the tray in a location with indirect light or use a grow light set to a low intensity to avoid scorching the tender cuttings. Aim to keep the humidity levels inside the dome around 90-100% for the first few days, then gradually reduce it to 80-85% as roots begin to develop. Monitor the moisture of the growing medium and mist the cuttings if necessary to maintain adequate humidity. Ventilate the dome periodically to allow fresh air exchange, which helps prevent mold and fungal growth. Once the cuttings have established roots, usually within 1-3 weeks, you can begin acclimating them to the external environment by gradually increasing the time the dome is removed each day.


Jiffy 7 Pellets 33mm

Jiffy 7 Pellets 33mm

Jiffy 7 Pellets 33mm are smaller…

…than the “regular sized” pellets that we are all familiar with, which makes them IDEAL FOR USE in ROOTIT Seedling Trays and 84-Cell Seedling Trays.

Jiffy 33mms inside Rootit Tray Insert

The pellets are made from Sphagnum peat from specially selected peat bogs. Lime and a special fertilizer with a low ammonium content is also added in order to stimulate growth. The pellets have a pH of approximately 5.3 and are wrapped in a thin, biodegradable net.

Jiffys are a popular ready to use media and are perfect for seed germination and also for rooting plant cuttings or clones.

The compressed pallets are approx. 33mm W x 40mm H when fully expanded. When exposed to water the Jiffy expands and the hydrated media is held within a degradable net. A small indent is provided on top of the disc to place the seed into once the disc has expanded.

Because the Jiffys have an outer netting to hold the media inside, they can be self-standing or growers can place them inside seedling trays for additional support. ( Handy when rooting cuttings )

Once a good root system has developed throughout the media, they can be directly planted into an NFT system or a larger plastic or fabric pot or even a rockwool slab.

Jiffy 7 Pellets 33mm are also very popular for soil growers and can be directly planted into the soil when the seedling is established.

Jiffy 7s are manufactured from sphagnum peat (and Coir fibers) harvested from carefully selected bogs which are subject to stringent internal and governmental controls to ensure minimal environmental impact. Peat is only taken from sources where the re-generation rate is greater than the harvest rate and the local ecology will not be adversely affected.


Eco-T Trichoderma Asperellum

Eco-T Trichoderma Asperellum

Eco-T Trichoderma Asperellum, sold in 40 g sachets.

Trichoderma are a group of fungi that are usually used by horticulturists as a natural defense against root damaging pathogenic fungi. Trichoderma can work wonders against pathogenic fungi that could otherwise destroy a healthy root system.

In fact, some of the most powerful root rot treatments available are formulas rich in trichoderma. Trichoderma can help maintain a healthy, vibrant root system by fending off potential threats. In most cases, trichoderma can be added to a feeding regiment to maintain a healthy trichoderma population.

After all, if there aren’t enough pathogens for the trichoderma to feed on, their population will diminish (not a bad thing). However, by maintaining a healthy population of trichoderma, a horticulturist can nip pathogenic fungi in the bud before they can negatively affect a plant’s root system.

– Source: Maximum Yield


KEY BENEFITS:

• Safe, non-toxic​
• For management of common soil borne diseases Pythium, Rhizoctonia, Phytophthora, Fusarium​
• Enhances root growth. Treated root systems have more feeder roots and root hairs​
• Improves seed germination offering faster seedling development.​
• Increases tolerance levels of abiotic (e.g. drought) and biotic (e.g. disease) stress conditions.​
• Maximizes the nutrient uptake efficiency and therefore helps to ensure the biggest return for the money spent on fertilizer.​
• Ideal for use in IPM programs and following soil sterilization​
• No residues and no withholding period after application. ​


DIRECTIONS FOR USE:

  • Apply as a soil drench to seedling trays, seed beds, potted plants, etc. at planting, and monthly thereafter.
  • Mix at a rate of 1g per liter water.
  • Mix the required amount of powder into a thin paste and add to the remaining bulk of your water.
  • Irrigate into the root zone after application.
  • Use within 6 hours of mixing.
  • Store at 4 – 10 degrees Celsius for maximum shelf life.
  • Do not leave powder or mixed solutions in the sun.
  • Read label and use accordingly.


Jiffy Preforma Plugs

Jiffy Preforma Plugs

Jiffy Preforma Plugs, also know as Jiffy Glue Plugs, are made from a fully bound, extremely uniform substrate, forming a structure with hundreds of micro air pockets evenly distributed throughout the plug. This stimulates superior fibrous root growth throughout the full depth and volume of the plug. The absence of a net around the plug allows the roots to develop optimally after potting on.

Cuttings grown in Preforma plugs produce notably cleaner callous than in other propagation substrates. The number of active root nodes formed at the callous is increased substantially, and stimulates fast multiple root development.

These “glue plugs” are manufactured and packed “wet” (they already contain moisture) and may have small colonies of mold inside of them, because they are a great substrate for flora to flourish in. In 99% of these cases, the fungi are saprophytic fungi and not harmful to plants (non-plant pathogenic). The two most well-known types are :  Trichoderma and Peziza.

When the plugs are placed in a normal nursery environment and watered a few times, the natural balance will be “normalized” and the fungi will disappear.

Plug size: Cylindrical, 30 mm x 50mm.

Our 48 cell seedling tray works well with these Jiffy Preforma Plugs, but you can also use other trays with holes similar to the plug dimensions.

Sold in packs of 10, 25, 50 and 100.

EazyPlug Plugs

EazyPlug Plugs

EazyPlug:

EazyPlug has, with its organic materials and our special way of bonding, a predetermined pH and EC value and a fixed air-to-water ratio. The EazyPlug is very easy to use. Just make sure that the plug always can drain the excess water and you cannot overwater it. Because the growing conditions are always optimal, the EazyPlug creates a very fast and powerful rooting and germination.

Germinating seeds

Fully moisten the plug and put your seed in the seed hole. Put a thin layer of fine coco coir on top of the plug (optional) and spray thoroughly with water. Make sure the plug can drain excess water and put it away in a humid and warm environment. Then wait to see the miracle happening. It is that simple!

Strike cuttings

Fully moisten the plug and put your cutting all the way into the cutting hole. Make sure the EazyPlug can drain excess water and put it away in a humid and warm environment. No rooting gel or powder is necessary.

Easy to transplant

The Eazy Plug will always remain firmly bonded together as a whole. This minimizes the risk on root damage during sorting, transplanting or replanting, thus preventing the plant from diseases.

Limitless shelf life

The Eazy Plug is supplied dried, making it clean and lightweight, with limitless shelf life and no risk of molds. It takes water back up very easily and quickly, retaining all of its former characteristics.

Eazy Plug Characteristics

Model : square plug
Air-to-water ratio : 20-80
Size : 3.5 x 3.5 x 3.0 cm
EC : 1.0 *
pH : 5.8 *
Volume : 0.035 L
Weight dried : 3 gr

Features

• Self regulating
• Easy to control
• Air pruning for substantial enlargement hair root mass
• Suitable for gradual drier cultivation

Compatibility

With all known growing media, like Rock Wool, coir pith, black and white
peat, garden soil, potting soil, soil-less mixes, bark fines and wood
mulch, sand and grit, wood fibers, perlite, pumice, clay and
vermiculite.

Employability

In hydroponic systems like eb&flow, drip-feed (recovery and nonrecovery), nutrient film technique, wicksystems, floating platforms,
deep water culture, aquaponic systems, dry hydroponics soil (indoor and outdoor)

Re-moistening time when completely dehydrated

Pouring from above < 10 seconds
Immerge < 10 seconds
Drip-feed – depends on the ratio
Watering from below < 45 seconds

Composting

100% in normal composting conditions, no industrial composting necessary.
Declared: bonding of components has no discernible effect on compostability.

Safety

Declared: material meets safety requirements of REACH.

Toxicity

Declared: non-toxic.

Denature after cultivation

Plug contains cutting stem and callus and can, in potency, contain a regenerative capacity and needs to be denatured by either a strong
acid or base, concentrated inorganic salts, organic solvents (alcohol or chloroform), radiation or heat.

How to strike cuttings with Eazy Plug

Step 1: Moisten the Eazy Plug
Allow the Eazy Plugs to fully suck up water with a pH of 5.8.
Let it drain out excess water. Do not squeeze out or dry the plugs. Eazy Plugs are self-regulating and will only hold the water they need for an optimum moisture level and an optimum air-to-water ratio. The plug will feel much heavier than Rock-Wool, but that’s normal.

Step 2: Take cutting 
For a more detailed explanation of taking cuttings click here.
Cut diagonally at a 45 degree angle just below a node or stem swelling, making sure to keep at least 3 nodes above your intersection.
Remove all but a couple of leaves. Scrape a little of the outer layer at the bottom of the cutting, but not all around. Cut off ⅓ of the top of remaining big leaves.

Step 3: Root stimulator
If you want to make use of a rooting powder (for example Rhizopon), dip the base of your fresh cut cutting into the rooting powder.

Step 4: Insertion in Eazy Plug
Insert the cutting into the Eazy Plug cutting hole. Make sure to insert it deeply enough, completely to the bottom of the cutting hole.

Step 5: Put into propagator
Put the tray with Eazy Plug into a propagator.
Close the lid of the propagator and shut any present air vents to keep the humidity inside the system.

Step 6: Remoistening and fresh air
Only remoisten the Eazy Plug after 3 days and keep on doing that every 3 days until the first appearance of roots.
Briefly open the propagator every day for a little fresh air.
Open the air vents slightly at the earliest after 4-5 days. Humidity should remain above 80%, as too much loss of humidity can seriously effect your success rate.

Step 7: Assure drainage of excess water
Make sure Eazy Plug is able to drain excess water at all times, so it can always self-regulate the correct amount of moisture. Never let the bottom of the Eazy Plug touch water, as the moisture absorption of Eazy Plug is exceptionally good and the Eazy Plug will quickly become too wet, which will have a negative effect on the rate of success.

Step 8: Open air vents
After the first roots have developed, you can gradually open the air vents further in order to acclimate the cutting to a less humid environment.

Step 9: Transplant
In 7-9 days from start your cutting should have grown its roots throughout the Eazy Plug and it is time to transplant them.

Conditions for developing roots:
1. Temperature: The optimum soil temperature for striking roots is 22º Celsius. Above 23º Celsius, you must consider a rise in failure rate.
2. RH (humidity): RH of 80-95% is perfect. As the cutting needs its energy for striking roots, the moisture level of leaves and stem should remain intact.
3. Light: In the first few days the cutting will form callus, from which the roots will start to grow. In this phase the cutting only needs tempered light with a broad spectrum (regular assimilation light). After the development of roots the amount of light can be gradually increased.

Garland XL High Dome Propagator

Garland XL High Dome Propagator 2022

The Garland XL High Dome Propagator is an unheated high dome propagator designed by Garland and to our knowledge one of the largest injection molded propagator on the market. The base tray of the Garland XL High Dome Propagator does not feature drainage holes, given that most users opt to fill the unit with smaller trays or pots or multi cell inserts.

PLEASE NOTE: BASE COLOR MAY BE EITHER GREEN OR BLACK, DEPENDING ON AVAILABILITY.

The lid of the Garland XL High Dome Propagator is Injection molded in crystal clear shatter resistant material. The lid features 2 adjustable ‘dial’ ventilators to control the humidity and optimize growing conditions

Dimensions – 58cm (l) x 40.5cm (w) x 22.5cm (h)

This is a Premium range of propagation, all made from high quality recycled plastics. These items are super strong and durable, with thicker wall sections offering extra rigidity. The trays are easy to clean and can even be put in a dishwasher. Although injection molded trays are generally more expensive than vacuum formed equivalents, they will easily last for 10 years or more.

Propagators are simple to obtain and provide an ideal start for young plants. A propagator holds in humidity and warm air while allowing seedlings to receive light. This an easy way to maintain a good environment for very young seedlings . However, since the cover prevents normal air movement (which is very important as it encourages young plants to grow strong stems),  seedlings should not be kept in a covered propagator for too long.

Once the young plants produce their second or third pair of leaves, or if they grow taller than about 7 cm with only the first pair, the cover of the propagator should be removed. A small oscillating fan on the lowest setting is a good way to give indoor plants the air movement they need, while outdoor plants can start to receive the natural outdoor air movement when they have reached this size.

Garland Small High Dome Propagator

Garland Small High Dome Propagator 2022

The Garland Small High Dome Propagator creates the perfect growing conditions for seeds and cuttings and is ideally sized for the windowsill.

The base tray features a generous 6cm planting depth, without any drainage holes, in order to promote healthy plant development. The lid is Injection molded in crystal clear shatter resistant material and features the easy to adjust ‘dial’ ventilator. The Garland Small Dome Propagator is an unheated high dome propagator which is perfect for cuttings because of the high dome.

This is a Premium range of propagation, all made from high quality recycled plastics. These items are super strong and durable, with thicker wall sections offering extra rigidity. The trays are easy to clean and can even be put in a dishwasher. Although injection molded trays are generally more expensive than vacuum formed equivalents, they will easily last for 10 years or more.

Dimensions – 23cm (l) x 17cm (w) x 18cm (h)

Vermiculite

Vermiculite

Vermiculite is a mined material. In its natural state it resembles mica rock, but when quickly heated, it expands due to the generation of interlaminar steam.
Vermiculite is most frequently used in conjunction with perlite as the two complement each other well.

  • 80%    porosity  
  • 10%    air space
  • 60%    moisture

Please note: Our Vermiculite is Medium – grade ( size ) Vermiculite

SOLD ACCORDING TO VOLUME WHEN FILLED.

Vermiculite is a popular hydroponic media favoured for its affordability.

It is made from a natural mineral that expands with the application of heat. The expansion process is called exfoliation which takes place in purpose built commercial furnaces.

Vermiculite is very lightweight and sterile.

It has excellent water retention and capillary action properties, which allows it to be fully hydrated simply by applying moisture from above or below.

When used in hydroponics, vermiculite is often mixed with perlite if the media becomes too water logged. This improves aeration and drainage.

In hotter climates vermiculite is often used by itself because of its higher water holding capacity. Vermiculite also tends to break down after a perod of time so is favoured for more short term crops such as lettuce.

Growers who use vermiculite usually have a system in place where they manually fill NFT growpots or cell trays with the media. A seed is then inserted into the top of the media and the pots and trays are placed into a propagation system like an Ebb and Flow table where they remain until the seedlings have emerged and are at a resonable size for transplanting into the main growing system.

The root system of the seedling holds the media together so individual root bound ‘plugs’ can be removed from the propagating cell trays and placed directly into the plant holes of an NFT gully if required.

If  NFT growpots are used, the media filled growpot is placed into the plant hole in the gully and the pot acts as additional support for the plant. The growpot also prevents light entering the gully which can promote algal growth

Rockwool Growing Medium

Rockwool Growing Medium

Rockwool Growing Medium can hold large quantities of water and air that aid root growth and nutrient uptake in hydroponics; the fibrous nature also provides a good mechanical structure to hold the plant stable. It is used primarily for drip hydroponic systems.

Rockwool is made by melting a combination of rock and sand and then spinning the mixture to make fibers which are formed into different shapes and sizes.

Rockwool  has a pH of roughly 7.8. Please see ‘Preparation’ further down…


Rockwool-Diagram

As can been in the diagram above, rooted Rockwool Plugs can be placed into Rockwool Cubes and the rooted cubes can then be placed on top of Rockwool Slabs. The roots will then grow into the slab over time.

Dimensions:

Square Rockwool Plugs: (36 mm x 36 mm (Top) x 40 mm (H)) – sold individually.

77-Plug Tray: (Tray Dimensions: 53 cm x 31 cm x 3 cm) filled with 77 x Plugs.

Rockwool Cubes:
Smaller sized cubes that can be placed on top of a Rockwool slab: 100 mm x 100mm x 65 mm (H).
Larger, higher cubes (A.K.A. Hugo Blocks): 150 mm x 150 mm x 150 mm

Rockwool Slab: 100 cm x 20 cm x 7.5 cm.

Rockwool Slab NARROW : 100 cm x 15 cm x 7.5 cm.


Disclaimer: Brand of horticultural rockwool may differ from time to time, depending on availability.

Rockwool Growing Medium Preparation

Items you will need:

Rockwool Cubes have a pH of roughly 7.8. This is pretty alkaline, yet our plants prefer to grow in a slightly more acidic environment (between 5.5 – 6.5). In order to prepare our Rockwell cubes for the seeds, we need to soak them in some pH adjusted water, that way they have everything the seeds need to germinate and sprout; water and a slightly acidic environment.

Hydrate And Stabilize The Rockwool Cubes

Get a bowl or some other container that is big enough to fill with water and have room left for your Rockwool cubes.

Fill the container/bowl with water from your tap.

Using either a pH test kit or a pH meter, determine the pH of the water. Water comes out pretty alkaline, usually around 7.4, so you will need to acidify it a little bit to bring that pH down to the desired level. Aim for as close to a pH of 5.5-6 as you can get.

To accomplish this, use pH down. Add to the water in small increments (a drop), and test the water to see where the pH is. Continue doing this until you have a pH of 5.5-6.

Important: Do not let the pH of the water go below 5.  A pH this low will damage the fibers of the Rockwool Cube

Now that we have the pH adjusted water, it’s time to stabilize and hydrate the Rockwool cubes in it. Insert the Rockwool Cubes into your container and let them soak for roughly 1 hour. Once the hour is up, the cubes will be big and fat with water.

DO NOT SQUEEZE THEM TO DRAIN ANY WATER

Rockwool Cubes are designed to maintain the correct water to air ratio and squeezing them may damage their structure.

Using Slabs

The slabs are wrapped and sealed in plastic. Most people will start their plants in Rockwool cubes and then transplant them to the slab. To transplant a Rockwool cube to the slab, simply cut an X that is the same size as the cube, in the plastic on top of the slab. You then lift the plastic tabs and set the cube on top of the slab. You may want to pin the cube temporarily with a plastic spike until the roots grow down into the slab.