Search Results for: 100% CCBA Exam Coverage 🏌 Exam Dumps CCBA Zip 🧜 CCBA Real Exam 🔃 Search for [ CCBA ] and easily obtain a free download on ⏩ www.pdfvce.com ⏪ 💐Valid CCBA Test Questions
Renegade Seed Company 3+1 packs – Photo Mando
Renegade Seed Company 3+1 packs – Auto Bouncing Betty
Renegade Seed Company 3+1 packs – Auto Harambe
Renegade Seed Company 3+1 packs – Auto Coyote Cookies
Renegade Seed Company 3+1 packs – Auto Citrus Hill CBD
Renegade Seed Company 3+1 packs – Photo Berry McLovin
EazyPlug Plugs
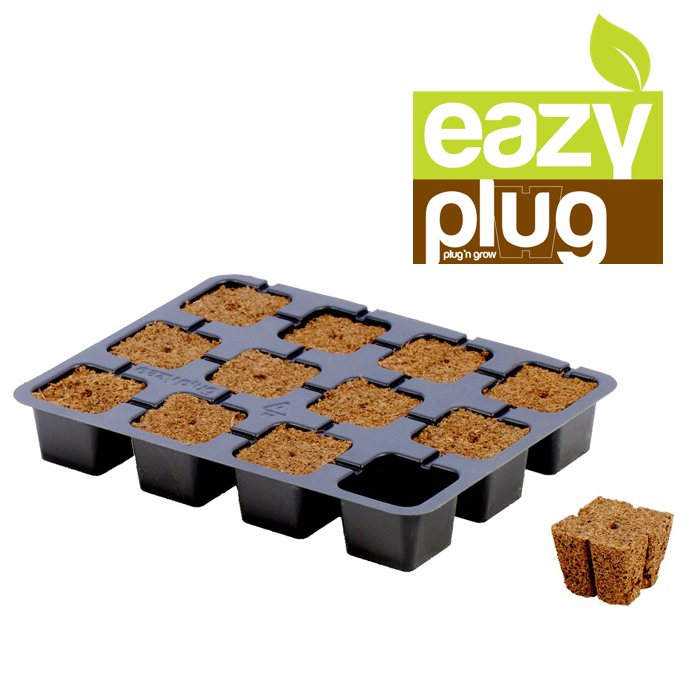
EazyPlug: 100% success rate
EazyPlug has, with its organic materials and our special way of bonding, a predetermined pH and EC value and a fixed air-to-water ratio. The EazyPlug is very easy to use. Just make sure that the plug always can drain the excess water and you cannot overwater it. Because the growing conditions are always optimal, the EazyPlug creates a very fast and powerful rooting and germination.
Germinating seeds
Fully moisten the plug and put your seed in the seed hole. Put a thin layer of Eazy Mixx top-layer soil (arriving next year) or Promix on top of the plug and spray thoroughly with water. Make sure the plug can drain excess water and put it away in a humid and warm environment. Then wait to see the miracle happening. It is that simple!
Strike cuttings
Fully moisten the plug and put your cutting all the way into the cutting hole. Make sure the EazyPlug can drain excess water and put it away in a humid and warm environment. No rooting gel or powder is necessary.
Easy to transplant
The Eazy Plug will always remain firmly bonded together as a whole. This minimizes the risk on root damage during sorting, transplanting or replanting, thus preventing the plant from diseases.
Limitless shelf life
The Eazy Plug is supplied dried, making it clean and lightweight, with limitless shelf life and no risk of molds. It takes water back up very easily and quickly, retaining all of its former characteristics.
Eazy Plug Characteristics
Model : square plug
Air-to-water ratio : 20-80
Size : 3.5 x 3.5 x 3.0 cm
EC : 1.0 *
pH : 5.8 *
Volume : 0.035 L
Weight dried : 3 gr
Features
• Self regulating
• Easy to control
• Air pruning for substantial enlargement hair root mass
• Suitable for gradual drier cultivation
Compatibility
With all known growing media, like Rock Wool, coir pith, black and white
peat, garden soil, potting soil, soil-less mixes, bark fines and wood
mulch, sand and grit, wood fibers, perlite, pumice, clay and
vermiculite.
Employability
In hydroponic systems like eb&flow, drip-feed (recovery and nonrecovery),
nutrient film technique, wicksystems, floating platforms,
deep water culture, aquaponic systems, dry hydroponics
soil (indoor and outdoor)
Re-moistening time when completely dehydrated
Pouring from above < 10 seconds
Immerge < 10 seconds
Drip-feed – depends on the ratio
Watering from below < 45 seconds
Composting
100% in normal composting conditions, no industrial composting
necessary.
Declared: bonding of components has no discernible effect on
compostability.
Safety
Declared: material meets safety requirements of REACH.
Toxicity
Declared: non-toxic.
Denature after cultivation
Plug contains cutting stem and callus and can, in potency, contain a
regenerative capacity and needs to be denatured by either a strong
acid or base, concentrated inorganic salts, organic solvents (alcohol
or chloroform), radiation or heat.
How to strike cuttings with Eazy Plug
Step 1: Moisten the Eazy Plug
Allow the Eazy Plugs to fully suck up water with a pH of 5.8.
Let it drain out excess water. Do not squeeze out or dry the plugs. Eazy Plugs are self-regulating and will only hold the water they need for an optimum moisture level and an optimum air-to-water ratio. The plug will feel much heavier than Rock-Wool, but that’s normal.
Step 2: Take cutting
For a more detailed explanation of taking cuttings click here.
Cut diagonally at a 45 degree angle just below a node or stem swelling, making sure to keep at least 3 nodes above your intersection.
Remove all but a couple of leaves. Scrape a little of the outer layer at the bottom of the cutting, but not all around. Cut off ⅓ of the top of remaining big leaves.
Step 3: Root stimulator
If you want to make use of a rooting powder (for example Rhizopon), dip the base of your fresh cut cutting into the rooting powder.
Step 4: Insertion in Eazy Plug
Insert the cutting into the Eazy Plug cutting hole. Make sure to insert it deeply enough, completely to the bottom of the cutting hole.
Step 5: Put into propagator
Put the tray with Eazy Plug into a propagator.
Close the lid of the propagator and shut any present air vents to keep the humidity inside the system.
Step 6: Remoistening and fresh air
Only remoisten the Eazy Plug after 3 days and keep on doing that every 3 days until the first appearance of roots.
Briefly open the propagator every day for a little fresh air.
Open the air vents slightly at the earliest after 4-5 days. Humidity should remain above 80%, as too much loss of humidity can seriously effect your success rate.
Step 7: Assure drainage of excess water
Make sure Eazy Plug is able to drain excess water at all times, so it can always self-regulate the correct amount of moisture. Never let the bottom of the Eazy Plug touch water, as the moisture absorption of Eazy Plug is exceptionally good and the Eazy Plug will quickly become too wet, which will have a negative effect on the rate of success.
Step 8: Open air vents
After the first roots have developed, you can gradually open the air vents further in order to acclimate the cutting to a less humid environment.
Step 9: Transplant
In 7-9 days from start your cutting should have grown its roots throughout the Eazy Plug and it is time to transplant them.
Conditions for developing roots:
1. Temperature: The optimum soil temperature for striking roots is 22º Celsius. Above 23º Celsius, you must consider a rise in failure rate.
2. RH (humidity): RH of 80-95% is perfect. As the cutting needs its energy for striking roots, the moisture level of leaves and stem should remain intact.
3. Light: In the first few days the cutting will form callus, from which the roots will start to grow. In this phase the cutting only needs tempered light with a broad spectrum (regular assimilation light). After the development of roots the amount of light can be gradually increased.
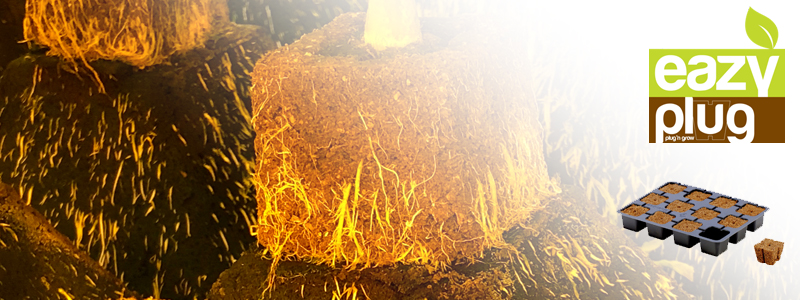
EazyPlug Pyramid

Stronger, healthier plants in less time
The EazyPlug Pyramid is an amazing new development for the horticultural sector. Its optimized growing volume, equivalent to 13,5 ltr (3 gal), is enough for a whole crop cycle. It is also enhancing all of the unsurpassed characteristics of the Eazy Plug. Like predetermined and buffered pH and EC values, or the completely self regulating air-to-water ratio. You could truly say that the Eazy Pyramid is the next evolution in organic growing.
Dense root structure caused by air pruning
EazyPlug Pyramid is bonded firmly to be used without a plastic wrapping. This way roots will stop growing when meeting air at the outside of the block. As a result the roots will start growing new root branches inside the block, seriously increasing the number of absorbing rootlets in the block and creating a much more dense rooting system. It is called the air pruning effect. This way the absorption capability of the root structure is maximized for the best possible intake of nutrients and fluids.
Limitless shelf life
The EazyPlug Pyramid is supplied dried, making it clean and lightweight, with limitless shelf life and no risk of molds. A dry EazyPlug Pyramid takes water back up very easily and quickly, retaining all of its former characteristics. So altogether easy to use.
Fast and healthy plant development
As a result the effective root surface area of your plant will be much bigger, and with it the uptake of water with the beneficial nutrients you are adding. Your plant will grow faster, will be healthier and produce higher yields than in any other available growing medium.
EazyPlug Pyramid characteristics
Model : Pyramid, Regular
Weight dried : 0.5 kg
Size moist: 25 x 25 x 15 cm
Air-to-water ratio : 20-80
Volume : 4.5 L
EC : 1.0 *
pH : 5.8 *
Model : Pyramid, Short Cycle
Weight dried : 0.12 kg
Size moist: 12 x 12 x 10 cm
Air-to-water ratio : 20-80
Volume : 1.4 L
EC : 1.0 *
pH : 5.8 *
• Self regulating
• Easy to control
• Air pruning for substantial enlargement hair root mass
• Suitable for gradual drier cultivation
Eazyplug Pyramid’s are Sold Individually
Compatibility
With all known growing media, like Rock Wool, coir pith, black and white
peat, garden soil, potting soil, soil-less mixes, bark fines and wood
mulch, sand and grit, wood fibers, perlite, pumice, clay and
vermiculite.
Employability
Hydroponic systems like eb & flow, drip-feed (recovery and non-recovery),
nutrient film technique, wick systems, floating platforms,
deep water culture, aquaponic systems, dry hydroponics,
soil (indoor and outdoor)
Re-moistening time when completely dehydrated
Pouring from above < 2 minutes
Immerge < 2 minutes
Drip-feed – depends on ratio
Watering from below < 60 minutes
Reusable
The REGULAR SIZED Eazy Pyamid is reusable. Just sterilize and reuse
Composting
100% in normal composting conditions, no industrial composting
necessary.
Declared: bonding of components has no discernible effect on
compostability.
Safety
Declared: material meets safety requirements of REACH.
Toxicity
Declared: non-toxic.
Recycling after cultivation
The pyramid does not contain any plant residue with regenerative
capacity and can be recycled by:
Using as soil improvement
Adding composting initiator and pack as compost bags
Re-usage after steam-clean or microwave-clean
Cultivation details
For air pruning effect, usage of the pyramid without sleeve is strongly
advised. In such case photosynthetic algae like green algae can occur.
This does not effect plant life and is only an optical issue. Green algae
can be easily treated with fungicides and/or a light copper solution.
AC Infinity AC-ADL8 UIS Type B Lighting Adaptor
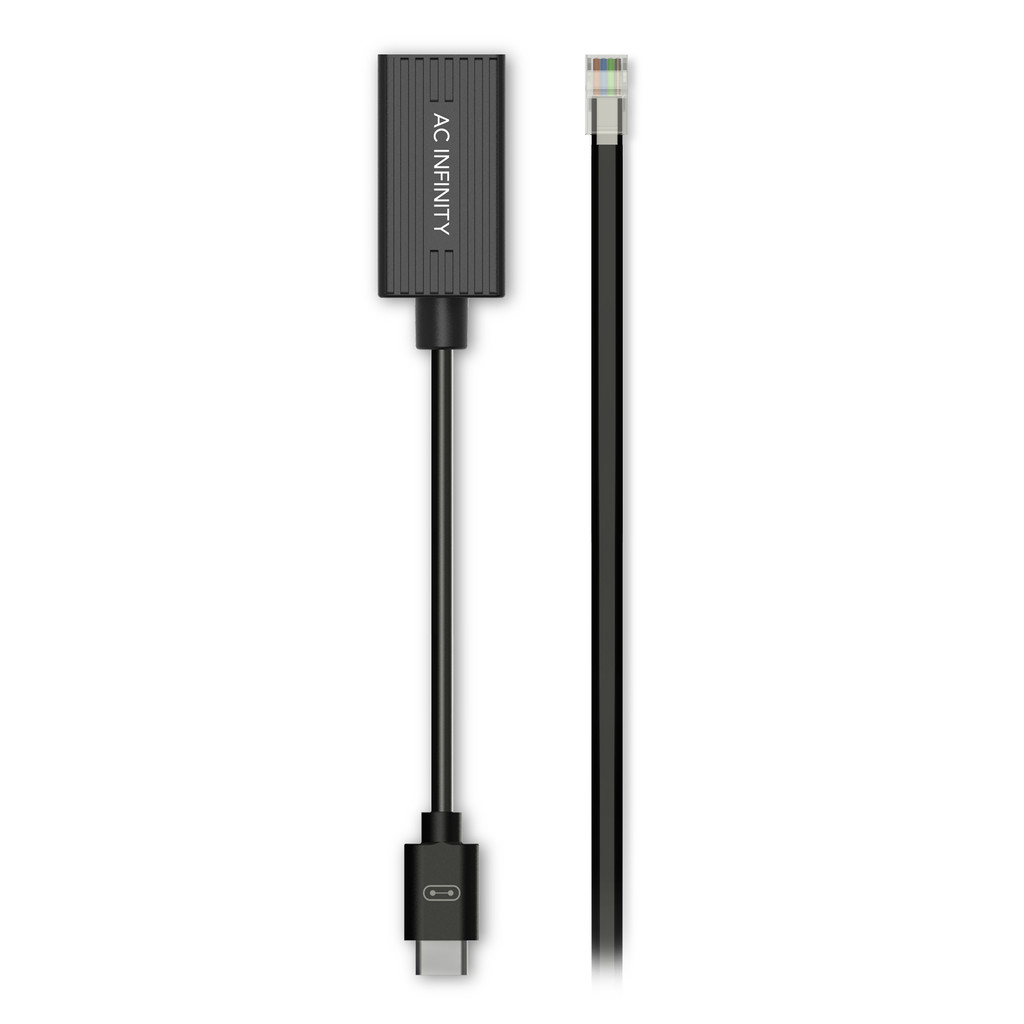
AC Infinity AC-ADL8 UIS Type B Lighting Adaptor
- Enables UIS controllers to work with RJ11 and RJ12 connector grow lights with resistor dimmers.
- Control previous gen grow lights using resistor dimming technology. Compatibility list coming soon.
- Automate light cycles, scheduling, and climate triggers; unlock data graphs and alert notifications via our app.
- Monitor and control your grow on your phone from anywhere with our latest WiFi-enabled UIS controllers.
- Our ecosystem of controllers and grow equipment work together to create your plant’s ideal environment.
AC Infinity AC-ADL8 UIS Type B Lighting Adaptor PRODUCT DESCRIPTION
An adapter dongle designed to connect our UIS controllers to grow lights from other manufacturers. The Type-B adapter works only with grow lights with RJ11 and RJ12 connectors that use resistor dimmers; see below for compatibility list. By connecting your lighting fixture to one of our controllers, you can automate it with light cycles, scheduling, and dynamic responses to temperature and humidity. It will also join the UIS platform of smart controllers and grow equipment, all working together to create the ideal environment for your plants. Our WiFi-enabled smart controllers allow you to monitor and control your grow on your phone from anywhere while providing data charts and alert notifications via the AC Infinity app. Once your first light has connected to the controller, you can control additional RJ11 or RJ12 connector lights using that manufacturer’s daisy chain method. Includes a 10-foot RJ11/12 extension cord. Compatible with our controllers with UIS connectors like CONTROLLER 69, CONTROLLER 69 WiFi and CONTROLLER 69 PRO; an additional UIS device is required to power the controller.
LIGHT COMPATIBILITY
Most RJ11 and RJ12 connector grow lights using the resistor dimming standards can work with the Type-B lighting adapter. However, each light manufacturer’s dimming protocol is different so some may have a limited dimming range with our controllers. Lights that have spectrum control or utilize a PWM or voltage protocol are not compatible. See our other lighting adapters or the UIS control plug if your light is not compatible. A firmware update via the AC Infinity app may be required for your UIS controller to work with this dongle. Compatible lights include, but are not limited to:
- CHILLED TECH – GROWCRAFT Series that are compatible with their Push-Lock Dimmer to RJ12 Adapter (Model GC-DIM-TM-RJ12-1).
- HLG – All models with RJ 0-10V Dimming box, including those with MEANWELL drivers.
- MARS HYDRO – FC, FC-E, SP, and TS Series Models with MOSO/MEANWELL drivers. See our Type-A adapter if your model has a MARS HYDRO driver.
- MIGRO – ARAY Series
- SPIDER FARMER – SE and SF Series Models with MOSO/MEANWELL drivers. See our Type-A adapter if your model has a SPIDER FARMER driver.
- MORE MODELS ADDED SOON!
All BRANDS listed above are registered trademarks of their respective companies. AC Infinity does not claim any affiliation with these brands.
Efekto Kumulus WG Fungicide
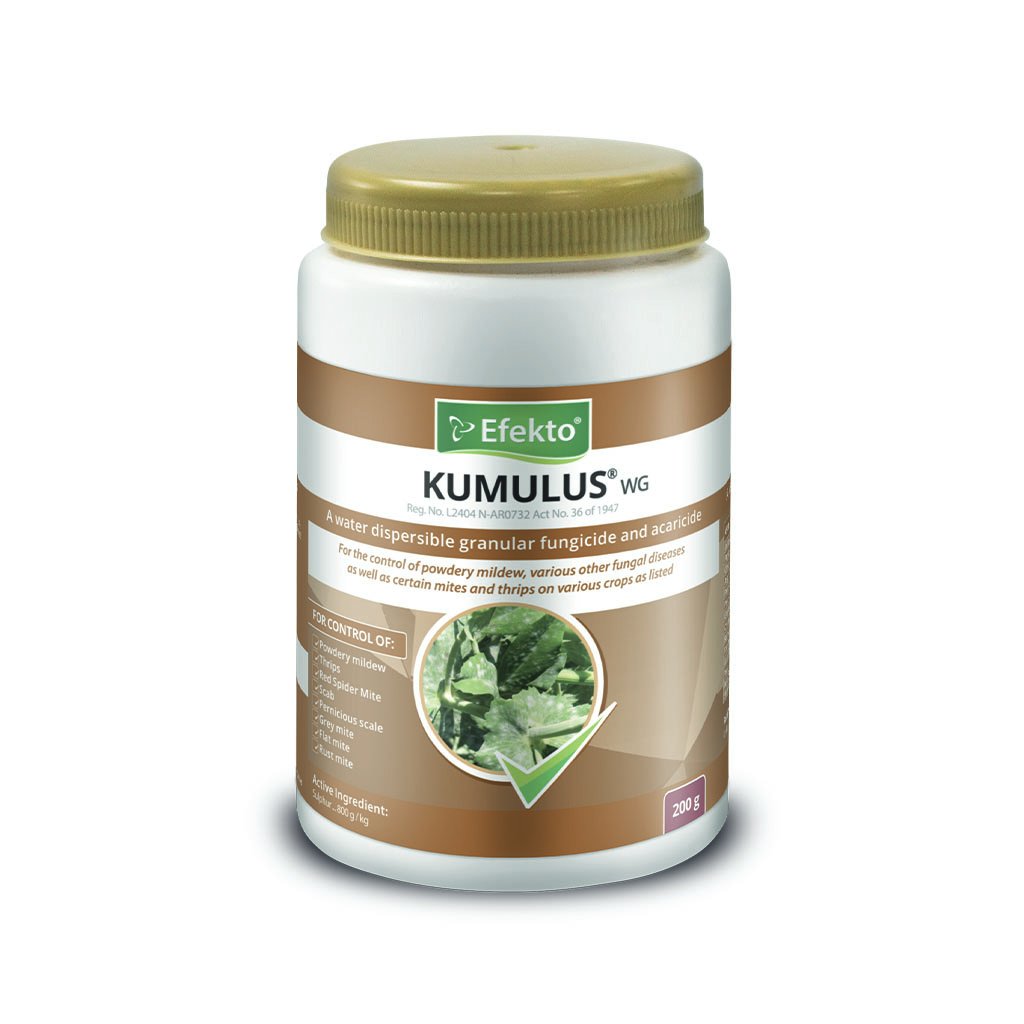
Efekto Kumulus WG Fungicide – 200g
A water dispersible granular fungicide and acaricide for the control of powdery mildew, various other fungal diseases as well as certain mites and thrips on various crops as listed. Also for the control of pernicious scale on dormant roses.
Active Ingredient: Sulphur 800 g/kg
For more directions for the use of Efekto Kumulus WG Fungicide, please click here to download the PDF.
| Name of Pest: (Crop and Disease) | Product Measurement: | Usage Description: |
| Avocado Thrips (Thripidae spp) | 15 g product – 10 l water |
|
| Papaya Powdery mildew (Ovulariopsis papayae) | 15 g product – 10 l water |
|
| Citrus Flat mite (Brevipalpus californicus), Grey mite (Calcarus citrifolii), Silver mite (Hemitarsonemus latrus), Rust mite (Phyllocoptruta oleivora) and Thrips (Scirtothrips aurantii). | 7,5 g product – 10 l water for citrus flat mite (brevipalpus californicus); or
10 g product – 10 l water for grey mite (calcarus citrifolii); or 12,5 g product – 10 l water for silver mite (hemitarsonemus latrus); or 15 g product – 10 l water for rust mite (phyllocoptruta oleivora) and thrips (scirtothrips aurantii). |
|
| Apples and Pears, Budmite (Eriophyes pyri), Powdery mildew (Podosphaera leucotrich) and Scab (Venturia inaequalis) | 10 g – 20 g product – 10 l water; or
300 g – 400 g product product – 100 l water for pre-blossom stage; or 250 g product – 100 l water for early post-blossom stage; or 200 g product – 100 l water for late post-blossom stage |
|
| Peaches, Plums, Apricots, Rust (Tranzchelia spp) | 7,5 g – 15 g product – 1o l water |
|
| Peaches – Powdery mildew (Oidium leucoconium) | 10 g – 15 g product – 10 l water |
|
| Grape vines – Powdery mildew (Uncinula necator) | 15 g product – 10 l water |
|
| Beans Thrips (Scirtothrips occipitalis) and Red Spider Mite (Tetranychus urticae) (cinnabarinus) | 20 g product – 10 l water. |
|
| Tomatoes Rust mite (Aculus lycopersicae) | 20 g product – 10 l water |
|
| Cucurbits Powdery mildew (Oidium erysiphoides) | 15 g product – 10 l water |
|
| Peas Powdery mildew (Erysiphe pisi) | 15 g product – 10 l water |
|
| Ornamentals Thrips (Thripidae spp.), Red Spider Mite (Tetranychus urticae) (cinnabarinus) and Powdery mildew (Oidium spp.) | 15 g – 20 g product – 10 l water |
|
| Roses Flower Carpet, Blossom Magic, Iceberg, Sharifa, Double Delight and Pernicious scale (Quadraspidiotus perniciosus) | 120 g product – 10 l water |
|
Surgical Scalpels
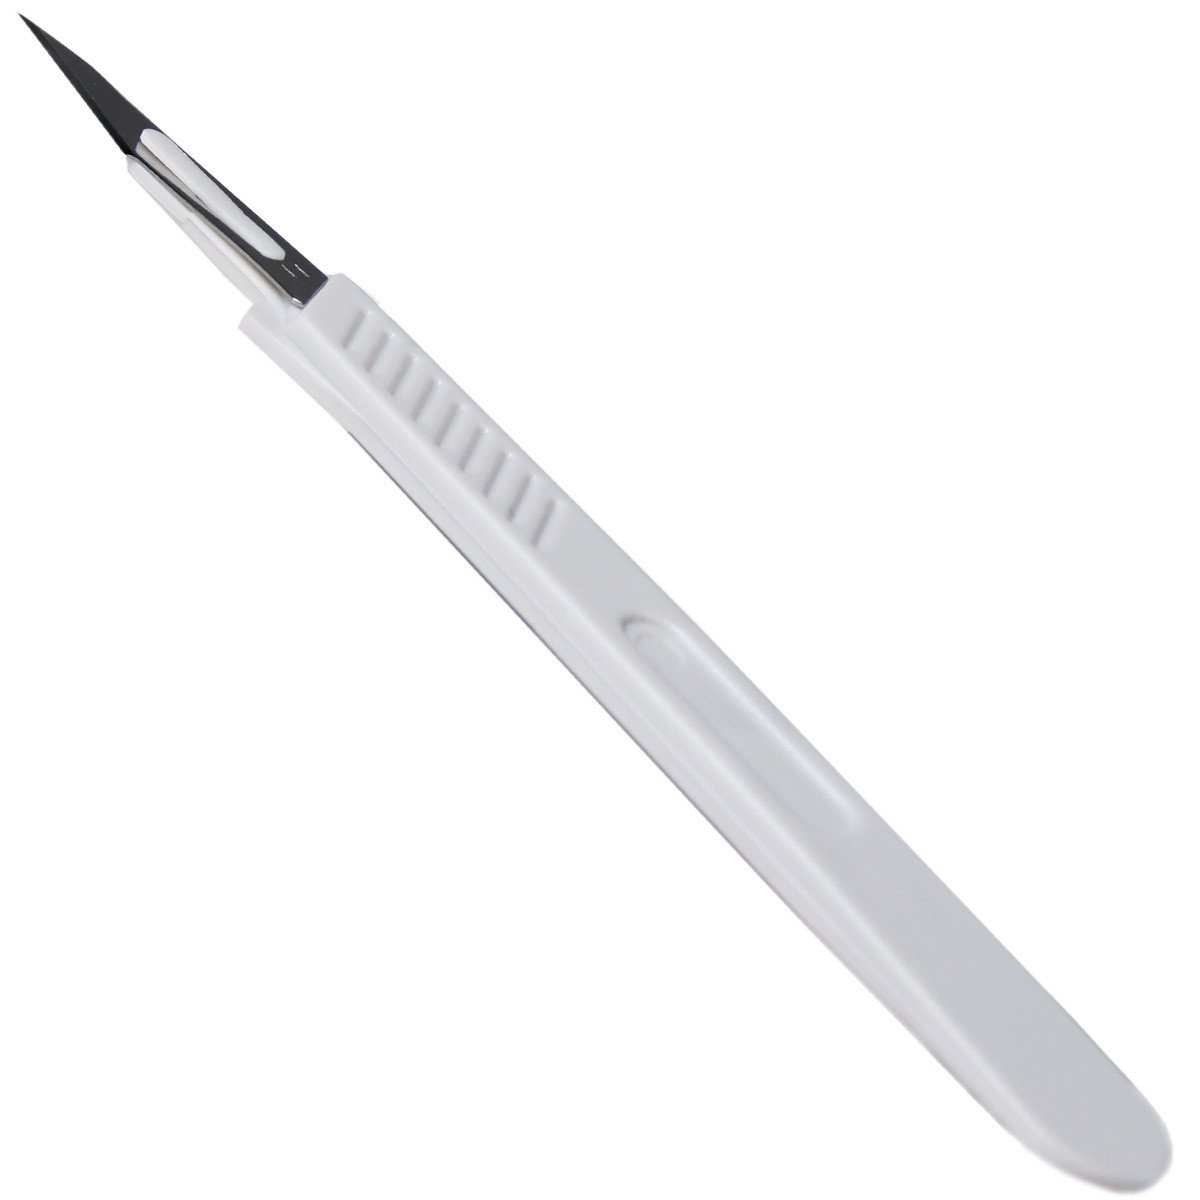
Sterile surgical scalpels are used to take cuttings from plants- fresh Surgical Scalpels need to be used every time that you decide to take new cuttings.
Taking cuttings is one of the most popular ways to propagate a plant. Also referred to as cloning, it offers the ability to get multiple plants that are genetically identical to the mother plant. Many people feel intimidated by the process, and are a bit leery to attempt it. If you are one of those people, relax, it’s a relatively easy process.
What follows are step by step instructions for a simple procedure that works for both hardwood and softwood plants. (NOTE: Not all plants can be cloned in this manner. Some plants are virtually impossible to get cuttings from, even for experts.)
Why Take Cuttings?
There are several reasons that you may want to clone your plant, one being, that it does not require seeds. Cloning may be your only option for obtaining a certain variety of plant when no seeds are available. Another reason is to maintain consistent quality control of your crop. Every seed, like every human being, is slightly different. Aside from identical twins, genetically, no two people are exactly the same. DNA works in plants the same way it does in humans. So if you have a plant that is just what you want it to be, you can take cuttings and have as many perfect clones of your special plant as you want.
Another big factor which makes cloning so popular is that in most cases, it’s much faster than starting from seed. The majority of plant species will produce a rooted, growing plant from a clone before the seeds of the same species can even sprout, saving a lot of time.
What You’ll Need
- A SINGLE EDGE RAZOR BLADE – Must be sharp!!
- BACK-UP BLOCK – A piece of Styrofoam, wood or plastic approximately 2″x2″.
- SHOT GLASS – Or similar small glass or plastic container.
- GROWING MEDIUM – Jiffys, Rockwool or Oasis cubes, Pro-mix, coconut fiber or one of several other suitable growing media.
- SEED TRAY WITH CLEAR HUMIDITY DOME
- ROOTING HORMONE – You will need a good quality gel, liquid or powdered rooting hormone. Although you can use a powdered rooting hormone, in our opinion they are much harder to work with resulting in a reduced success rate.
- SPRAY BOTTLE WITH WATER
- RUBBING ALCOHOL
Before You Start
This might sound obvious, but you should only take cuttings from healthy plants. The healthier the mother plant, the better success you will have with your clones. You should take a few more cuttings than you need and then select the best ones to use and dispose of the rest.
You will need to leach the nitrogen out of the mother plant(s) by watering them heavily with pH adjusted water only (no fertilizer) for two or three days before you take the cuttings. This is an important step because the nitrogen stored in the plant will retard rooting.
Decide what you are going to use for growing medium. Most people use Jiffys, Rockwool or Oasis cubes. You can also use many different mediums successfully. Use plastic cups with holes cut in the bottom to hold coconut fiber, a Perlite & Vermiculite mix or other loose type growing medium. .You will need to pre-soak your growing medium before you start, using pH balanced water. Distilled water is the best thing to use, but any good, chlorine free water source will work. (NOTE: Most growing medium need to be soaked in pH 5.5 to pH 6.5 water. Rockwool needs to be soaked for 24 hours with water adjusted to a pH of 4.5 to 5.5).
Make a hole in the top of the growing medium which is about the same size or a little smaller than the stem of the cutting. You do not want to force the cutting into the growing medium.
It is critical that you sterilize everything before you start, because cuttings are very susceptible to fungus, viruses and diseases until they root. Use rubbing alcohol on your hands, the razor blade and the cutting block. Rinse the shot glass (or whatever you are using) with alcohol, dry it and then fill it 3/4 full with rooting hormone, and set it aside for now.
Work quickly but carefully. When you make the cut that separates the clone from the mother, you must get it into the rooting hormone as quickly as possible to prevent air from getting pulled into the stem. Please be careful not to cut yourself with the razor blade. (The lawyers made us say that).
Take the Cuttings

 Take a growing tip from your plant 3″ to 6″ long with at least one leaf internode, two is better but not always possible. (A leaf internode is where the leaf connects to the stem, See diagram 1).
 With a Sharp single edge razor blade, carefully cut off one or two leaves (or small branches) flush with the stem. (See diagram 2).
 Make a cut approximately 1/4″ below the internode(s) where you just trimmed the leaves. Cut at a 45 to 60 deg. angle. (See diagram 3). Hold the back-up block tightly behind the stem where you are going to cut. This supports the stem and protects your fingers. Make this cut as quick and clean as you can as you do not want to tear or crush the stem.
 Quickly insert the cutting into the rooting hormone (See diagram 4). If you are using a liquid hormone you can let the cutting soak for 30-60 seconds. With a gel type hormone you just dip the cutting and then insert it into the growing medium. If you are using a powdered hormone you need to wet the stem with water and then carefully roll it in the powder.
 Gently insert the cutting into the growing medium (see diagram 5). Do not push the cutting all the way thru the medium. You need to leave room for the roots to develop. Make sure that the cut(s) you made at the leaf internode(s) are below the surface of the growing medium.
- Lightly pack the growing medium up against the cutting. Make sure there is good contact between the cutting and the growing medium.
Care and Feeding Instructions
You have successfully taken cuttings. Now the challenge is to keep them alive long enough to root. The cuttings are obviously very vulnerable at this point and must be handled with care. If you follow the steps below you should have few problems.
- Once you have your cuttings in the growing medium, mist them with the spray bottle filled with water and place them in the tray. Mist the inside of the clear humidity dome and place the dome over the tray. (NOTE: The cuttings need some ventilation and a couple of small holes in the dome will usually do the trick).
- Remove the dome and mist the cuttings 2 or 3 times a day. This keeps the cuttings from drying out and also changes the air under the dome. This step is critical as the cuttings have no way to replenish lost moisture until they develop roots. Mist the inside of the dome and replace on tray. The humidity under the dome needs to be about 90% until roots appear on the cuttings. (NOTE: Be careful that the air under the dome doesn’t get too warm. If it does, you may have to increase the amount of venting, as well as the number of mistings per day). Cuttings need to be kept between 72° and 80° Fahrenheit. Too hot or too cold will inhibit root growth. If you live in a cold climate you may need a heated propagation mat.
- The cuttings will require lighting at this time. Dappled sunlight is fine if you are leaving your cuttings outside. Indoors, we recommend fluorescents. They are cooler and more energy efficient then metal halides and provide equal to superior results. Keep in mind that fluorescent lights don’t penetrate so you must keep the lights 1-2 inches above the plants.If you are using a Metal Halide or High Pressure Sodium fixture you must keep the cuttings much further away (2 – 3 feet away for 175 – 400 watt bulbs and 4 – 6 feet for a 1000 watt bulb).The lights should be turned on for 18 to 24 hours a day.
- To water the cuttings we suggest using either plain distilled water or RO (reverse osmosis) water. It is recommended but not absolutely necessary to add a very mild fertilizer such as Olivia’s Cloning Solution or Wilder’s Clone Root Concentrate at this time. You can also use your hydroponic fertilizer at 1/4 strength. Don’t forget to adjust the pH of the water/nutrient solution at 5-5.5 for Rockwool and 5.5-6.5 for most everything else.
- Water the cuttings approximately every 2 days unless you live in a very dry climate in which case you will probably need to water every day. Never let the growing medium dry out. Do not let it set in water either, or the stem will rot. A great method for watering the cuttings is to use two trays, one with holes and the other without. Fill the tray without holes about half way with water and then slowly lower the tray with the holes and the cuttings, into it. Let sit for a few moments and then slowly raise the tray back out and let it drain. Small Hydroponic systems are available to automate the watering cycles of the cuttings, greatly reducing the amount of manual labor.
- After about a week you can test to see if your plants have started to root. Remove the humidity dome and leave it off for an hour or two. If the plants have not wilted at all then they probably have enough root development to support themselves. If no wilt is noticed leave the dome off. If they are wilted, spray the cuttings and dome and replace the dome on the tray. Once you have determined that the plants can support themselves, stop misting the cuttings and leave the humidity dome off. (NOTE: Once the plants have roots, constant misting can actually be harmful to the plants).
- If the lower leaves start to turn yellow and die, don’t worry. This is perfectly normal. It is the plant feeding off of itself to sustain life, moving valuable nutrient and water from the older growth. Do not remove any dead growth until the plant is well rooted. If you remove the dying growth the plant can starve and die completely.
- When the cuttings are completely rooted you can move them into your hydroponic system or the soil.
Final Notes
Cloning is easy once you get the hang of it. Just remember that every step must be done properly. Skipping a small, seemingly insignificant step can have very significant consequences. We suggest that the first time you take cuttings, take twice as many as you need. With a little practice this method of propagation should produce a 95 to 100 percent success ratio.
The use of distilled or RO water can drastically increase your success ratio, especially if you don’t have good quality water where you live. Do not continue using distilled water once the plants have gone into the hydroponic system or soil as it can lead to mineral deficiencies. RO or other chlorine/chloramine free water should be used at this time.
This is one tried and true method of propagation that works well on most types of plants. There are several other ways to clone your plants, including, air layering, dividing, and tissue culture. There are even hydroponic systems that do a good job of rooting cuttings using no growing medium at all. Once the cuttings form roots you simply transplant them to whatever growing medium you will be using.
Sonoff Basic R2 Smart Switch 3-Pack

Sonoff Basic R2 Smart Switch 3-Pack: 3 x basic WiFi smart switches, controllable from your smartphone the eWeLink home automation smartphone app.
- Schedules and Timers (Even schedules with 100’s of short ON and OFF cycles per day – as is necessary when doing aeroponics)
- “Scenes” can also be set up, using data from other Sonoff devices, like the TH Elite, or data coming in from Zigbee devices – when certain conditions are met, set up which Basic R2 Smart Switch to turn on or off.
IMPORTANT TO REMEMBER:
- No system is perfect – always monitor your automation to ensure that your plants aren’t in danger!
- Not all electrical equipment is suitable for remote operation – some may “light up” (Power up) when its smart switch engages (turns ON), but it may still need a person to press a button on the device, or its remote, before it will actually start to OPERATE.
- Timers and schedules are stored on the switches themselves, but a WiFi connection will be necessary for “SCENES” to work.
Sonoff made upgrades and optimizations to the Sonoff Basic R2 Smart Switches, mainly on their safety to provide a higher value and usage experience to users.
Moisture and dust resistant, no potential safety hazard in harsh weather. BASICR2 is tested to work at an excessive humidity environment for up to 48 hours.
It has high feasibility in various environments and prevents sparking from high humidity environments. There is adequate protection against accidental contact with live parts in all unfavorable positions of normal use. The structure strictly controls the requirements of insulation, micro disconnection, and installation test to ensure the reliability and safety of BASICR2. Even a heat shrinkable sleeve is used for the fuse to provide better electrical insulation.
Besides CE, FCC and RoHS certified, BASICR2 is also compliant with safety standards, having been tested and ETL certified too.
Sonoff Basic R2 Smart Switch 3-Pack, Features:
- ETL Certified
- Remote ON/OFF–Turn electrical devices on/off from anywhere
- App Support –Free iOS and Android mobile App eWeLink
- Sync Status–Real-time device status provided to App
- Timing–Set scheduled/countdown/loop timers to turn on/off at specified time
- Share Control– Control your smart home together with your family
- Scene–Turn on/off a gang of devices with one tap
- Smart Scene–Triggered on/off by temp, hum or other environmental conditions from sensor
- Compatibility –Works perfectly with Amazon Alexa, Google Assistant, IFTTT
Specifications:
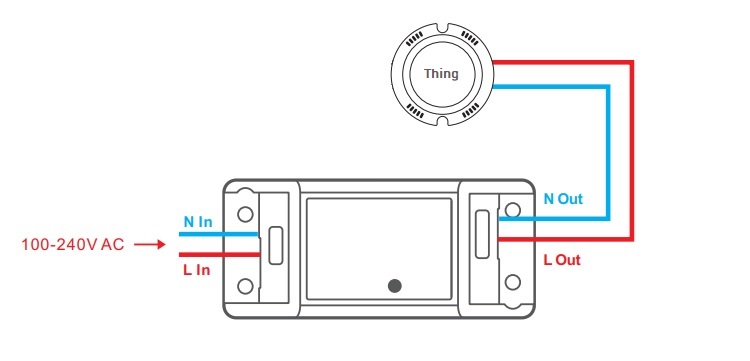
- Input: 100-240V AC 50/60Hz;
- Output: 100-240V AC 50/60Hz;
- Max.Load: 10A/2200W;
- Gang: 1-gang;
- Wi-Fi: IEEE 802.11 b/g/n 2.4GHz;
- Meterial: PC;
- Size: 9 × 4 × 2 cm
Sonoff Basic R2 Smart Switch
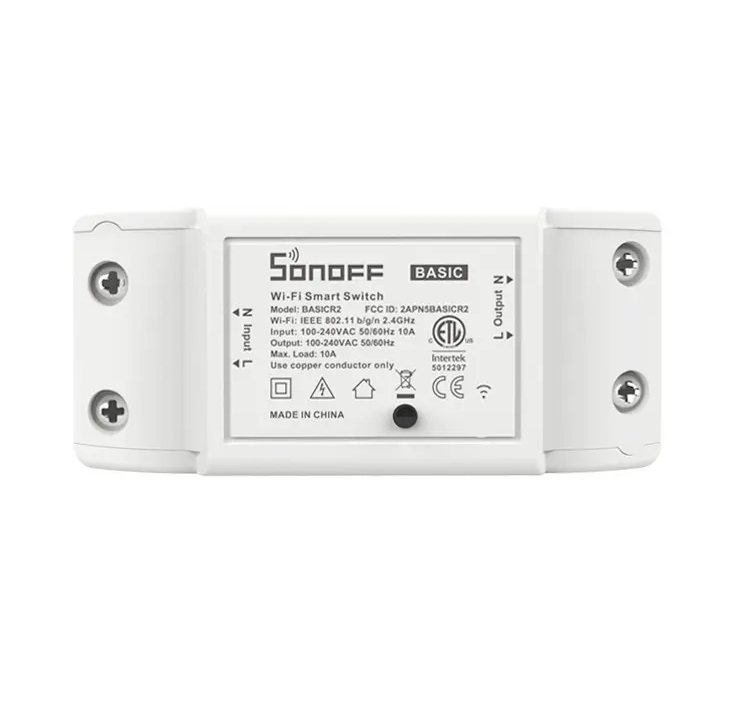
Sonoff Basic R2 Smart Switch – a basic WiFi smart switch, controllable from your smartphone using the eWeLink home automation smartphone app.
- Schedules and Timers (Even schedules with 100’s of short ON and OFF cycles per day – as is necessary when doing aeroponics)
- “Scenes” can also be set up, using data from other Sonoff devices, like the TH Elite, or data coming in from Zigbee devices – when certain conditions are met, set up which Basic R2 Smart Switch to turn on or off.
IMPORTANT TO REMEMBER:
- No system is perfect – always monitor your automation to ensure that your plants aren’t in danger!
- Not all electrical equipment is suitable for remote operation – some may “light up” (Power up) when its smart switch engages (turns ON), but it may still need a person to press a button on the device, or its remote, before it will actually start to OPERATE.
- Timers and schedules are stored on the switches themselves, but a WiFi connection will be necessary for “SCENES” to work.
Sonoff made upgrades and optimizations to the Sonoff Basic R2 Smart Switches, mainly on their safety to provide a higher value and usage experience to users.
Moisture and dust resistant, no potential safety hazard in harsh weather. BASICR2 is tested to work at an excessive humidity environment for up to 48 hours.
It has high feasibility in various environments and prevents sparking from high humidity environments. There is adequate protection against accidental contact with live parts in all unfavorable positions of normal use. The structure strictly controls the requirements of insulation, micro disconnection, and installation test to ensure the reliability and safety of BASICR2. Even a heat shrinkable sleeve is used for the fuse to provide better electrical insulation.
Besides CE, FCC and RoHS certified, BASICR2 is also compliant with safety standards, having been tested and ETL certified too.
Features:
- ETL Certified
- Remote ON/OFF–Turn electrical devices on/off from anywhere
- App Support –Free iOS and Android mobile App eWeLink
- Sync Status–Real-time device status provided to App
- Timing–Set scheduled/countdown/loop timers to turn on/off at specified time
- Share Control– Control your smart home together with your family
- Scene–Turn on/off a gang of devices with one tap
- Smart Scene–Triggered on/off by temp, hum or other environmental conditions from sensor
- Compatibility –Works perfectly with Amazon Alexa, Google Assistant, IFTTT
Specifications:
- Input: 100-240V AC 50/60Hz;
- Output: 100-240V AC 50/60Hz;
- Max.Load: 10A/2200W;
- Gang: 1-gang;
- Wi-Fi: IEEE 802.11 b/g/n 2.4GHz;
- Meterial: PC;
- Size: 9 × 4 × 2 cm