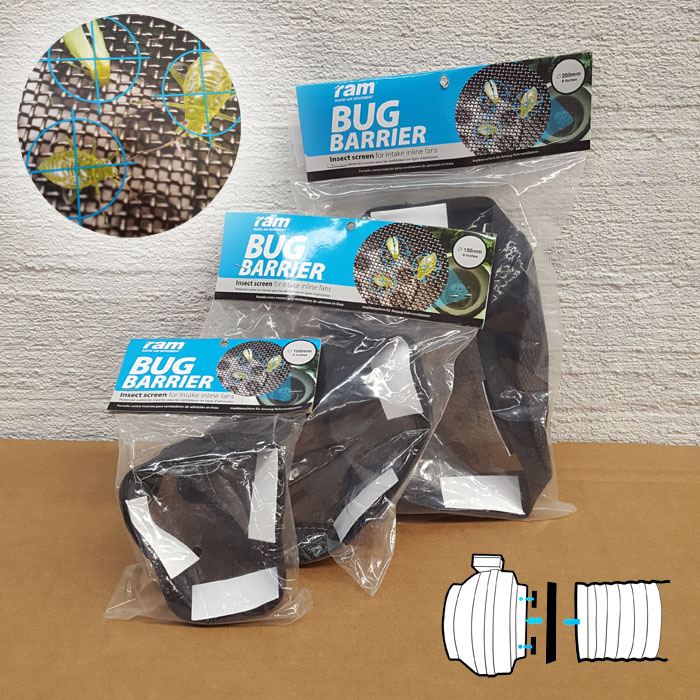
The RAM Bug Barrier is a fine mesh screen for intake fans to prevent insects in your grow room. Eliminate unwelcome visitors and debris from getting into your garden without losing airflow. The mesh screen comes with Velcro strips for you to attach to your intake fan to allow for easy installation. The RAM Bug Barrier fits over your inline fan and the ducting can then be put over the RAM Bug Barrier and secured with a ducting clamp.
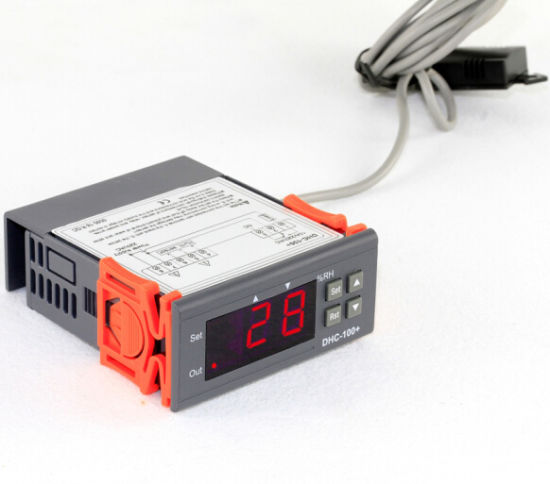
The unit is versatile and can be used in a number of ways depending on which operating mode you select and how you wire up the unit.
There are 2 simple modes of operation, where the unit will turn equipment on when the humidity drops below a set % ( Humidification mode ) OR the unit will turn equipment on when the humidity rises above a certain % (Dehumidification mode).
For more advanced users, two sets of equipment could be operated with the digital humidity controller. Here, the default circuit ( called Normally ON / Normally CLOSED ) will be used to constantly power equipment, UNTIL such time as the switching conditions are met.
Dry Weather Example: A humidifier will continuously operate UNTIL the RH goes above a certain %, at which point the controller will “flip over” the normally active circuit, powering down the humidifier and turning on the alternate circuit ( connected to, for example an extraction fan ) which will operate until the RH drops to below the set %.
Wet Weather Example: A dehumidifier will continuously operate UNTIL the RH drops below a certain %, at which point the controller will “flip over” the normally active circuit, powering down the dehumidifier and turning on the alternate circuit ( connected to, for example a misting unit ) which will then operate until the RH increases to above the set %.
The unit can be programmed in various other ways, which include the % drop or increase before circuit is switched over, ON time delays ( To prevent damage to equipment ) and it also has an emergency mode feature, where equipment will be turned on for preset amounts of time in case of RH probe errors.
The unit runs off 220V AC, which means no additional AC Adaptors / Drivers are needed to power up the unit itself.
Please note that the controlled equipment will still require their own power sources ( the unit does not provide power to the equipment, it only engages or disengages their circuits ) PLEASE USE RESPONSIBLY – Get a professional to help you if you feel unsure about your wiring.
Unit includes RH probe only, no additional electrical wires or plugs are included.
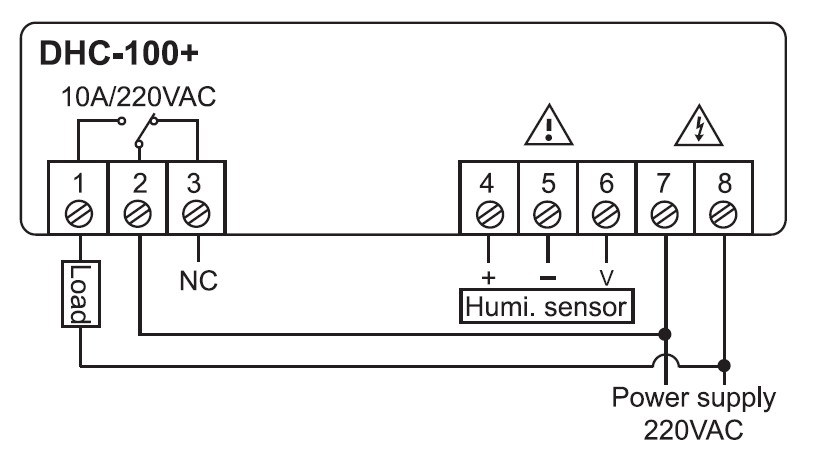
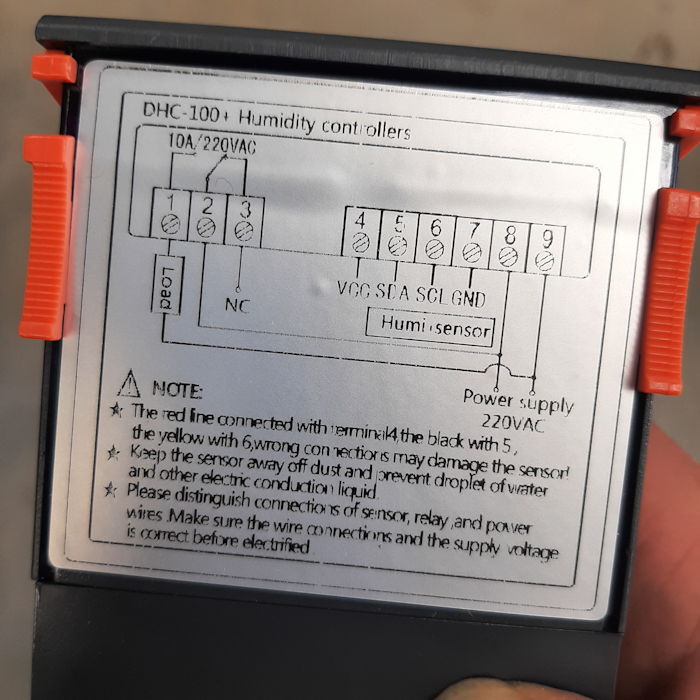
Wiring Diagrams:
Some units have a 3-wire sensor. If you plan to remove and then replace the sensor from the unit, MAKE NOTE OF WHAT COLOUR WIRE IS INSTALLED INTO WHICH TERMINAL BEFORE REMOVING THE WIRES
Some units have a 4-wire sensor. If you plan to remove and then replace the sensor from the unit, MAKE NOTE OF WHAT COLOUR WIRE IS INSTALLED INTO WHICH TERMINAL BEFORE REMOVING THE WIRES
Technical Specifications:
Model number
DHC-100+ series
Supply voltage
220Vac, 110Vac, 50/60Hz; 12Vac/dc, 24Vac/dc
Humidity measuring range
0%-99%RH
Humidity control range
10%-99%RH
Resolution
1%RH
Humidity accuracy
25℃: ±(5%RH+0.5digit)
10-40℃ 0%-59%RH: ±(6%RH+0.5digit)
10-40℃ 59%-99%RH: ±(8%RH+0.5digit)
Input types
HTG3515CH temperature humidity sensor, length is 2 m (includes the probe)
Sensor Stability
±0.5%RH/year
Output types
One SPDT electromagnetic relay
Relay contact rating
10A at 250VAC, Max.single phase load is 0.5HP/220VAC
Power consumption
Less than 3W
Front panel IP rating
IP54
Insulation resistance
500M ohm min
Withstand voltage
2KV 50Hz for 1min, no breakdown and flashover phenomenon
Vibration resistance
(10-5-10) Hz, 2G, 3min vibration, work normal
Operating temperature
0 to 60 ℃
Operating humidity
20-85% RH max, non-condensing
Storage temperature
-30 to 75 ℃
Digital Timer: Automate your hydroponic growing system with a Digital Timer for convenience and control.
If your timer has no display upon receipt … plug it in ( to charge the internal battery ) for an hour or two. Then press the reset button to activate the timer.
Control your hydroponic grow with a Digital Timer for your lamps, fans, pumps and other devices.
Digital Timers have the advantage of keeping time during load-shedding.
Timers allow you to turn devices on and off without having to be present to do so.
Test your timers at least once a month to ensure that they are in proper working order.
Advisable to keep a spare in case of a faulty timer as they may burn out after a certain amount of time, or with high Amps when switching ON.
When powering up equipment with high combined Amperes use a Contact Relay in conjunction with the timer to help prevent the timer from burning out.
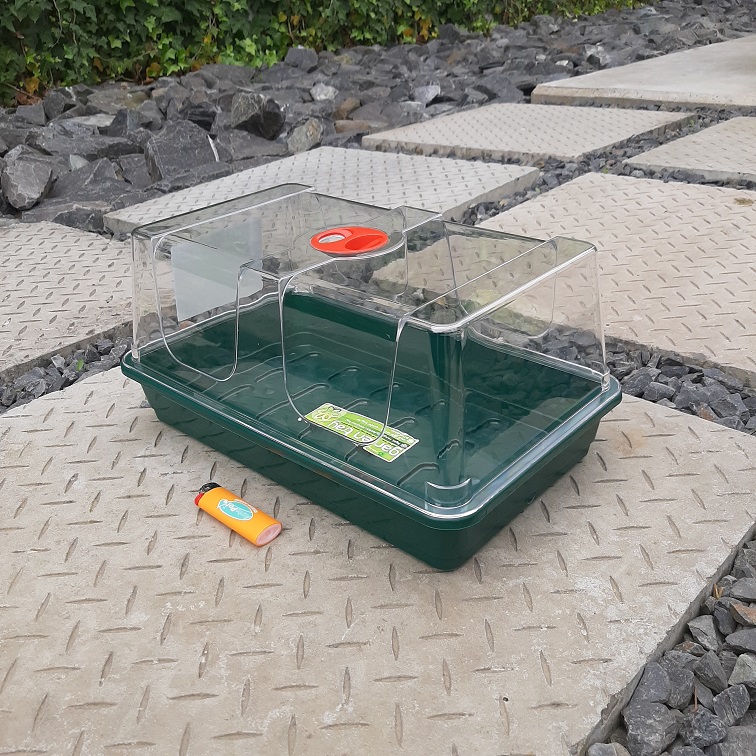
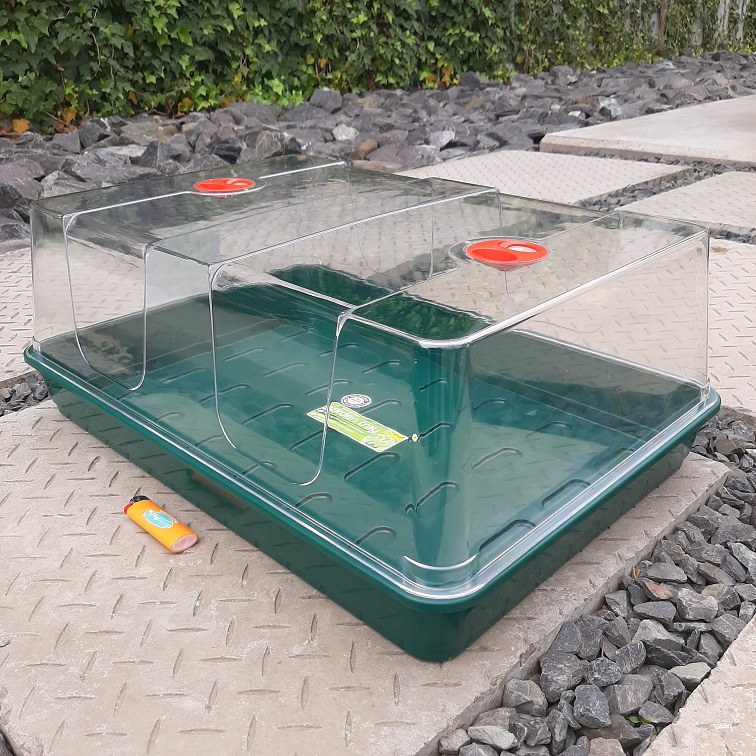
Garland Large High Dome Propagator is a very popularly sized unit using a standard seed tray as a base designed by Garland. The base does not have drainage holes, and the cover features an easy to adjust ‘dial’ ventilationhole.
The lid is Injection molded in crystal clear shatter resistant material. The Garland Large Dome Propagator is an unheated high dome propagator which is perfect for cuttings because of the high dome.
Dimensions – 37.5cm (l) x 23cm (w) x 18cm (h)
This is a Premium range of propagation, all made from high quality recycled plastics. These items are super strong and durable, with thicker wall sections offering extra rigidity.. The trays are easy to clean and can even be put in a dishwasher. Although injection molded trays are generally more expensive than vacuum formed equivalents, they will easily last for 10 years or more.
The Garland XL High Dome Propagator is an unheated high dome propagator designed by Garland and to our knowledge one of the largest injection molded propagator on the market. The base tray of the Garland XL High Dome Propagator does not feature drainage holes, given that most users opt to fill the unit with smaller trays or pots or multi cell inserts.
PLEASE NOTE: BASE COLOR MAY BE EITHER GREEN OR BLACK, DEPENDING ON AVAILABILITY.
The lid of the Garland XL High Dome Propagator is Injection molded in crystal clear shatter resistant material. The lid features 2 adjustable ‘dial’ ventilators to control the humidity and optimize growing conditions
Dimensions – 58cm (l) x 40.5cm (w) x 22.5cm (h)
This is a Premium range of propagation, all made from high quality recycled plastics. These items are super strong and durable, with thicker wall sections offering extra rigidity. The trays are easy to clean and can even be put in a dishwasher. Although injection molded trays are generally more expensive than vacuum formed equivalents, they will easily last for 10 years or more.
Propagators are simple to obtain and provide an ideal start for young plants. A propagator holds in humidity and warm air while allowing seedlings to receive light. This an easy way to maintain a good environment for very young seedlings . However, since the cover prevents normal air movement (which is very important as it encourages young plants to grow strong stems), seedlings should not be kept in a covered propagator for too long.
Once the young plants produce their second or third pair of leaves, or if they grow taller than about 7 cm with only the first pair, the cover of the propagator should be removed. A small oscillating fan on the lowest setting is a good way to give indoor plants the air movement they need, while outdoor plants can start to receive the natural outdoor air movement when they have reached this size.
Tony Hinde provided this quick introduction into how hydroponics works, all aspects around growing plants from seed or seedling in a hydroponic system and common problems encountered.
More extensive guide to hydroponics .
HOW PLANTS GROW
We need to know how plants grow in soil in order to understand how hydroponics differs from soil. A plant has three main parts, namely the root system, the stem and the leaves. The root system anchors the plant in the soil and takes up water and nutrients from the soil.
The soil itself consists of 5% organic matter, which is plant remains and animal residues. These are broken down by bacteria to form humus, This mixture increases the water-holding capacity of the soil and fixes inorganic plant nutrients as well as being a source of nitrogen. The inorganic part of the soil, comprising 45% by volume, is made up of minerals released from broken-down rock particles, mainly sand and clay. This provides the chemical nutrients for plants. The remaining 50% of soil is made up in equal parts of water and air.
Air is essential for the supply of oxygen to the roots of a plant. The stem connects the roots and the leaves. It is responsible for getting water and nutrients from the roots to the leaves. The leaves, in the sunlight, turn carbon dioxide and water from the atmosphere into chlorophyll. This is the green substance which is the source of energy to help the plant grow. Another function of the leaves is to act as an air-conditioner to cool the plant on a hot day. Now we come to the common denominator between growing in soil and hydroponics, which is the availability of mineral elements. These are absorbed by the plant from the soil (or nutrient solution in hydroponics) and are essential for the growth of the plant.
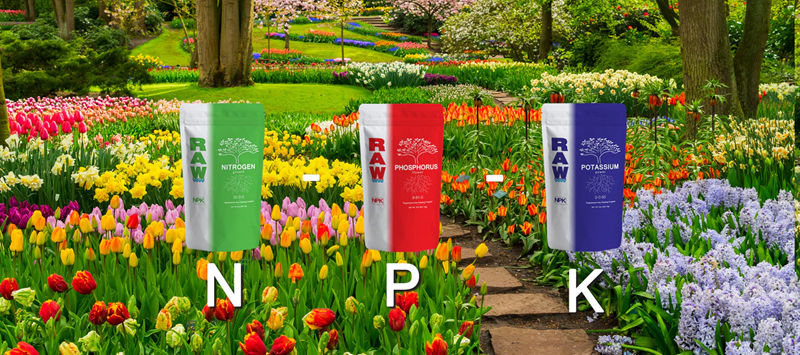
There are six major elements and six trace elements. The major elements are nitrogen, phosphorus, potassium, calcium, magnesium and sulphur. The trace elements are iron, mangenese, boron, copper, zinc and molybdenum. There are other trace elements, but they do not have any effect on plant growth. We don’t want to frighten you with too much science, but it is important that you have the basics. An interesting fact is that the mineral elements mentioned above form only about 2% by weight of a tomato fruit, with 95% made up of water!
NUTRIENTS
You don’t have to worry about making up a nutrient solution of the major and trace elements, as there are ready-made mixtures on the market. We use a two-part nutrient, which, though a bit more trouble than single-part nutrients to mix, has given superior results without the sedimentation experienced with the single-part mixtures. A new solution should be made up once a week, throwing the old solution away into your garden. During the week top up the reservoir with plain water to replace any transpiration losses.
If you want to be more scientific, you can use an EC meter. This measures the total concentration of nutrients in the solution. There comes a time when your plants do not seem to be very happy, turning yellow or brown for no apparent reason. This may be caused by a deficiency in one of the mineral elements. While this may seem to be a contradiction if you are using a ready-made solution as mentioned above, in fact it isn’t, as plants may need more of a particular element at different times in their growth cycle. Although the different nutrient deficiency symptoms may look the same, there are small differences in each problem. It is by observation that the cause may be isolated.
Nitrogen Small, stunted plants with very large root systems; leaves smaller and lighter in colour than normal; slow growth. Paleness will start at the tips of the lower leaves. If this deficiency continues, the foliage will continue to develop, but stems will be spindly, sappy and soft, flowering will be delayed, small fruit will grow and the plant will become more susceptible to disease.
Phosphorus Stunted plants with dark, dull and sometimes discoloured leaves, unusually hard stems, poor root system and very little branching. Attacks lower, more mature leaves first. Occurs especially when nitrogen level is low.
Potassium In early stages, yellowing and curling of older leaves. Newer leaves will begin to droop. Older leaves then become blotchy and scorched. Flowers are lacklustre and stems are soft. The plant will be more susceptible to diseases such as mildew and rust.
Calcium Underdeveloped roots are the first to be affected. Younger leaves will be immobile and their edges will curl. Plants will be stunted and have dark crinkly leaves. (See blossom end rot under diseases.)
Magnesium Symptoms do not appear until the deficiency is well established. The plant will be stunted. Leaf veins will stay green while the remainder of the leaf turns yellow. Brown spots will appear and then the plant will dry out. Flowers will be slow to develop, if at all. Flowers that do grow will be lack lustre.
Sulphur Resembles nitrogen deficiency in many ways. Iron Tips of new leaves will become either pale or yellow, and this will spread inward. The leaf will likely turn blotchy from a lack of green pigment, eventually turning brown and drying out. Manganese Poor blooming, weak growth. Leaves may turn yellow or blotchy.
Boron Brittle stems and immobile new leaves with brown tips.
Zinc Growth will be stunted. You may never encounter any of these imbalance problems, but it is as well to be aware of them. If they do occur, one of the ways to remedy the situation is to give the plant a foliar feed of nutrient solution, using a very fine spray.
HYDROPONICS AND pH
How pH affects nutrient uptake
Before your eyes glaze over with all this science, it is necessary to have a working knowledge of pH. Although it sounds fearful, it is simply the relative acidity or alkilinity of a solution. In hydroponics we are interested in determining the pH level of water before nutrient is added to it, making adjustments if necessary, and then checking the pH level of the nutrient solution from time to time.
If we take a scale of 1 to 14, the centre point, or neutral position, is 7. Everything above neutral is alkaline and everything below is acid. To determine accurate pH levels, each whole number is divided into ten parts. Thus we have 6.8, 6.9, 7.0, 7.1, 7.2 and so on. When growing several kinds of vegetables or herbs in one unit, you will probably do best in the slightly acidic range of 5.6 to 6.5, as it is within this range that the nutrients are most available to the plants. To illustrate this, at 7.0, which is outside the most suitable range for vegetables, they will take up nitrogen, phosphorus and potassium, but only half of the trace elements such as iron, manganese, boron, copper zinc and molybdenum. So if the pH is above 7.0, look out for trace element problems, rather than those caused by lack of major elements.
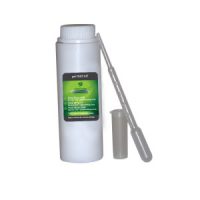
There are two simple methods of determining pH level, namely litmus paper or pH indicator solution. It is unlikely that the pH of your water supply will fluctuate, but if it does, a check of the pH level every two or three days may be necessary; otherwise, once a week should be enough. Many areas have a water pH of 7.0 to 8.2. Your nutrient powder will probably affect this, bringing it down close to the desired 5.6 to 6.5. If you change your nutrient solution regularly, say every week, pH shouldn’t be a problem. The other factors which may affect pH are the hardness of the water, which can be ascertained by getting an analysis from your local council, climate, what plants you are growing and how much nutrient each plant uses.
However, having said that, it is not necessary to get in a lather over pH, as you will still get decent crops! It is just interesting to experiment with different conditions. If your pH is too alkaline, add pH Down Nitric or pH Down acid. The amount to be used should measured in single drops only! Check the pH level every eight hours. If your pH is too acidic, add pH Up to your solution.
Certain vegetables have specific preferences. For example, lettuces like 6.0 to 7.0 and tomatoes prefer 5.5 to 7.5. When growing combinations of vegetables, a good pH range is 5.6 to 6.5. For Herbs only it is 5.6 to 7.0. If you are growing vegetables and herbs together try to maintain a pH of 6.0 to 6.5. Have a look at this chart for detailed information on the correct pH/EC/ppm for a variety of plants grown using hydroponics.
Now we come to the interesting part of hydroponics. You can grow almost anything in your unit; flowers for cutting, house plants for decoration, or vegetables and herbs to improve your meals. The only limitation is that root vegetables, such as potatoes and carrots need a different hydroponic system and will not have enough space in your unit. But it could also be argued that these vegetables do not suffer from long storage as much as vegetables like tomatoes, lettuce and green peppers, which thrive in your unit. So start with these and then experiment to your heart’s content as you go. We will discuss growing of specific plants later; the comments here apply to any plant you want to grow.
SEEDS
When you select seeds for raising, bear in mind that commercial seed varieties have been bred for toughness and long shelf life in the supermarket at the expense of fragrance and flavour, so ask for seed varieties suited to home growing. For instance, you might like to grow a bush tomato instead of the vine type, which may grow too high! Leaf lettuce will yield a high volume of leaves in a few weeks, while head lettuce takes a bit longer. If you choose a head lettuce, such as “Great Lakes”, treat it like a leaf lettuce and simply pick the leaves for your salads. Don’t be afraid to experiment with hydroponics; use any seed that interests you.
You can plants seeds directly into your hydropopnic unit or, by using the growing medium supplied with your unit, which is equal parts of vermiculite and perlite, put them into seed trays from local nursery. You can soak the seek overnight in water for faster germination. Plant two seeds where you want one plant. If both come up, snip off the smaller one with scissors. Push your seeds gently into the growing medium no deeper than 1.5cm. Most seeds germinate best in darkness, warmth and moisture. Thus, you can cover your seeds with dark plastic sheet or use a humidity dome with a heating pad. For those seeds that germinate best in light, such as certain herbs, use clear plastic. Check every day for results. As soon as the first sprouts poke through the medium, take the cover off to let air and light get to the seedlings. Failure to remove the cover soon enough will make the seedlings “bolt” (grow long and spindly). If that happens you might as well pull them out and start again!
If you have different seeds in the same tray, some may germinate faster than others. Just fold or cut the cover as needed. Some seeds come up fast (basil, cucumbers); others are quite slow (parsley, peppers). Identify what you have sown with plant markers. Use a waterproof felt pen or pencil so that the writing won’t wash off. If your seeds don’t sprout, there are five possible reasons: – The seed tray is too cold for them (less than 13 degrees Centigrade). – You have bought old seed that is no longer fertile. Check the “sell-by” date on the package. – Your seeds were not treated for fungus resistance and have been eaten by the fungus. You’ve put your seeds under the germination cover, placed them in the hot sun and cooked them. Keep the tray out of direct sunlight. – The seeds have come from sterile hybrids. This might happen if you saved seed, e.g. tomato, from a fruit that you bought at the supermarket.
SEEDLINGS
If you have grown seeds in the hydroponic growing medium in a seed tray, all you have to do is transfer them, with the growing medium clinging to their roots, to the unit. There should be no shock, drooping or wilting. They will just continue growing! When you insert the seedling into the growing pot, don’t be afraid to put the roots and the stem up to the first set of leaves into the pot. Ideally, the roots should just protrude into the nutrient channel. If you have been impatient to get started and bought seedlings in soil from your local nursery, that is O.K!
You will have to wash the roots gently to remove the soil. Use cold water running steadily from a tap. The water will help to loosen the soil and the coldness will have an anaesthetising effect on the plant to minimise the shock. Then feed the roots into the growpot so that they stick out of the bottom of the pot. Place one hand under the pot and with the other hand put in the dry mixture by holding the pot under a gently-running tap. The mixture will not now come out of the bottom of the pot. Be warned that there may be some wilting or drooping initially and some plants may even lose some leaves, but you will see the new growth will appear within a few days. Whether you have used hydroponically raised seedlings or those raised in soil, be gentle with the roots.
CUTTINGS
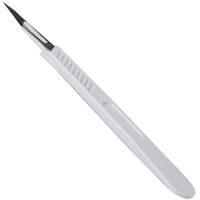
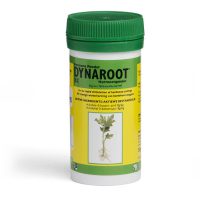
Any plants that will normally root from cuttings can be placed directly into your growing pots. To make the cutting, use a sterile scalpel blade and cut a section of the plant that has at least 3 internodes diagonally down. Clean the leaves from the last 50mm of the stem and coat with a rooting hormone and place in your growing medium.
If you want to use your unit as a hobby, plant whatever interests you and don’t be afraid to experiment. If you want to grow crops for your table it may be advisable to stick to salad vegetables. Notes on a few of the more popular vegetable crops and their requirement follows:
Cucumbers If you don’t wish to cross-pollinate, plant the English or seedless variety. They like hot weather and direct sunlight and are sometimes susceptible to mildew. They can be trained upwards and then laterally, using twine as a support. The crop then hangs downwards.
Lettuce Grow either the heading variety, such as “Great Lakes”, or a leaf lettuce or “cos” lettuce. Although it is a cool weather crop, it can be grown throughout the year if shade is used during the summer months. It prefers a temperature of between 13 and 24 degrees Centigrade.Germination takes about 10 days and you should have leaves to harvest in six to eight weeks. If you want a continuous supply of lettuce, you should stagger planting.
Tomato This is a most popular and rewarding plant to grow. It loves the sun and prefers a temperature range of 21 to 27 degrees Centigrade. When the plant has two pairs of leaves in addition to the seed leaves, it can be transplanted from the seed tray into the unit. At this stage you should make arrangements for supporting the plant. We have used twine, attached to the shade support quite successfully. You should get a crop about 12 weeks from planting seed. Experiment with different varieties. The small cocktail varieties are particularly sweet. It should be remembered that certain plants either like or dislike growing in close proximity, so it is as well to keep “friends” together and “enemies” apart. Examples of “friends” are tomatoes and parsley or lettuce and cucumber. However, tomatoes do not like cabbages, but it is highly unlikely that you will be growing those at the same time anyway! Cucumbers and sage should be kept apart. When growing combinations of vegetables, the pH should be 5.6 to 6.5.
GROWING FLOWERS
Flowers are very rewarding in any garden, and no less so in your unit. The carnation is always a favourite. It likes a pH of 6.0 to 6.5, but requires a fair amount of attention to be successful. Antirrhinums or Snapdragons will grow for many months of the year at a pH of 6.0. Experiment with Sweet Peas, Marigolds, Zinnias and anything else that takes your fancy. Just remember that flowers also have “friends” and “enemies”. These can be found in any good gardening book.
GROWING HERBS
There is nothing more satisfying than being able to enliven your cooking with fresh herbs. The main herbs for cooking include Basil, Marjoram, Sage, Parsley, Oregano and Thyme. The difference between using dried and fresh herbs is unbelievable! Herbs can be grown from seed, or you can obtain cutting from friends. Their pH requirements vary, but not markedly. For example, parsley grows best from 5.0 to 7.0, while thyme prefers a pH of between 5.5 and 7.0. A good range for herbs only is 5.6 to 7.0. If you are growing vegetables and herbs together, aim for between 6.0 and 6.5. Quite apart from the culinary uses, herbs are known for their medicinal properties, but that is another topic altogether!
GENERAL HINTS
Housekeeping The pump should be cleaned at least weekly. The impeller can be accessed by pulling off the front of the pump, Do a daily check to see that the 5mm feeder pipes are clear and that the flow in the gullies is in contact with the roots of the plants, not wandering all over the place! The initial setting of the pump is 300l/h. You can increase this as the plants grow, and if you feel that the flow is insufficient. As a rule of thumb, the flow should be about 1-2 litres per minute. Keep your unit and its plants clean. Remove dead leaves before they rot, to avoid any fungal infection.
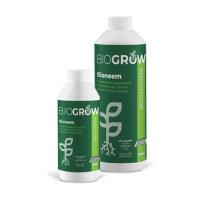
Pests Watch out for insects, such as red spider mite and aphids. You can use commercial insecticides, but if you don’t like using them, a general organic spray that you can make yourself is as follows: Chop 90 grams of garlic cloves in a grinder or blender and soak for 24 hour in 2 tablespoons of mineral oil. Dissolve 15 grams of oil-based soap in 500ml of water and add to the garlic mixture. Stir well and use in your hand sprayer. Alternatively, there is a natural insecticide called “Neem”, which is derived from the Indian neem tree.
Record-keeping Although you may not like the idea, it is worthwhile to keep a log of your day to day activities (hydroponically speaking of course). Record the pH when checked, when you changed the nutrient solution, the weather and light conditions, when seeds were planted, when they germinated, when they were transplanted, when they, start fruiting, when and how much you harvested. Anything that will add to your knowledge later can be noted. If you have problems, this may help you find solutions.
TROUBLE-SHOOTING
This section is intended to give you some idea of what to do if your plants do not seem to be as healthy as they could be. The problem with such a section is rather like reading a medical book containing symptoms of various diseases; you seem to have them all!
Bolting of lettuce Lettuce is a cool weather crop and will bolt if it is too hot or if it doesn’t get enough light from germination to maturity. Give it plenty of light early on, but keep in a cool shady place after partial maturity. Use 40% shade cloth.
Damping off This disease is also called root rot, although damping off applies more to seeds and root rot to plants. It is a fungus disease caused by a variety of fungi. It strikes seeds, which will turn mildewy and fail to grow. It may be due to the fact that your unit is in a place that keeps it too damp, dark and cool. In plants, the roots turn brown and rot. One answer is an all-purpose fungicide.
Drooping leaves Check to see that your plants are getting enough water. Check that the pump is operating correctly. If these are all right it is possible that your nutrient concentration is too high. Flush the system and run on plain water for a couple of days, then use the nutrient again. Make sure that there is a good circulation of air around the unit and that it is not too hot.
Limp Lettuce When they are grown in the sun, lettuce leaves are sometimes too limp to serve. They will crisp up nicely for your salad if you wash them in cold water, shake gently and put them in a plastic bag in the refrigerator for an hour before using.
Overfeeding This is a common mistake, and burns the plants. It is safer to run nutrient on the lean side. If the plants get too little nutrient, you will know they need more because the veins of their leaves will turn yellow or pale. Just add a pinch of nutrient powder and they’ll turn green again almost overnight.
Rain overflow If a heavy shower should cause your reservoir to overflow, it is best to throw away the solution and prepare a fresh one. Light rain will have little effect on the solution.
Spindly growth This is caused by insufficient light.
Sunburn White, bleached-looking patches appear on the leaves. Plants such as tomatoes and cucumbers need a 30% shade cloth, while lettuces do best with 40% shade cloth. Tip burn The tips or margins turn brown. This is caused by overfeeding. Flush the system and make up a new batch of nutrient solution.
Yellow leaves When a vegetables is nearing the end of its fruitful life, its older leaves will usually turn yellow and die. This is normal. When younger leaves yellow or turn a distinctly lighter green than older leaves, try adding a pinch of nutrient. Wait a few days and they’ll turn green again. If not, add a little more.
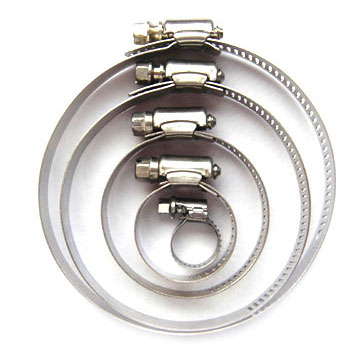
Clamps are a simple solution for connecting ducting to Inline Fans, Carbon Filter, Ducting Splitters or Air Cooled Reflectors. Fitted with a worm screw, tighten with a screw driver in a few seconds. Clamps provide a secure connection, ensuring your extraction system remains securely connected.
The Clamps are made from strong, Stainless Steel They are super easy to install and will last you for many grows to come. To install a clamp, you simple screw it open wide enough to fit over the end of your ducting, slip your ducting over the Fan/Reflector/Carbon Filter’s flange and screw it closed to ensure your ducting is fastened on tightly.
Available in a few different sizes to suit all ducting sizes. They are an efficient, cost effective method of joining ventilation equipment.
Clamp Sizes:
14-32mm (for larger water pumps) 95-121mm
133-159mm 197-222mm
241-267mm
286-311mm
PLEASE NOTE: 14-32mm Clamps are Stainless Steel, for use under water.
Clamps are an adjustable steel band that the user tightens with a screw. Most people generally know this kind of fitting as a Jubilee Clip which is often in the plumbers tool box. The premise is the same just on a bigger scale to suit ducting, not water pipes. The worm gear that adjusts the tightness allows a secure connection between ducting and fan or filter.
Many growers use ducting clamps in combination with Aluminium tape. This makes an even stronger join with advantages of both. The tape has a bigger surface area for joining and can go round and round as many times as you want. It can degrade after a while though so the Ducting Clamp will increase holding power of the join.
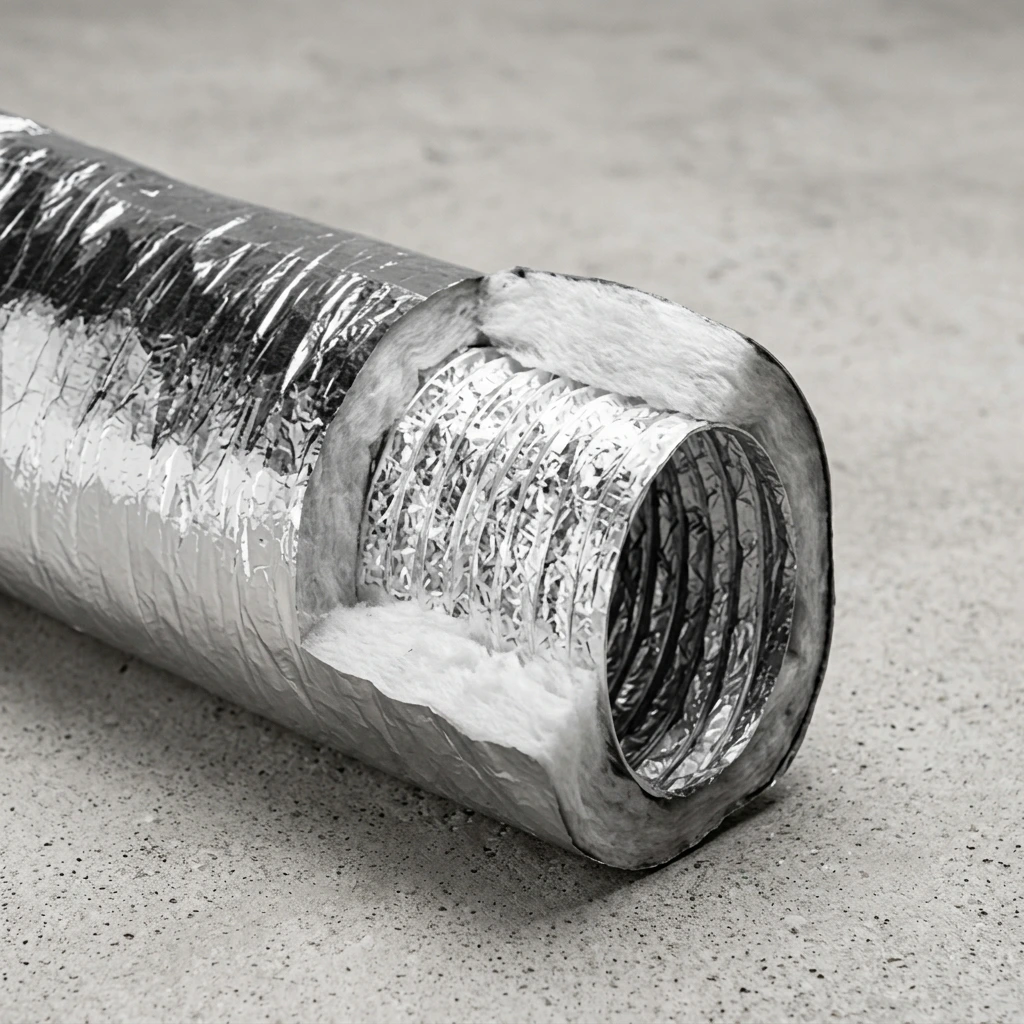
Acoustic ducting is used to reduce the noise generated by air extraction.
Prices are per meter, max length of single piece of ducting = 10 meters. ( Example: if ordering 15 meters, you will receive 1 x 10 meter length and 1 x 5 meter length )
Offering a more cost-effective and flexible alternative than silencers, Acoustic Ducting is used to reduce the noise made by ventilation fans in grow rooms and industrial areas.
It’s made from a perforated inner core that’s identical to our Aludec Ducting but with lots of small holes punched in it – this is then wrapped in a layer of fibre and sealed by another layer of aluminium foil. As the air travels down the inner core the sound is let out through the holes into the fibre, which deadens the sound.
In practice it reduces the noise of a fan by around 60%-80%.
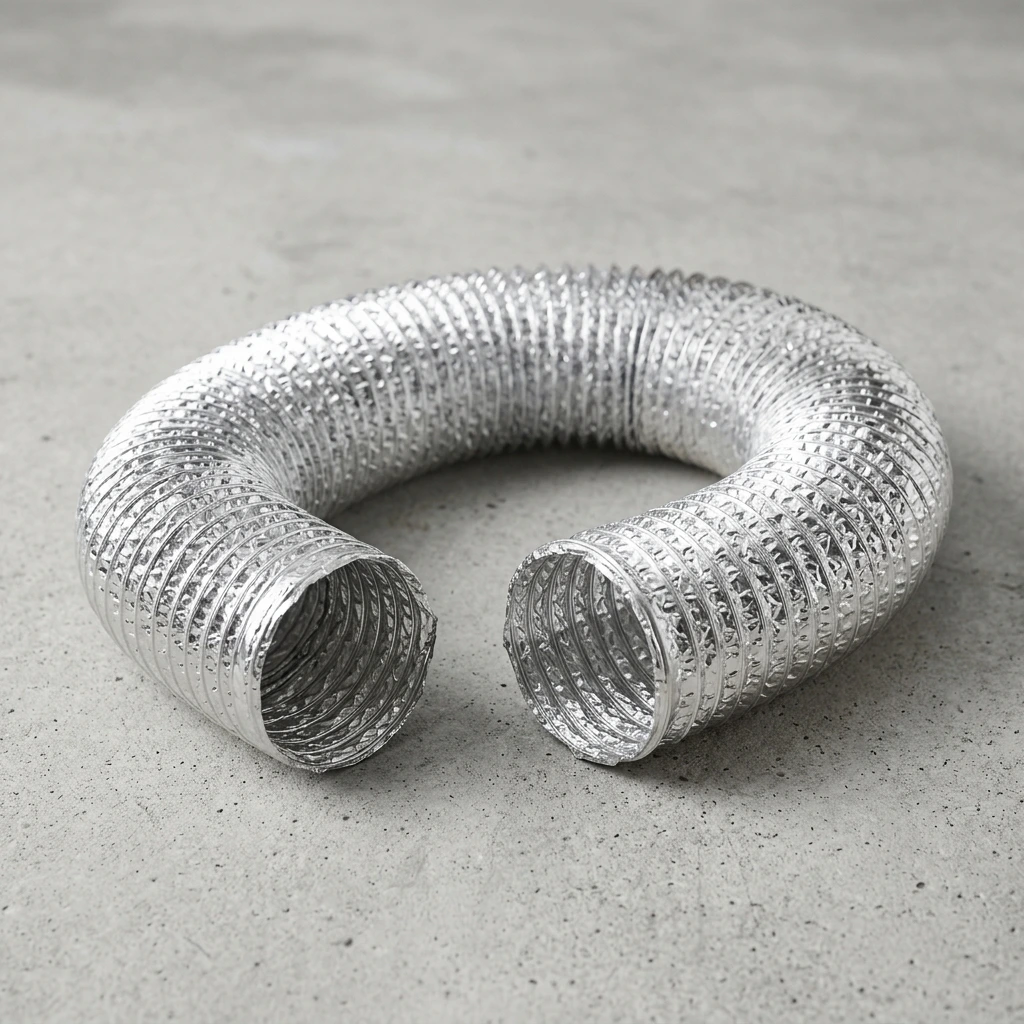
Ducting is used to connect inline fans with items like spigot flanges, Air Carbon scrubbers or other fittings .
This flexible aluminium Ducting is specifically produced for low and medium pressure heating, cooling, ventilation, exhaust and air conditioning systems. It is produced from multi-layer aluminium, strengthened with high tension hard steel spring wire. It has high elasticity and flexibility. It can be easily fitted to circular, oval or rectangular connectors.
Keep in mind: It is ideal to keep your ducting pulled as tight as possible to reduce resistance thus ensuring maximum airflow. The more bends and corners you put in, the more you are reducing the fans capability.
Sizes: 102mm, 127mm, 152mm, 203mm , 254mm, 317mm
Prices are per meter, max length of single piece of ducting = 10 meters. ( Example: if ordering 15 meters, you will receive 1 x 10 meter length and 1 x 5 meter length )
We use cookies to ensure that we give you the best experience on our website. If you continue to use this site we will assume that you are happy with it. Privacy policy